

CHOUTAC CHUNG – Samurai Robot
Last night, I was trying some brushes in Photoshop.
I would like to show you how to paint with Photoshop in 3 steps using the Pen Opacity Pressure
I tried a brush that reminds me of the quality line of one of my favorite pen, the Uni-Ball EYE, from Mitsubishi.
The flow of ink applied on paper with this pen is constant whatever speed or pressure you draw with.
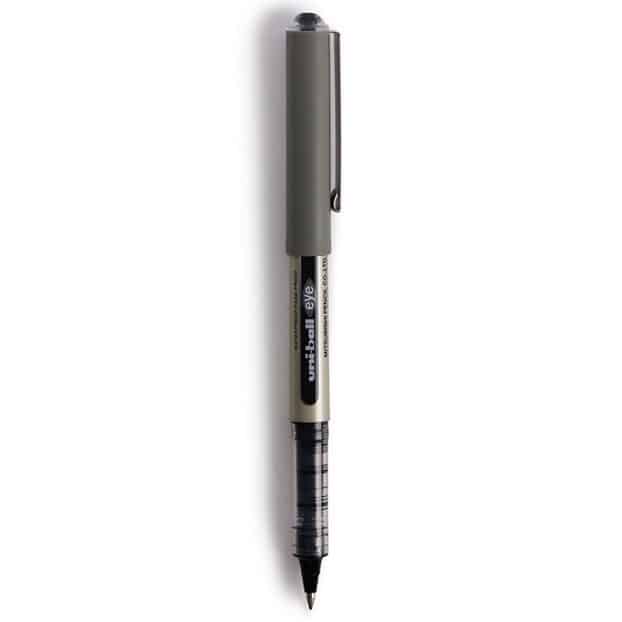
I don’t really know why, I instantaneously felt comfortable with this brush, even if you can’t find more basic.
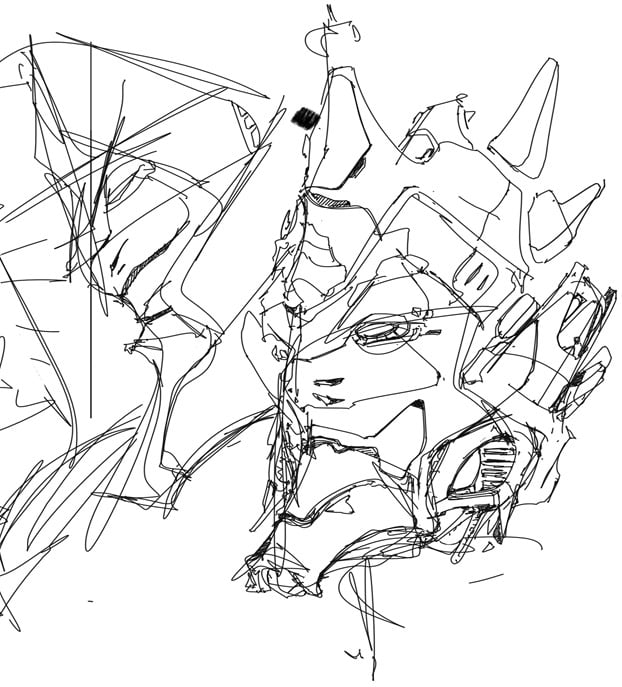
Anyway, a Samurai robot appeared a few minutes later. A cool outline came out so let’s use it for our TIP OF THE DAY!
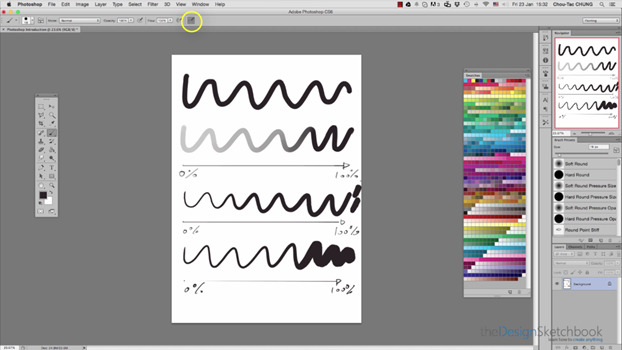
First of all, there is 2 main way to paint. WITH or WITHOUT pen opacity pressure.
 To activate it, press the following button (Options bar on the top of the page). This small button will make a huge difference in your painting approach in Photoshop.*
*There is another way to activate it in the brush options but to make it simple, let’s stick to this button for today.
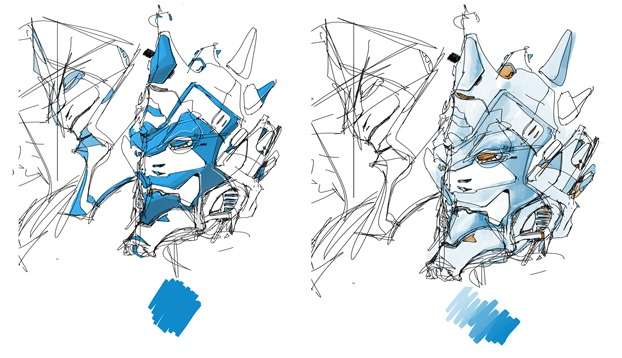

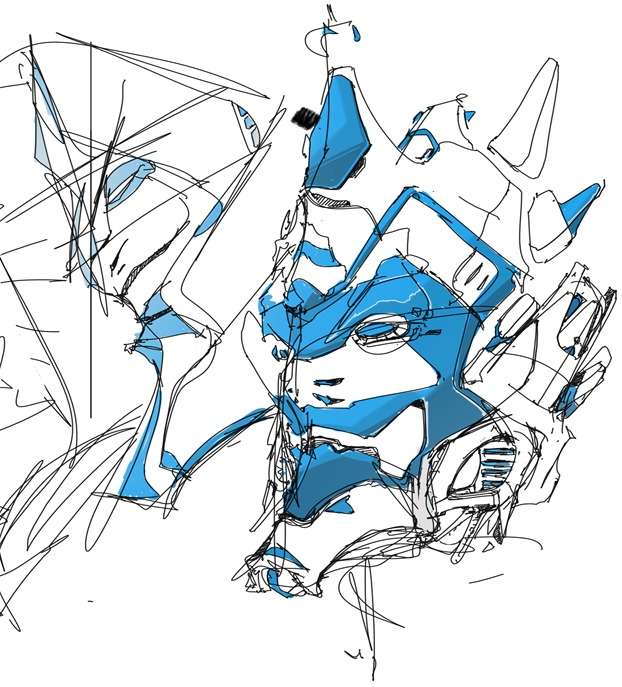
1. Paint with pen pressure OPACITY
To get all these shades of blue color, I just need to pick up one tone of blue. I paint controlling the shading from light to that selected tone with the pressure sensitivity of the pen.
We actually play with the opacity to deliver a feel closed to traditional painting.
Wacom says that there is 2048 pen pressure sensitivity. With my very first Wacom Graphire 2 it was 512. I actually barely see the difference.
If the next tablet says 4096, don’t get impressed too fast. 😉 (the evolution tend to double at each major update: 256, 512, 1024, 2096, next ?)
Instead, look at side features such as inclination recognition of the pen.
2. Paint without pen pressure OPACITY
This technique is often used in cartoons, comics, or manga. You deliver 3 shades of colors. Basically, the light, medium, and shadow. I let you count the number of shades applied to Frieza.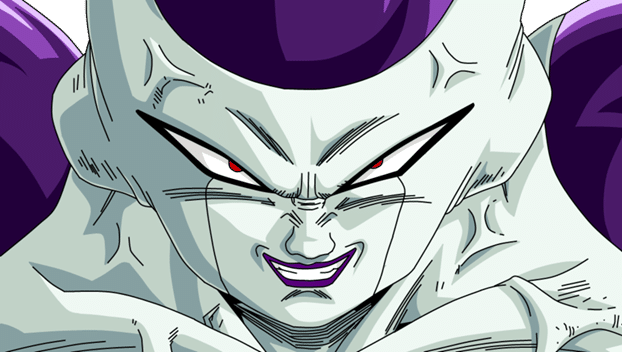
FRIEZA, DRAGON BALL Z
For the Samurai Robot, I picked up 3 tones of blue from the color palette that I superposed. I started with the lightest tone. I recommend using 1 layer per tone. It allows you to make corrections. With experience, you may decide to paint all in one layer.
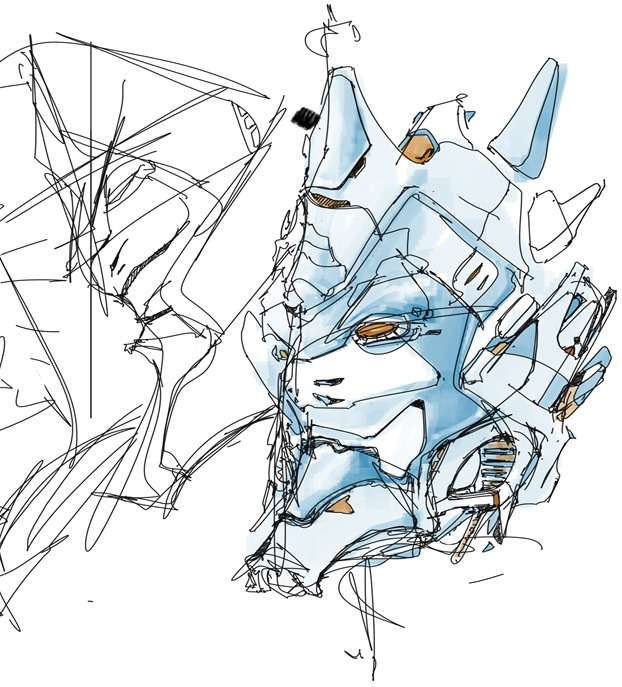
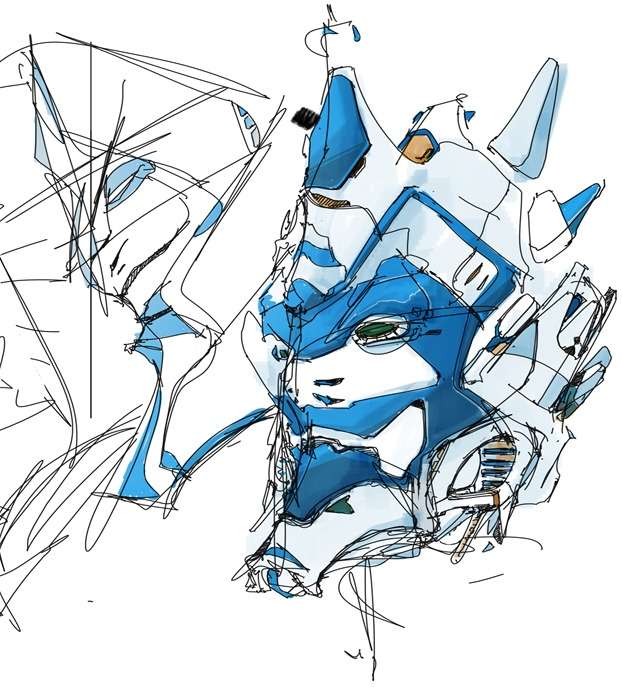
3. What if we merge both techniques?
I quite like merging both. The “cartoon” rendering adding to the “traditional” painting brings an interesting impact on it.
This application of colors is here applied to a robot, but you could easily think about transposing it to Product design, transport, architecture, and so on. Creativity has no boundaries.
So learn your basics, get inspired by any kind of artist, and always look for innovation. Step-by-step, you will create your own style at the end of the day.
Hoping it helps, let me know if you have any questions!
Just drop a comment below.

2 comments