Hey there, design enthusiasts!
It’s Chou-Tac,
Are you ready to level up your sketching skills with a fun and engaging challenge?
Today, we’re diving into the exciting world of SONY projectors using the fundamental form of cylinders.
Whether you’re a student, a professional designer, or simply love to draw, this tutorial will help you practice in a way that’s both efficient and enjoyable.
Why Sketching SONY Projectors with Cylinders?
- Ease of Learning: Cylinders are one of the basic forms in design, making them perfect for understanding complex objects like our new design of Sony projectors.
- Versatility: You can represent various parts of the projector, from the lens to the body, using cylinders.
- Real-world Application: Mastering this skill allows you to design not just projectors, but a wide range of products from your favorite brands.
Step-by-Step Guide to Sketching SONY Projectors with Cylinders
- Avoiding Distractions: Sketching requires focus, but life often gets in the way. From pets needing attention to sudden household chores, distractions are inevitable.
- Time Management: We’ll aim for a 30-minute sketching session. This manageable timeframe encourages you to practice regularly and improve the quality of your sketching time.
- Materials: Grab some paper and a ballpoint pen or use your graphic tablet. Both are suitable for our exercise.
- Sketching Process:
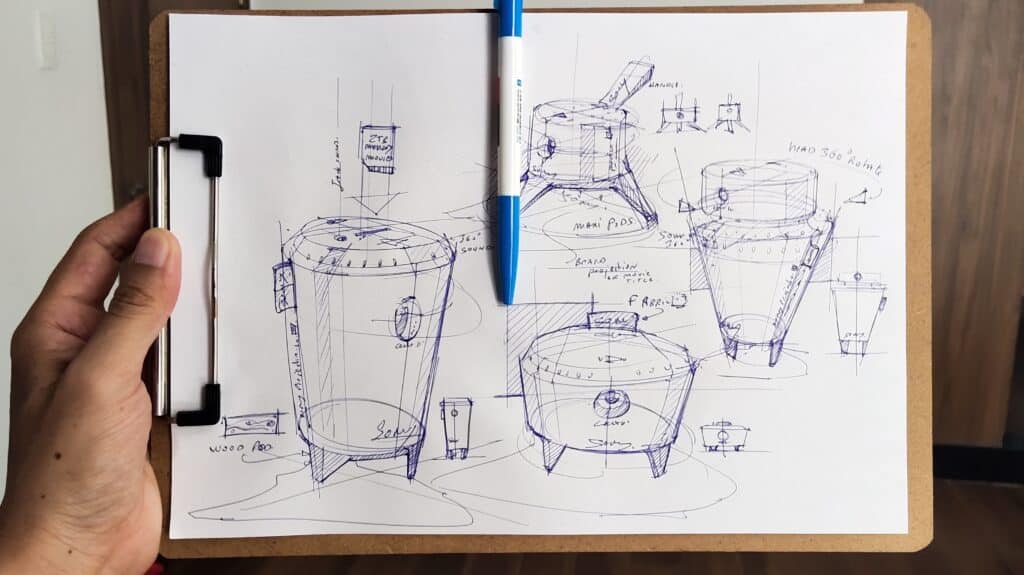
- Start with the Core: Begin by sketching two ovals to form the top and bottom of the projector’s main body. These ovals serve as guides for your cylinder form.
- Link the Ovals: Connect these ovals with lines to create the basic shape of a standing cylinder, representing the projector’s body.
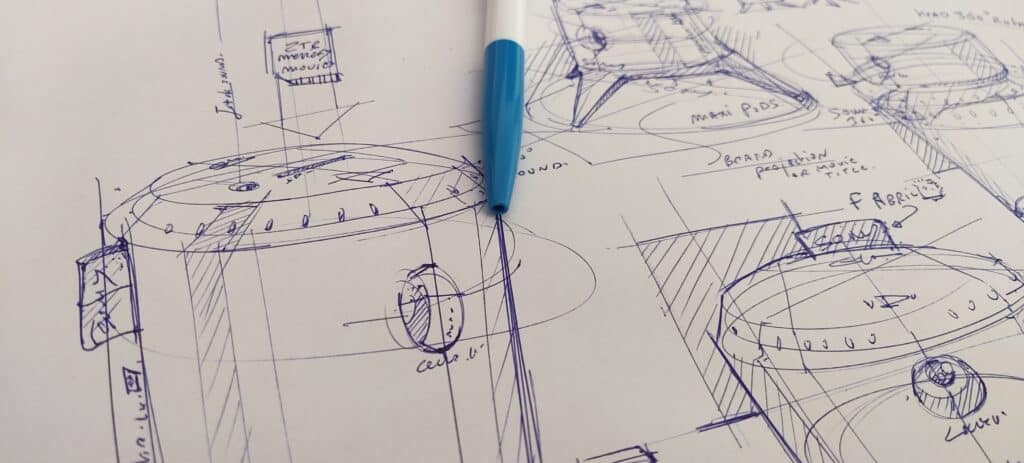
- Add Details: Sketch a smaller cylinder or oval for the lens, keeping the bottom circle visible if it’s transparent. Add vents, buttons, or logos with quick, expressive lines.
- Shading for Depth: Use shading techniques to give your sketch dimension and realism. Add half tone, shadow, and reflected light to make your sketch pop.
- Cast Shadows: Optionally, draw the cast shadow for a more dynamic look.
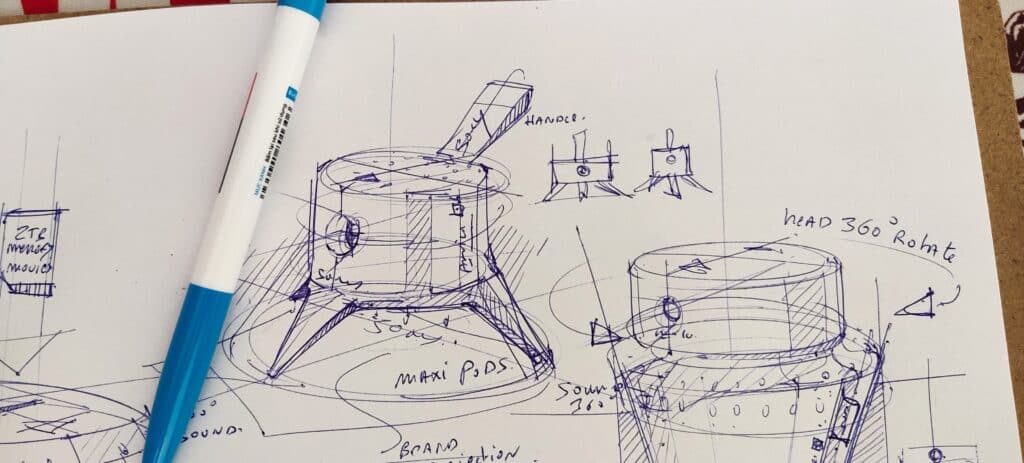
- Variations: We’ll sketch 4 variations of a SONY projector using cylinders. Each variation will help you explore different aspects of sketching and design.
Tips for an Effective 30-Minute Sketching Session
- Set a Timer: Keep distractions at bay by setting a 30-minute timer. This helps you stay focused.
- Embrace Imperfection: Remember, this is a practice session. Let go of perfectionism and enjoy the process.
- Practice Regularly: By dedicating just half an hour to sketching, you’ll soon find yourself sketching for longer periods naturally.
- Draw from Life: If possible, sketch real SONY projectors or similar products to enhance your observational skills.
Conclusion: Love Sketching Endlessly
There’s a French saying, “When we love something, we don’t count!” This rings true for sketching.
With this tutorial, you’re not just learning to draw SONY projectors; you’re cultivating a love for design that transcends time
For further practice, consider exploring our beginner-level tutorial on how to draw various products using ellipses and cylinders. It’s a treasure trove of techniques to enhance your sketching journey
So, what are you waiting for?
Grab your tools, set your timer, and let’s embark on this 30-minute sketching adventure together.
Happy designing!
Cheers,
Chou-Tac
NEXT: How to draw an infinity of products with ellipses and cylinders.
TRANSCRIPT
Hey, guys. Welcome to the designsketchbook.com.
It’s Chou-Tac and today, we are going to draw a Sony projector.
So I invite you to draw with me for 30 minutes. So take a pen, piece of paper, get ready and let’s start.
So let’s start to draw a cylinder. The cylinder is going to be a little bit more narrow at the bottom. So I can draw the top surface and the bottom by a link. Here’s a control line for identifying the face of the projector. I’ll add it here to make it in 3D volumes. Can you see the front front line for the control line? I’m going to use it now; it’s like a symmetry axis, I would say, in perspective where it helps me to draw the part at the bottom.
Now I draw the lens. One ellipse. Now I draw a second one behind. But see how I didn’t draw the full ellipse for a second? Here, another contour line to identify where is the lens and getting more details so you can feel more of the deepness of this lens. A bit of hatching to create some contrast. Now I bold, so it is going to be more explicit for the volume of the overall object.
So imagine that the light is coming from the top left and so you can put more line weights on the bottom right. Here, a bit of details for the sound and speakers. So we are going to draw together some simple volumes. A little bit of an indicator maybe like the name of the lens, the technology, and the brand Sony right here.
Once again, the brand, the details, and the line and the lens are all aligned on the contour lines because you would be surprised how many products around you are symmetrical. And remember, if you’re a beginner in perspective, feel free to download the designer starter kit. I put in the link below so you can download it. It’s for free and great for beginners to get started in design sketching.
So it’s good to post some time when you draw and think about your next move. It’s just something that you should do really relaxed. See how I do some? Because drawing, I try to visualize before committing with the line. So drawing is not a race; you just take your time and for example, when I draw this ellipse, even though it has some dynamic feeling, you can see that the momentum is not very fast; it’s actually a regular movement.
Cross drawing and go! So I invite you to try multiple cylinder forms. It’s the same shape but smaller, like if it was squeezed. Can you feel that different feeling that we get from it? But same process: cylinder, control lines, then the lens. We are attaching exactly in the same order as before; it’s all about strategy— from general to detail.
Train that way and soon it will make sense to you and you will practice naturally with probably almost the same order or maybe exactly the same. The detail is pretty magic because it adds some product filling—instantaneous product filling; it’s not anymore just a cone or drawing; there is something more to it.
I add some hatchings here to enhance volume; all hatchings are oblique. I try to make them not follow any line of the product itself so it contrasts even more. Hatching is very useful for color blocking or adding shadow—adding volumes—it’s perfect for sketching fast and communicating your ideas while creating good contrast.
Okay! And let’s go for the third one. We are now at 6 minutes and I’ve already completed 2! So we get it more narrow at the bottom as a projector lens; I would add a more vertical cylinder right here—it’s like a head and shoulder! I feel like Wall E though—just adding some volumes here and there, building form along the way.
And this is a projector but when you extrapolate as a designer, decide what you are drawing—if you want to make it look like perfume or something—you could modify it by trying to add some thickness to its body for example and see some transparency with liquid inside.
This is pretty magic when you draw because you can actually create anything you want just pretty quick! So add here some details; it’s pretty convenient but try not to put too many details because we may lose focus on the product itself.
So I got this pen in a very cheap shop; try to get a ballpoint pen—it doesn’t have to be very expensive—or just try some! If they have good pressure and sensitivity that’s what matters most—not price!
I like drawing with cheap ballpoint pens as well because they tend to be very light; it’s less tiring and I can draw much longer with a light pen because sometimes you can see some fancy pens that are super heavy made of metal—not a fan of those personally! Maybe you’re into them? So give it a try—it’s my personal preference but I do recommend light pens!
Add some notes: head could go in 360 degrees! And to emphasize this add also rotation axis that cross in middle of control lines—that’s why it’s pretty cool! In design sketching there are imaginary lines that you can add better communicate your ideas.
I like sound of nib scratching or rubbing paper—pretty relaxing! That sounds like ASMR somehow! If you don’t know what ASMR is, I invite you to type in Google or YouTube—it’s about how satisfying sounds can get!
And now we have 20 minutes left—keep going! Just draw for fun! Now we draw some front view to have an overall proportion; it helps better compare between three proposals—it feels like minions somehow with their meter eye!
So now we’re spending more time on details because we already have general forms—and it’s really relaxing actually at that stage—just trying to find new places to connect tags so feel free to choose one of your choice as well!
Add some hatching—I try to have also nice composition when using hatching—to make color blocking! As you can see—I add type on top of pre-existing line—I don’t hesitate drawing on top of them!
This is why it’s really important drawing quite lightly at beginning sketch so you can bold along way—you have different layers sketches of line weight! If you’re heavy-wristed try getting training/warm up before drawing—trying being gentle as possible—it will help long term!
Or maybe get ballpoint pen that’s newer because some ballpoint pens when they get old—they tend thicker—the ink tends glueish I’d say! Sometimes all need is buy new pen—it can save problems due heavy wrist issues!
Now I was wondering why not adding SD card slot on top of it? Then drew axes like rails coming from slot—and drew SD card as if could be inserted! Okay these rays are important—they give guide for size!
I got quick mistake but will add hatching hide it—can see? Voila! It tends disappear! Because we’re not using rubber—it’s all about ballpoint pen making sure you’re not tempted erase all time when you’re beginner!
Because happens waste time more than improving—just keep drawing with ballpoint pen—you’ll progress much faster realizing mistakes seeing how progress showing mistakes getting feedback—or maybe study them longer instead ignoring erasing still don’t know how figure solution!
So I like using board which is pretty convenient if throw standing—as gives stiffness adds effects sound nib scratching paper—let’s draw last one!
See how contour line plays inside lens? Here we go—and you guys draw enjoying cylinders ellipses lens now looking another design tripod! There we go—some details right here!
Same process as other which is pretty cool since know how draw cylinders—you can actually draw so many variations—it could be flatter thinner everything up you—and here with tripod size adding even possibilities!
Don’t count attack taking time looking around what could improve—it’s been soon 20 minutes we’re together drawing—and do see how fast first steps take longest time—all detailing shadow trying make volume interesting!
Small like blue rice cooker somehow—but see bit too wide alright so 20 minutes together left 10 minutes keep up spending more time details trying figure out kinds details could add!
To do so—you can actually add limitation—I would say it’s like okay—you want fun projector? You want mobile easy move easy put bag? Try get ideas way will fit inspiration drawing here projector!
Remember turn paper when drawing easier angle straight lines—the more you’ll realize right way faster complete product here we go take your time—you don’t have watch video every single second just enjoy drawing with me!
Cool adding notes let’s carry on—what if below projector could project light logos or maybe title movie etc.? Take your time adding wood texture pattern giving extra information—it’s like sample swatch added paper!
You don’t have draw effect on product itself actually since detail isn’t most relevant product—not key point want people see first mhmm here we go continue adding quick background here hatching another background here—
Can see how helps make product pop very light rectangle hatching parallel sometimes wonder if when draw reminds zoom scale iPad using two fingers—it’s like real life sometimes do something regret break something wish could control z—
Like control z shortcut undo most graphic software such Photoshop! Here we go—in just less than half an hour complete full bot did see cast shadows floor? Not even adding hatching them—it helping show area better perspective!
Some little refinements—we can do so as well—it has somehow peaceful feeling when drawing at this stage this jack club jack add mic earphone here we go—
So hope enjoyed video thought would be good idea do ASMR without recording voice explanation sharing stories—this will just sound paper nib drawing on it if something interests let me know thinking why not just quick idea!
There we go touch up almost done alright feel free send drawings shoot.arobas@designsketchbook.com—I’d curious see that—and see next video but if can’t wait see learn cylinders feel free go blog face tutorials again download Designers Data Kit free!
See you guys bye bye!






Add comment