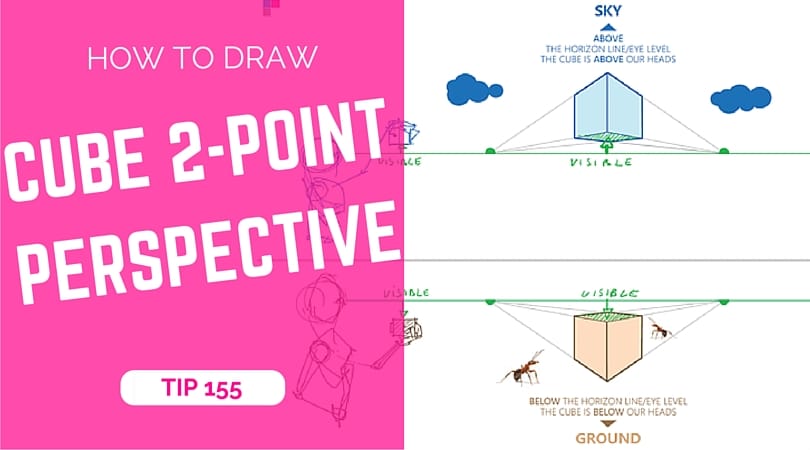
We saw previously How to draw a Cube with a 1-point perspective and how to recognize whether you need a 1 or 2-points perspective.
I hope you enjoy how easy it is to learn with this tutorial made for beginners.
Today,
it’s time to learn how to draw a cube with a 2-point perspective step-by-step.
If you miss the previous basic tutorial video of the beginner series,
you can watch them at the links below:
- How to draw straight lines
- How to draw perfect squares
- How to draw awesome circles
- Let’s now look at How to sharpen your sense of proportion with that easy trick of division.
- How to draw a cube with 1-point perspective
That was the last video of the series of the 6, related to the Designer Starter Kit.
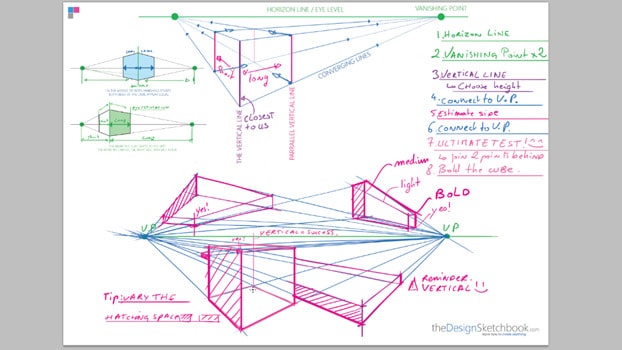
NOTE: How to draw perspective tutorial in a few pictures below (All steps in the video above)
This is a preview of the Designer Starter Kit made for beginners.
You can download it for free.
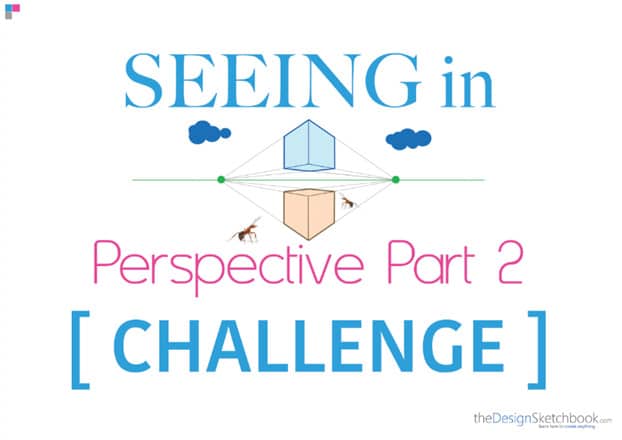
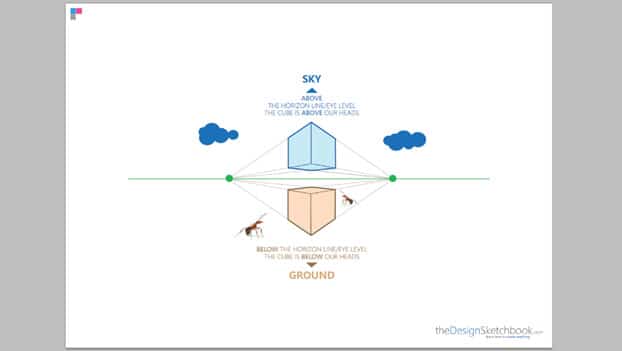
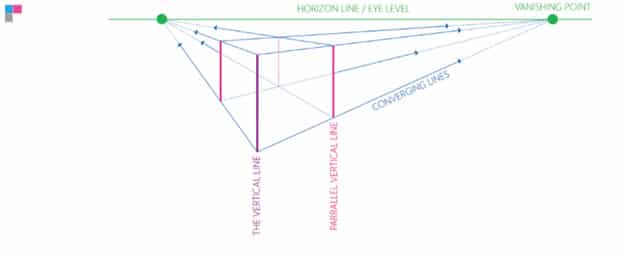
The 2 green dots are the 2-point perspective.
We call them also the “Vanishing points”.
We will draw our cubes in 3 dimensions starting from these 2 green dots.
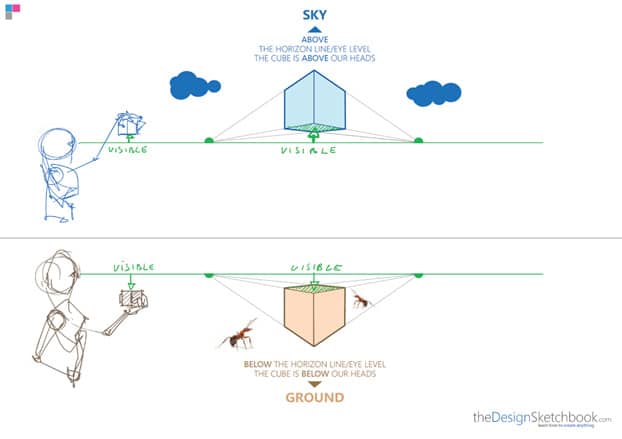
We look at the object from 2 different points of view:
- Above the horizon line (green line), we can see below the cube.
- Below the horizon line, we can see the top surface of the cube.
The horizon line is also called the “Eye level”.
Simple right?
The blue lines are called the converging lines. They converge to the vanishing points.
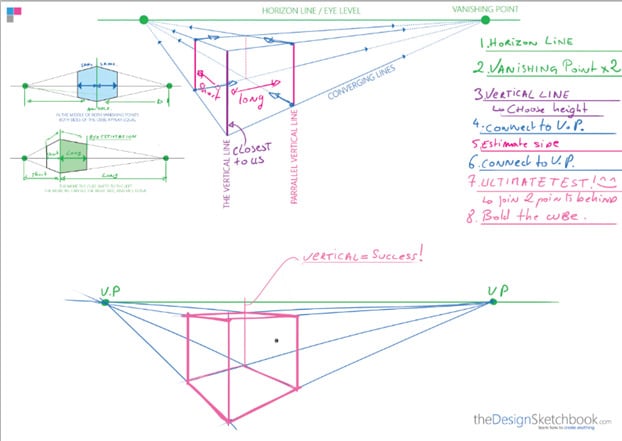
(You can see in the video tutorial above “How to draw the cube stroke-by-stroke”, with the correct order of lines.)
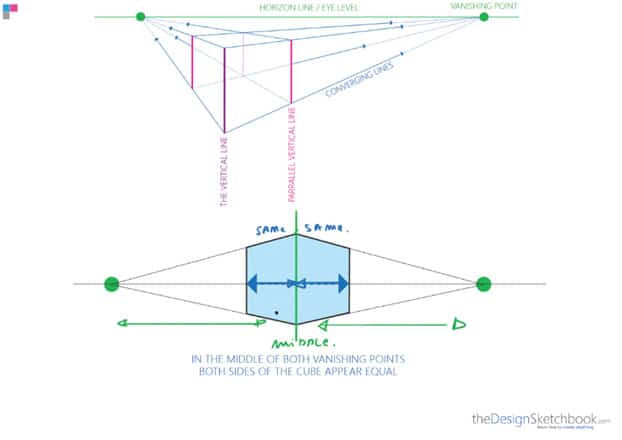
When the cube is in the middle of the vanishing points, both sides are equally distant.
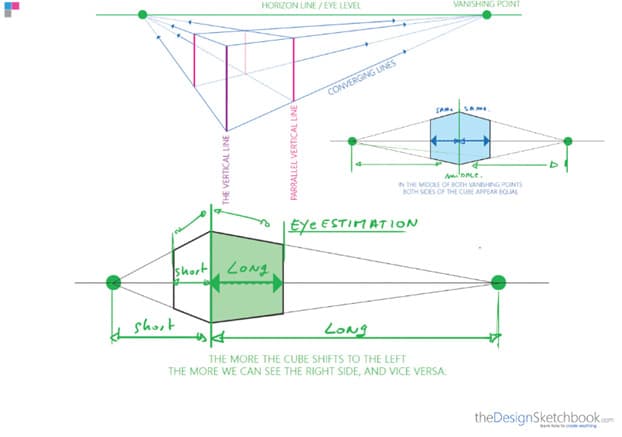
We call this the foreshortening.
The distance gets visually shorter in perspective.
If the cube is on the left, the right side is longer.
Vice-versa. (The distance is chosen by estimation.)
Yeah! You can be proud of your accomplishments!
Remember, what matters the most for beginners, is to make the first step.
And you did!
What if do some extra boxes to spice up our perspective drawing!
Here is a perspective example drawing of a variety of boxes.
What’s next:
I have a surprise for you. I already prepared the next level perspective tutorials for you to start to gain a much more professional drawing style!
Now you have well acquired the theory,
it is time to have ambitious design sketching exercises!
It is a series of 3 videos to complete the Cube Mania Drawing Challenge:
>> Yes, I want to start with the 1st video of the Cube Mania Challenge!
I add below a quick preview of what you will be able to draw in less than a week of practice!





Chou-Tac
I went through your 2 point perspective tutorial. You’ve done an outstanding job of presenting the subject.
I’ve been sketch in perspective for 60 plus years. You nailed it! Easy to understand lesson, thinking of someone at a starting out level.
Thanks and congratulations.
Richard Kleinschmidt
Minneapolis, Minnesota, USA
Hello Richard,
I am glad you enjoyed the video tutorial on perspective and found it beginner-friendly.
That’s what I try to do. 🙂
Simplicity is the key. It helps to start fast with confidence, and especially make people like it!
So there is a lot higher chance to keep up and reach higher goals!
Have a wonderful day!
Cheers,
Chou-Tac