Industrial design beginners can learn to draw spheres with cast shadows quickly and easily!
With my simple and straightforward drawing tutorial, achieve your goals in no time—let’s get started now!
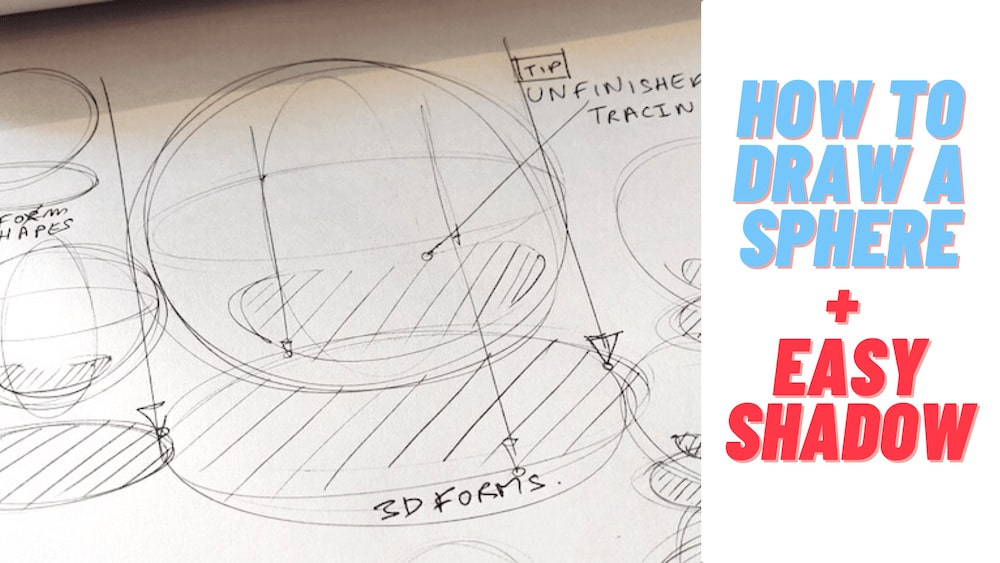
- How to Draw a Sphere | Easy Shadow Technique
- 1. Draw a circle
- 2. Draw the cast shadow with an ellipse
- 3. Draw hatching for the shadow
- 4. Draw a 3D volume adding 2 ellipses only
- TRY THIS: The "3D link axis"
- 5. Draw the Core shadow
- 6. Light source from top left
- How to go from Beginner doodles to Professional drawings
- WHAT'S NEXT: Advanced Preview
- The 2 sources of light
- Practice Practice Practice!
- BONUS FUN EXERCISE
- Conclusion
How to Draw a Sphere | Easy Shadow Technique
- Draw a circle
- Draw the cast shadow with an ellipse
- Draw hatching for the shadow
- Draw 3d volumes with 2 ellipses only
- Draw the core shadow
- Light source from the left
There are plenty of complex explanations of
“How to shade a sphere” on the Internet.
And they are overwhelming!
The following 6 steps shadow drawing tutorial is made easy:
I made it simple for Industrial design beginners to start gaining confidence in sketching with “How to draw a sphere with easy shadow”.
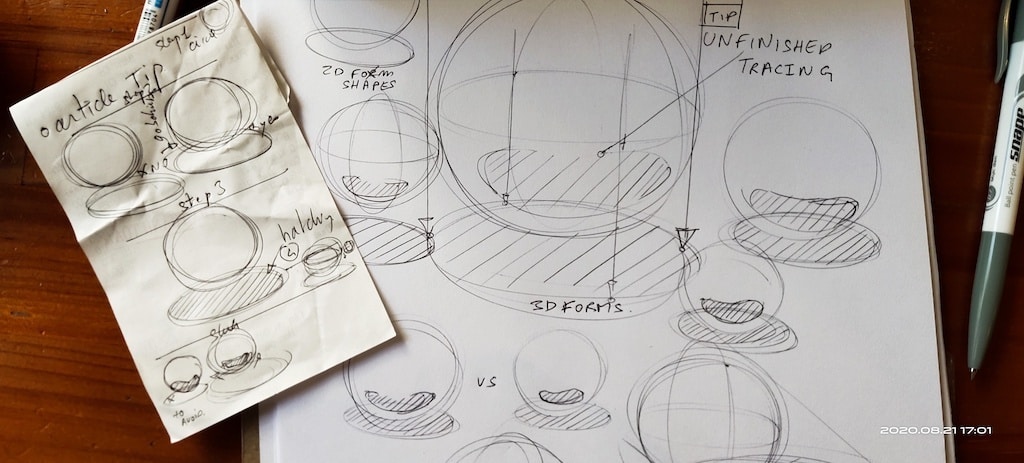
I believe in learning to take baby steps
before jumping into “expert drawing techniques”
in Industrial Design Sketching.
This step-by-step drawing tutorial for beginners
shows you how to draw a 3D sphere super fast and easy
– without any complicated theory about light and shadow.
Get a ballpoint pen and let’s start drawing
with this SIMPLIFIED method for cast shadows on the sphere!
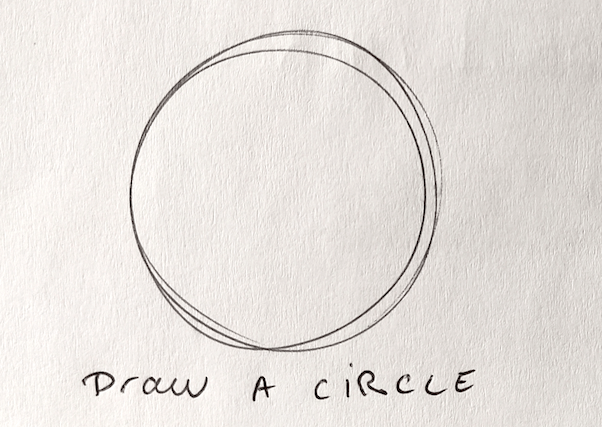
1. Draw a circle
Draw a circle using the ghost drawing allows you to draw the circle with fluidity.
You simulate the circle movement before drawing it.
To complete your circle, do not hesitate to draw it with 3 or 4 “loops”.
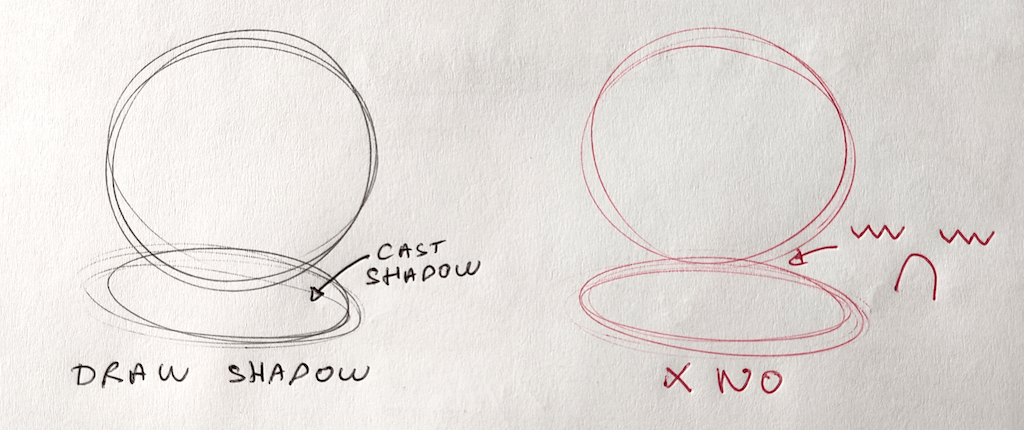
2. Draw the cast shadow with an ellipse
The ellipse represents cast shadow.
Do not draw the ellipse literally below the circle.
Make sure the ellipse overlaps the circle.
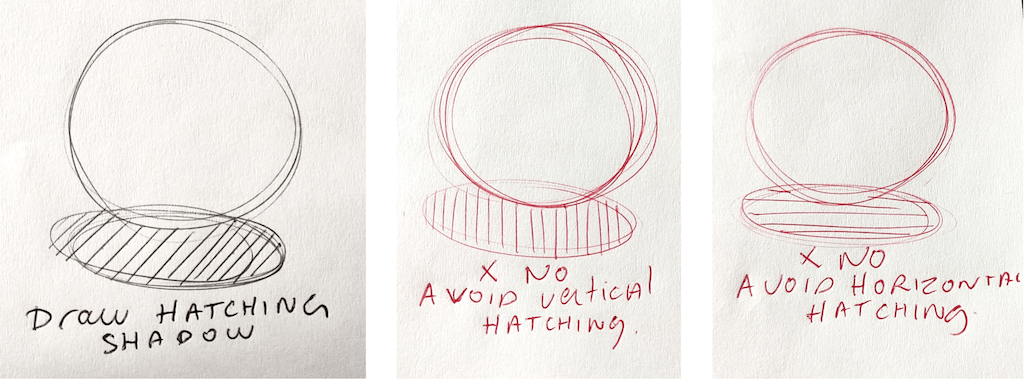
3. Draw hatching for the shadow
Draw inside the ellipse with oblique hatching.
Avoid drawing vertical and horizontal hatching
4. Draw a 3D volume adding 2 ellipses only
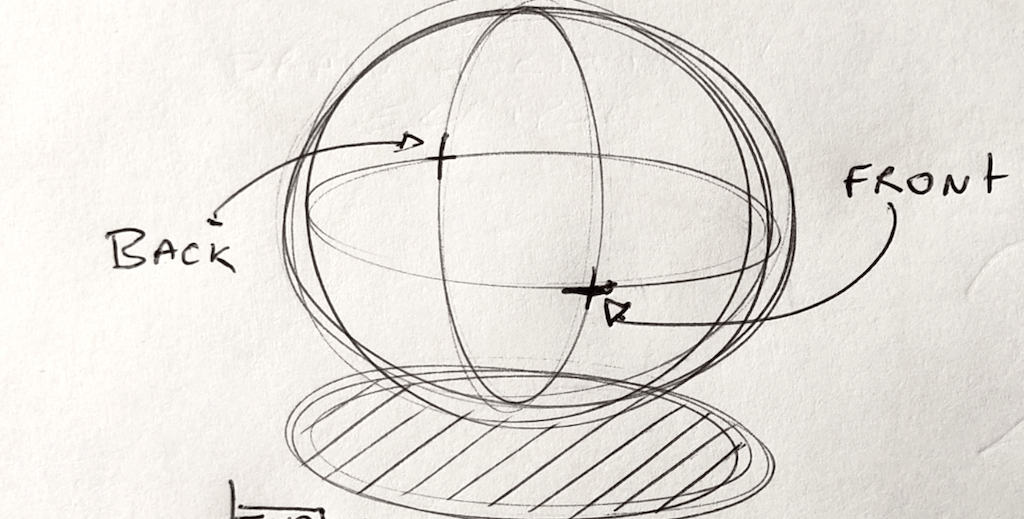
Draw 1 horizontal ellipse (on the widest part of the circle)
Draw 1 vertical ellipse (on the highest part of the circle)
In just a few seconds, the 3D volume of the sphere appears!

OPTIONAL TIP:
For clarity, draw two little crosses.
One in front, and one in the back of the sphere.
(The cross in front is a bit bigger and bolder than the one behind.
It makes the front cross closer to us.)
TRY THIS: The “3D link axis”
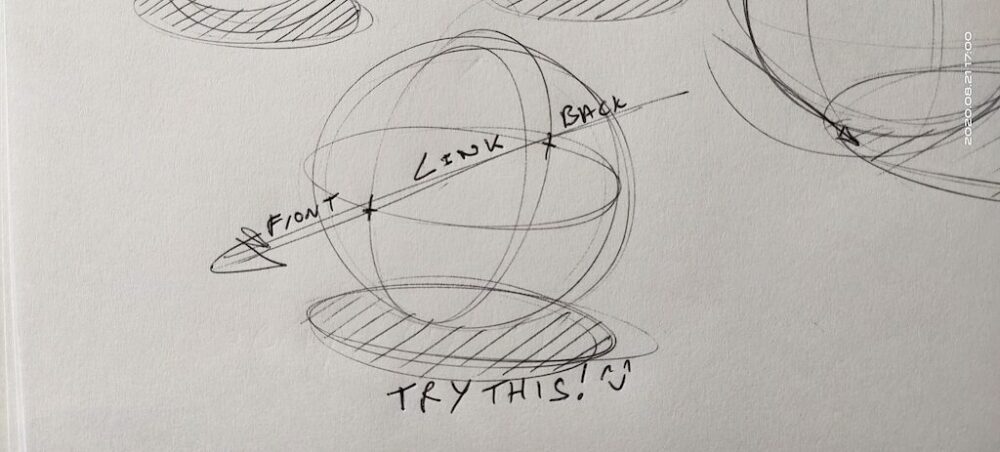
Remember the 2 crosses (one in front, one in the back)
Connect them to create that “Link axis”
It enhances, even more, the 3d sphere effect!
5. Draw the Core shadow
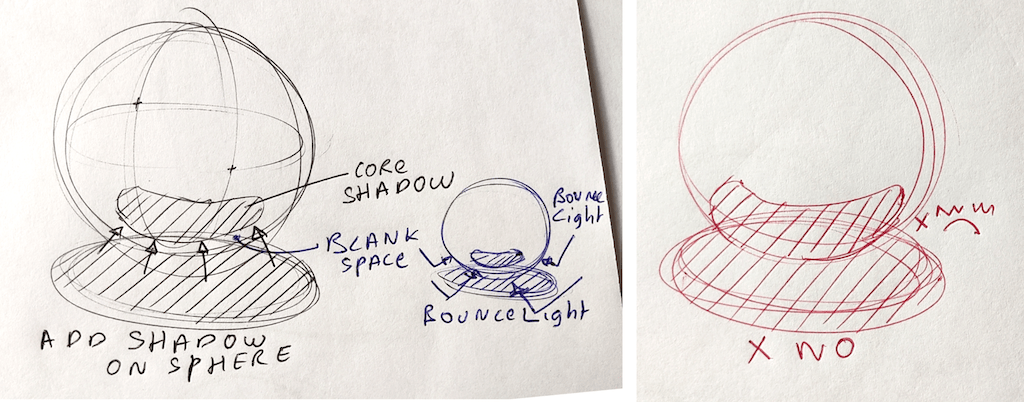
Add the core shadow (peanut shape) to the sphere.
Make sure you leave a bit blank below the shadow.
Do not fusion the core shadow with the cast shadow.
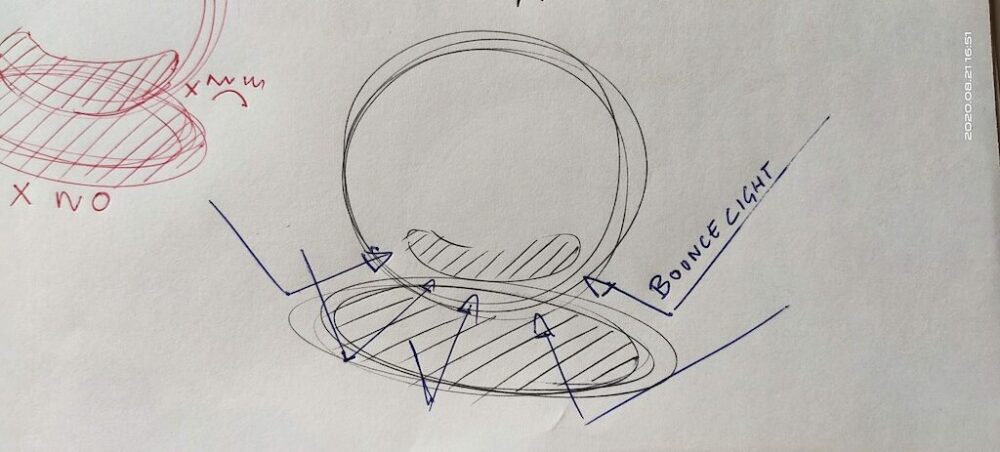
NOTE: Be aware of the Bounce light
- The bounce light creates the white/blank space below the core shadow.
- Imagine the light rebound on the white table, and reflecting below the sphere.
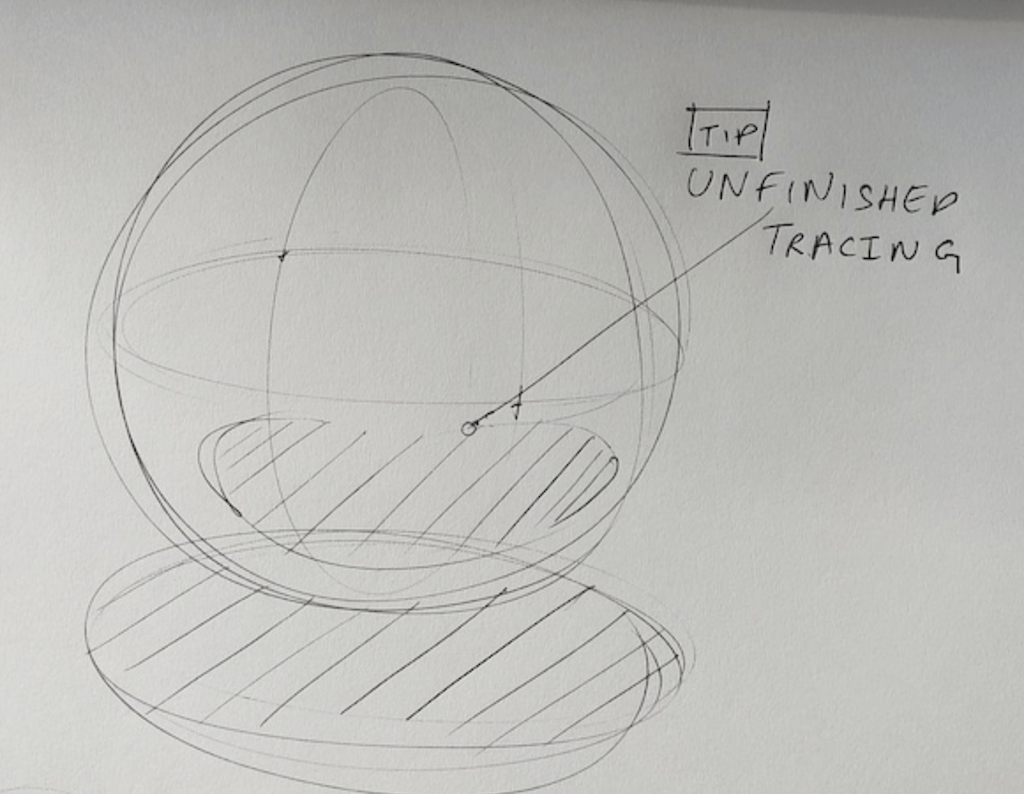
TRY THIS: “Unfinished Shadow Tracing”
Don’t finish your core shadow where the light is the highest.
Draw the hatching as if the line tracing was there.
The brain will magically reconstitute the form. : )
6. Light source from top left
TIP: To help you better visualize,
spot the contact point below the sphere touching the ground.
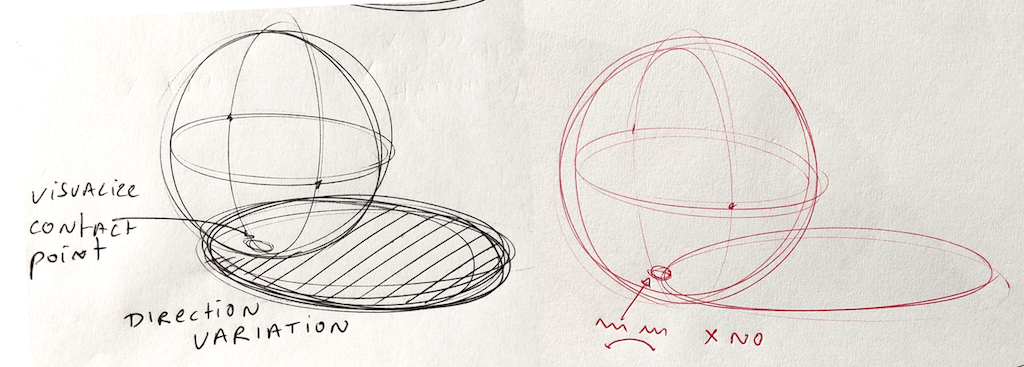
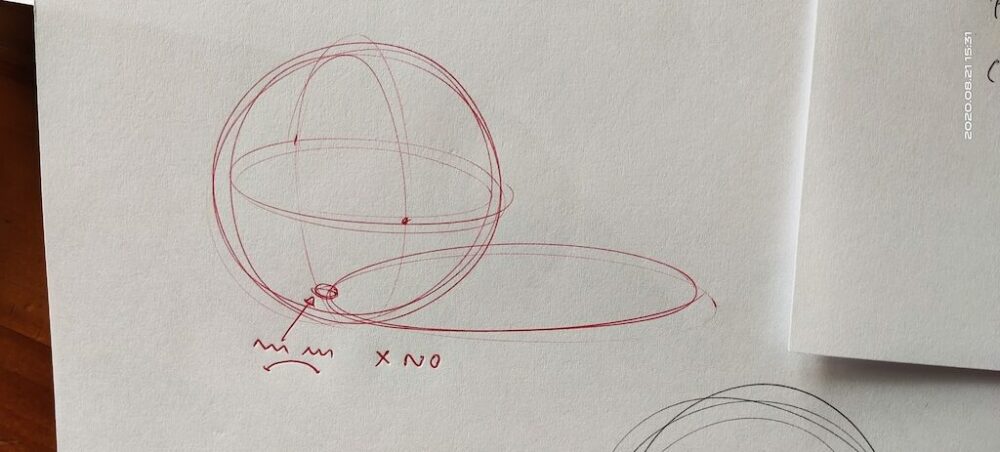
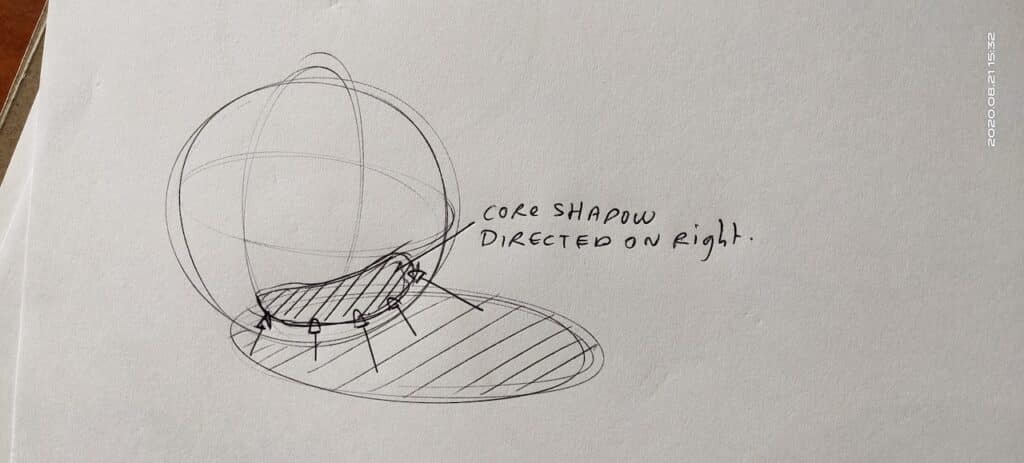
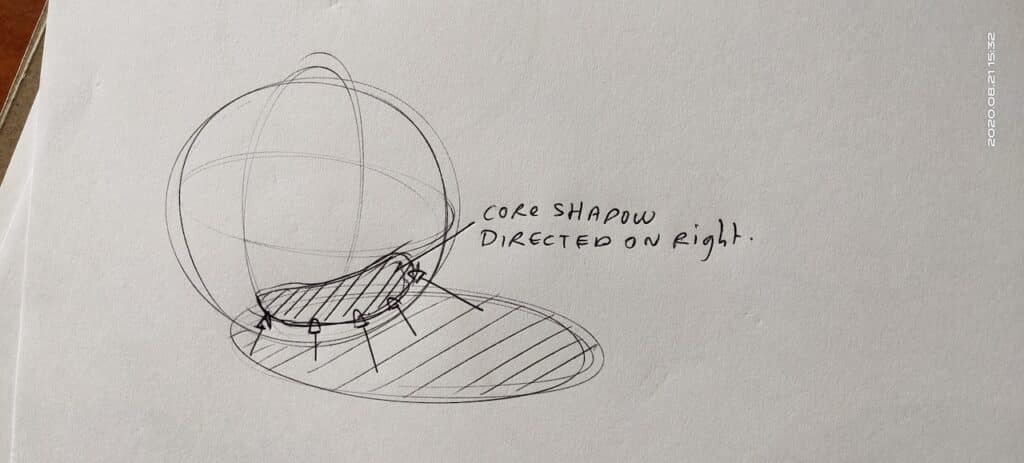
- The (peanut) Core shadow is also on the right side of the sphere
How to go from Beginner doodles to Professional drawings
When you start practicing, your doodles are clumsy.
That’s normal, it is because you are acquiring knowledge.
That’s a good thing!
Know your brain limits, and you will learn happily.
The brain is not made to multitask.
Focusing on learning both the theory + making nice drawings is tough.
So first, absorb the techniques of making doodles.
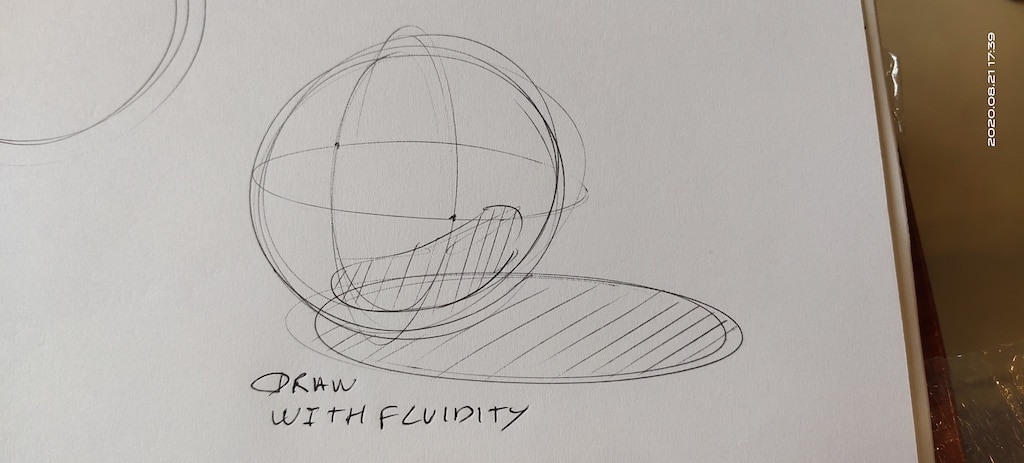
Then when you feel ready, practice drawing with fluidity and with lighter lines.
Your sketch will become much more Lively!
WHAT’S NEXT: Advanced Preview
I like to popularize a technique first.
Then make you ready to jump on more advanced tutorials to learn the actual proper technique.
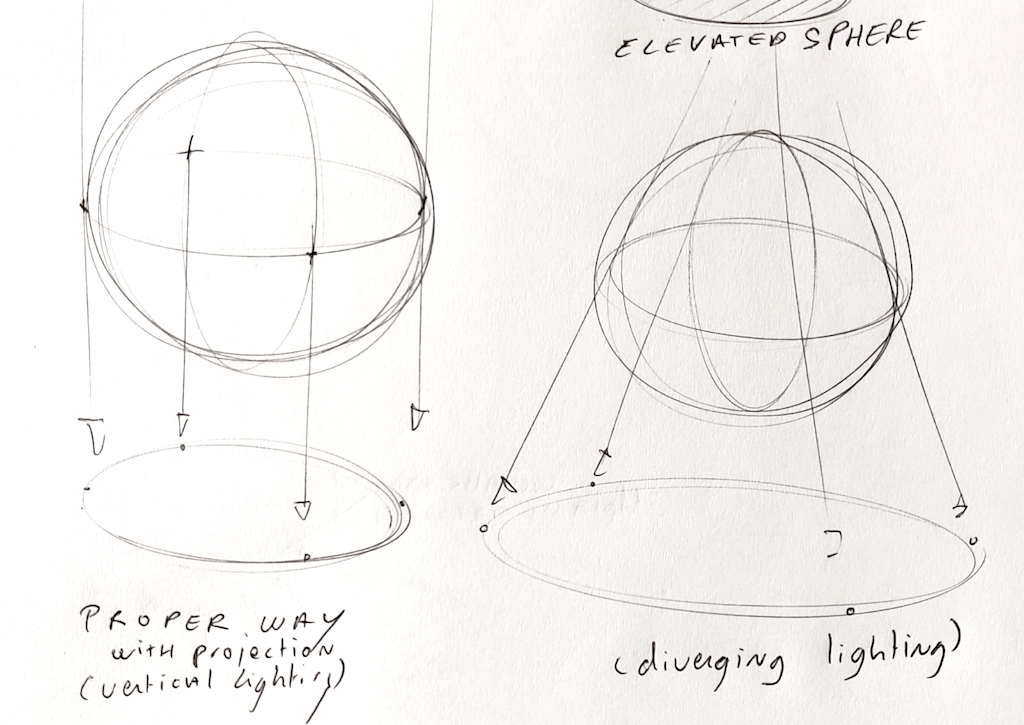
I will create a step-by-step tutorial on How to draw cast shadows on the sphere.
For now, I wanna give you a preview of it as a “visualization insight”.
- When you draw the core shadow, imagine these 4 arrows projecting on the ground.
- You got here an ellipse on the right of the sphere.
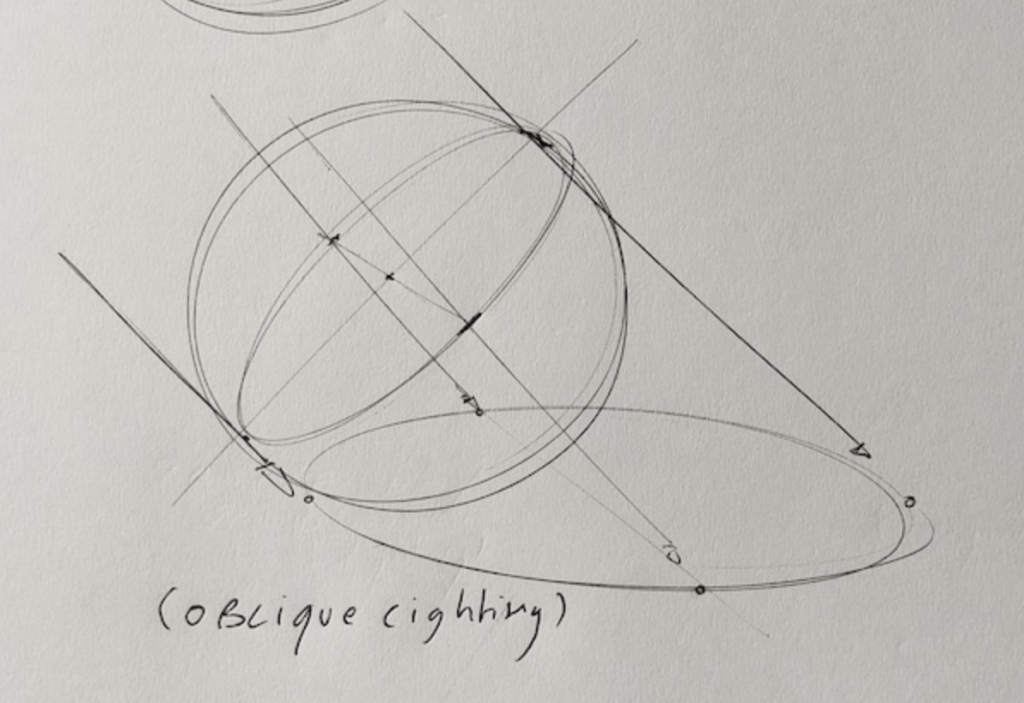
And if you want to start with this technique now, you can follow the steps of How to draw cast shadows on boxes (parallel source light).
The 2 sources of light
There are mainly 2 types of light sources:
- Parallel source light
It’s often represented by the sun, as it is so far away. - Diverging source light
It comes from a closer source, such as a lamp post for example.
Practice Practice Practice!
Like how my friend and Concept artist Edward Eyth says:
“PRACTICE, PRACTICE, AND PRACTICE”.
Enjoy learning the simple way and fun matters to be able to practice so much.
Learn to love the process and you will grow your design sketching skills with more complex and cool drawings. You will raise your confidence and soon reach a professional level.
It’s like learning to ride a bike with the 2 extra little wheels first.
So you can soon ride freely without them and learn how to ride on more challenging roads!

Remember, if you want to step up like crazy,
information is nothing without practice!
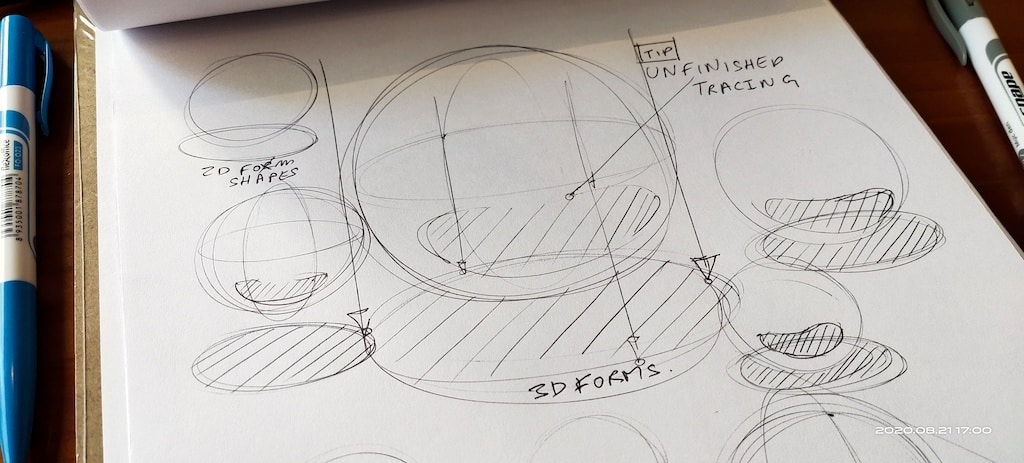
Practice drawing plenty of spheres filling your paper recto verso.
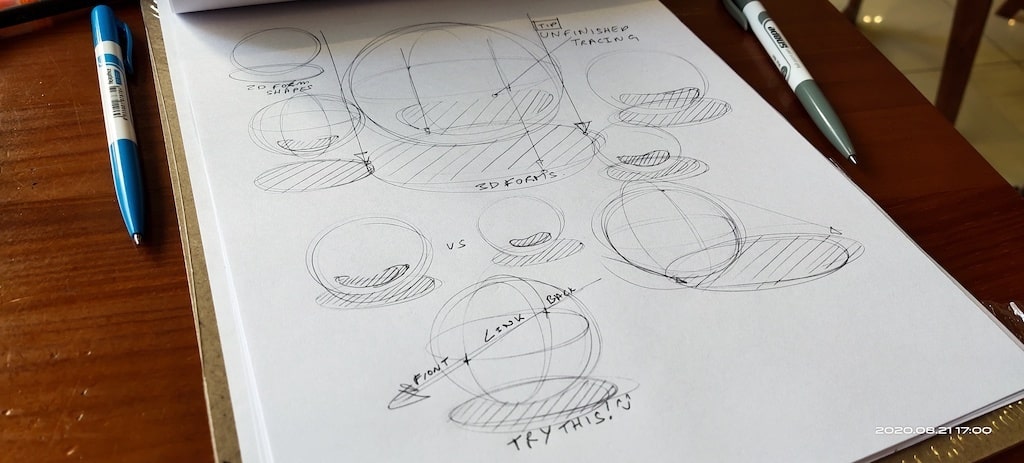
Take a pen, get started drawing now, and let me know how it goes :).
BONUS FUN EXERCISE
To carry on with spheres,
here is a funny game drawing plenty of circles and making them become a crowd of Minions!

Conclusion
In conclusion, drawing spheres with cast shadows can significantly boost your confidence in industrial design sketching. This 6-step tutorial provides a simplified approach tailored for beginners, enabling you to capture the essence of 3D forms quickly:
- Start with the Basics: Begin with simple exercises like drawing circles and ellipses to establish your groundwork. Practice these techniques diligently to refine your skills.
- Practice Makes Perfect: As concept artist Edward Eyth emphasizes, “Practice, practice, and more practice!” Embrace the journey of learning, enjoying the process, and allowing yourself to grow from your initial doodles to professional renderings.
- Visualize and Experiment: Utilize the “3D link axis” and other visualization techniques to enhance the 3D effect of your spheres. Don’t hesitate to experiment with different light sources and shadow effects.
- Keep it Simple: Remember, the goal is not to overwhelm yourself with complex theories but to absorb foundational techniques first. Once you feel ready, you can delve into more advanced tutorials.
- Stay Motivated: Keep practicing, and let your sketches fill your paper. Enjoy the fun of learning, as this will keep you motivated and lead you to create more complex and engaging drawings.
By following these steps, you’ll not only improve your ability to depict spheres with realistic shadows but also develop a deeper understanding of light and form.
Remember, information is nothing without practice!
So, grab your pen, start sketching, and share your progress.
Let’s make learning to draw a sphere and its shadow an enjoyable journey towards mastering industrial design sketching!
Happy Sketching!
See you tomorrow!
Cheers,
Chou-Tac







Thank you for this information and tutorial. Quite interesting. It would be nice to see a tutorial with step by step instructions on how to shade a sphere (and an image of a fully shaded sphere).
I dont udernstant how you drawd your sphere and his shadow its says that you “will create a step-by-step tutorial on How to draw cast shadow on the sphere. For now, I wanna give you a preview of it as a “visualization insight” but I dont see it on this page web w
here is it?