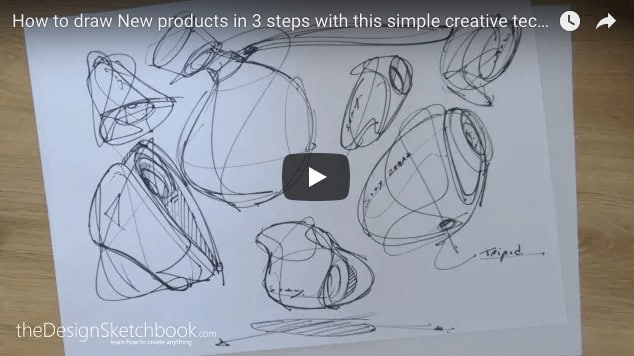
How to Sketch New Products in 3 Simple Steps with the Happy-Accident Technique
Sketching new products can feel daunting, especially if you’re staring at a blank page. But fear not!
Today, I’m going to share a fun and effective way to get your creative juices flowing.
We’ll delve into the Happy-Accident technique, a method I personally use when I’m stuck for ideas.
It’s perfect for beginner designers who want to create on the go without a predefined vision.
Step 1: Embrace the Blank Page
When you face a blank page, don’t see it as a barrier but as an opportunity for creativity. The Happy-Accident technique thrives on spontaneity, allowing you to sketch without a clear visualization in advance.
- Tip: Start with a simple abstract shape.
Remember, you don’t need perfection here.
This approach encourages you to skip perfection in your early sketches.
Step 2: Let the Magic Happen
This is where the technique truly shines.
Begin drawing without a specific goal, letting your pen or pencil wander freely.
- Technique: You can draw shapes that evoke forms or products. Imagine you’re molding clay with your lines, pushing and pulling them into new shapes. This process is similar to distorting forms to create dynamic sketches.
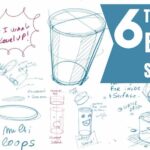
- Example: If you start with a simple cylinder, you can distort it into various product forms like a mug, a vase, or even a futuristic device.
Step 3: Transform and Define
As you continue, you’ll start seeing recognizable shapes within your abstract sketches. This is where you refine and add details to turn these abstract forms into tangible products.
- Detailing: Add elements like buttons, screens, or any characteristic details that make the product recognizable. This step not only makes your sketch more interesting but also hones your detail-oriented skills.
- Creativity Boost: If you’re feeling particularly adventurous, try the 1-minute sketching challenge to see how quickly you can transform a shape into a product.
Bonus Tips for Sketching Confidence
- Tip 4: Draw confident like a “Designer Rockstar” by varying your line style and exploring different angles to give your sketches a dynamic edge.
- Tip 5: Express emotions through your lines. A sketch can convey a mood or personality, making your designs more engaging.
- Tip 6: Before diving into complex shapes, master the basics. Understanding the cube in perspective helps you visualize and draw any form with confidence.
Final Thoughts
The beauty of the Happy-Accident technique lies in its flexibility and the joy of discovery.
It’s not just about drawing; it’s about creating on the go, surprising yourself with what emerges from your pen. Whether you’re designing sneakers, cars, or concept art, this method can be applied across various domains
Remember, the key to mastering this technique is practice.
Keep your sketchbook handy, and try this technique whenever you feel stuck or uninspired. With each sketch, you’ll not only improve your drawing skills but also expand your creative horizon.
Explore more sketching techniques in our Designer Starter Kit or challenge your creativity with our 1-minute sketching challenge.
Let me know how this technique works for you, or if you have other tips to share, in the comments below or by email!
Keep sketching, and keep exploring!
Tell me in the comments if you enjoyed this tutorial.
If you’re looking for more tips on how to draw with confidence, check out our article on 15 TIPS | Draw Confident Lines like a “Designer Rockstar”!
DESIGN SKETCHING TUTORIAL TRANSCRIPT
Hey, guys.
So today, we are going to see how to draw with the happy accident. I’m Chou-Tac Chung from thedesignsketchbook.com, and I’m going to show you a super nice technique to draw from imagination even if you start with no ideas in mind or even if you have no skills yet in drawing, at least not much yet.
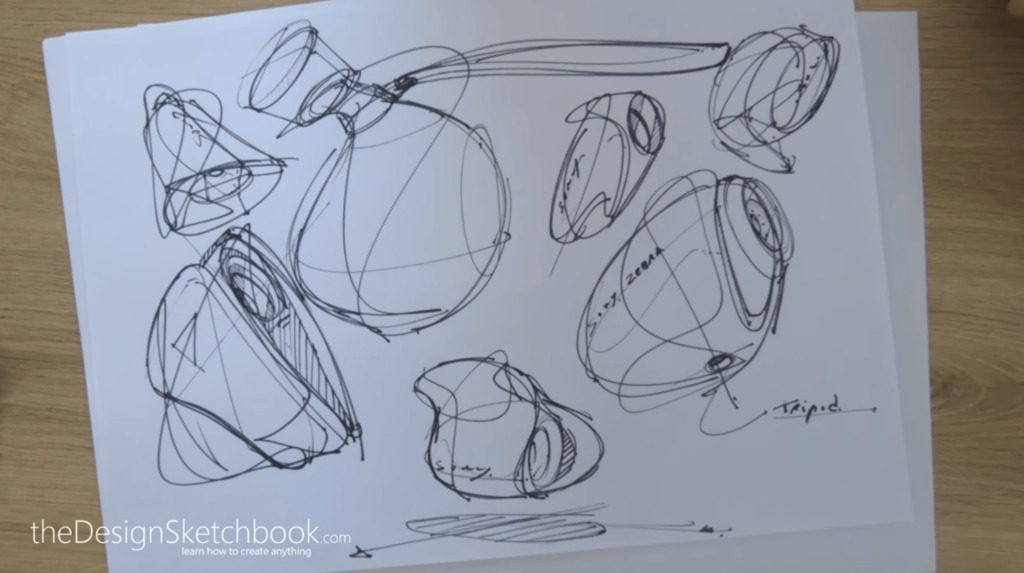
So, if you are not really confident about your drawing and you are facing the blank page, this technique is really cool because what you start with is actually a random shape. Like, for this shape here, I was closing my eyes and just drawing something random. Then I added some contour lines to it because I wanted to create a volume that could come up from there. And so on. I can also carry on with adding some more details right here, like adding a cap. Because from this random shape, I felt like it looked like some kind of a bottle, and I created a volume all around with the contour lines and then added this cap as a detail.
This is really like the misconception that we may have: we think that before drawing, we need to have a clear visualization of what we want from the start. But here is the total opposite. You just draw something random, and this is what we call the happy accident. It’s that from there, you can see something that’s coming out. It’s like when you are looking at the clouds and then you come up with some shapes—random shapes that look like something existing. And this is what you want to do in this exercise.
I’m going to add some more details like a sling for here to make this bottle into something more portable. So once again, you start with something random. You close your eyes and just draw. From there, then you can define something with the main volume and add some details. You can add some elements. Here I’m adding some hatching to emphasize more on this volume.
This is something which is really cool because you can really start with shapes that can surprise you—shapes that you have never drawn before or even seen before. This is how you can actually brainstorm when you are lacking inspiration for your project.
Once again here, I’m doing another one. This is a random shape. I add the contour lines for the main volume and here—why not add an action cam lens on top of it? Okay? This is really fun; it’s something that will always surprise you because this is how you can actually look for ideas in your own imagination.
Of course, feel free to get some more inspiration when you are drawing as well. Take your time; it’s something that you can just sketch—draw something which you may not be familiar with—and see how you can go on with that. This is where the challenge lies: you can really look for new ideas along the way.
Here I’m adding some more details, trying to explore some more forms on it. I’m adding some hatching to create more contrast about the different pieces of this product. As you can see, I did add a logo because the logo helps give it a more product-oriented physical aspect to your sketch in just one or two seconds.
Here I’m adding some notes, and as you can see, I put a line below the title about the tripod notes just because it makes sure that it’s much cleaner for your notes and ensures that your writing is straight. The pen I’m using is a very super thin pen—it’s a 0.4 Pilot G-Tec-C named Mica. I pretty like this one; it’s a gel pen and plays with something from Lite which is very homogeneous and super thin.
Now my twin marker’s nib is almost empty, so I need to replace it with this pen here. Alright! So one more here—why not add another action cam? Once again, I started totally random; I added some details. You can also add graphics as well as a logo—as I did just before—to give it some more physical aspect to this product.
Here I’m adding the reflection of this lens by adding some hatching—not especially around but not on the reflections—which creates more contrast for it. I can add some construction lines just to give it more orientation in this sketch.
Getting some notes here and then some hatching as well for this front surface—just right here—I’m adding some bold lines so I can emphasize what I want for this sketch first. Yeah! So this is hatching here in the front; I’m getting more contrast on what is outside and inside.
Make sure that your hatching always has good quality; this will make your sketch always look more product-oriented. This one is another one; it’s really fast—like when you’re doing your random shade like a signature but without controlling its trajectory.
Okay! So I keep going with some principles. By the way, feel free to download the designer starter kit if you’re a beginner in design sketching—you can see right here; there’s a link in the description below. It’s free, and it will help guide your first steps in design sketching to gain confidence in your lines.
You can see that I’m using a lot of ghost drawing; it means that I’m simulating movement—even if I may not draw on top of it—it helps me visually visualize my next move. So I’m trying to fill the paper; some sketches are getting smaller right here.
Feel free to try drawing from different sizes; this creates depth for your sketching board as well! There we go! So I really want you guys to have fun when doing this exercise!
I’m using just one piece of paper but challenge yourself to spend like one full afternoon doing this exercise because it’s going to really fulfill your mind with new shapes and train your arms with new movements.
This will be super helpful for you guys forever because as soon as you master new shapes, you’ll unconsciously keep them forever! Whenever you want to use new shapes, you’ll be able to take from this library of forms by practicing for one afternoon—for four hours—or use it as a warm-up before starting projects or practice every morning when waking up for ten minutes or so.
This will truly fulfill your memory of forms and push further into your mind! Here I’m adding some small reflections; as you can see, the lines aren’t finished—they’re more random curves giving depth as well!
I hope you liked this tutorial! Feel free to have fun with all these sketches! To make sure that you don’t miss any new videos and updates click on the subscribe button and hit the small bell icon as well so you’ll get all notifications on future videos!
See you! Bye-bye!






Add comment