How to Draw Product Design from Simple Forms (Easy Level)
Product design sketching is an art form that blends creativity with technical skill, and here’s a guide to help you transform simple geometric shapes into detailed product designs:
Starting with Basic Shapes
- Draw the Foundation Shapes:
- Begin by sketching an ellipse, a circle, and a cube on your canvas. These foundational forms will serve as the building blocks of your product. If you’re unsure about drawing in perspective, consider checking out The Designer Starter Kit for step-by-step guidance on these basic shapes.
- Use of Contour Lines:
- Add contour lines to your cube to give it volume. These lines help in visualizing how light would fall on the object, making it appear three-dimensional. For more insights on sketching volume, visit Sketching Volume in Product Design.
- Rounding Corners and Adding Details:
- Round the corners of your cube to give it a more realistic look. This step helps in adding depth and realism to your sketch. For ellipses and circles, add extra contour lines to suggest additional volume or texture.
Enhancing Your Sketch
- Transparency and Perspective:
- Imagine your forms as transparent, like glass, which helps in understanding spatial relationships within your design. Always adhere to perspective rules to ensure your product looks coherent and realistic. Explore more about perspective in Understanding Perspective in Design.
- Adding Textures and Patterns:
- Rather than covering the entire surface with dots or other patterns, give hints of texture. This technique allows the viewer’s brain to fill in the rest, creating a more efficient sketch.
- Improvisation and Creativity:
- Product design is about improvisation. Start with your basic forms and let your creativity guide the addition of details. This approach not only fosters creativity but also reduces the fear of making mistakes. Read more about the importance of improvisation in Creative Improvisation in Design.
Final Touches
- Details and Realism:
- Gradually add details to your sketch. Start with the general forms and move towards intricate details. This method keeps your design coherent and focused. For more on detail work, visit Adding Details to Product Designs.
- Experimentation:
- As you sketch, don’t aim for perfection from the start. Experimentation is key. Try different configurations, like adding a screen behind your product, to see what works best. Remember, the goal is to have fun and let your creativity flow without being constrained by rules.
Conclusion
By starting with simple forms, using contour lines for volume, embracing transparency and perspective, and allowing yourself the freedom to experiment, you can create detailed and imaginative product designs. For more tutorials and inspiration, visit The Design Sketchbook blog, where you’ll find a wealth of resources, including Sketching Techniques for Beginners and Designing for Creativity, to aid your journey in product design sketching. Remember, product design sketching is as much about having fun and exploring possibilities as it is about technical skill.
DRAW 3 SIMPLE FORMS TUTORIAL | TRANSCRIPT
I’m going to show you in this video, one of the main principle of Product Design Sketching on how to create your own products from scratch.
So remember to click on the bell to subscribe to the channel.
So today I’m discovering with you the software KRITA that you can download on the website for free krita.org. It is an amazing digital drawing software that is used a lot by manga and anime artists.
Alright, so let’s start.
I was pretty curious about this software because of the brushes, which of… which are used by many artists. So let’s make a try right here. So for this product here, for this exercise right here I invite you to take a piece of paper and draw with me.
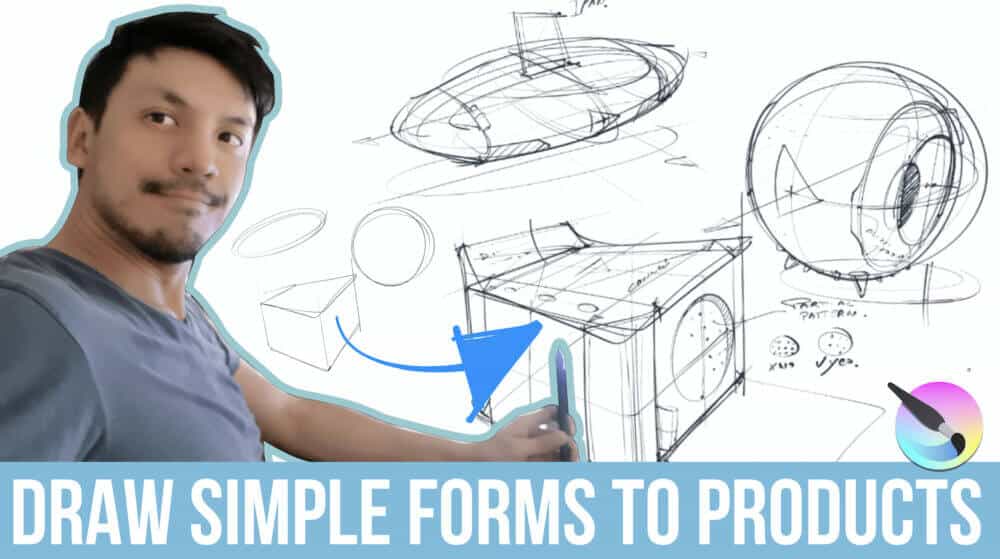
So you’re going to do one ellipse, one circle, and one cube. So for the cube so if you have if you don’t know how to draw them or you feel pretty hesitant on that you can get the Designer Starter Kit where I show you all the steps to draw them in a very simple way and to make your first step in perspective.
So what I’m doing here with the cube is I like to draw the Contour lines, which actually give a better perception of the volume.
They are very convenient and very essential for product designers to use the contour lines because it’s very fast to show the volume without spending ages to do the shadows on it. So you can already have premice of your product.
And I like to round the corners because it gives you some more realism to it. And here what I do is I’m adding some extra Contour line for this ellipse and circle to create some extra volumes on one second few second only.
And here’s an axis to just to show like the X Y Z axis and I like to draw this little cross to better mention like what is in the front and what is on the back.
So, one of the rules also in product design is to draw in transparency as you can see, I imagine that these forms are actually transparent like made of glass.
Alright. So what I have done here is that I have started with phase one which was Draw the main shape from the general shape, and then I’m drawing some details.
That’s a key principle in Product Design.
You don’t start by drawing the details. You start by drawing the main forms which are here like very simple, very basics and then you go on the details. And always remember to follow the perspective.
And here is a trick is that for the textures, I like for the little dot as you can see is I’m not covering the whole surface of the little dots.
What I do is that I’ll just give a hint of them because in product design, sketching when you want to draw something is pretty convenient, actually that you just represent a bit of the texture – and then he’s actually meaning the overall of it.
So it’s a partial pattern.
So here we go. If you have a full it is not recommended it’s fine but it’s not recommended and I better give just a hint of them.
Your brain we actually recompose everything. Alright so it actually helps you to better focus on the overall and that your eyes are not just putting this little dot.
Alright so let’s keep going so I quite like to as you can see is that more I go through this sketch more I like to spend more time on the details it’s very fast to show the main form is actually taking a few seconds and after that, the details just take your time.
As you can see here also some contour lines right here that actually helped me to solve to understand to show is what is going in or outside of this hole of this sphere.
So it’s just like, quick doodling here. I haven’t done much research on data I’ve been through like some thumbnails. I’m just drawing on… along the way I’m creating along the way.
Like from the start I didn’t really know what I’m going to do it just like an exercise to improvise. And to give you the habit that whenever like you start the sketch, don’t be afraid of making mistakes.
You just improvise along the way and your creativity actually will be built step by step, and with a lot of, I would say intuitions, and a lot of testing and this is pretty cool because you allow yourself to have a freedom of mind. Freedom is like visiting a city without visiting the city, without a map and this is what I love about traveling about recently. This is having is kind of fitting when I’m drawing right here.
It’s pretty much far fetched. But there is no rule there are no boundaries to creativity. And if you love this kind of randomness, this kind of discoveries, you might love creating and sketching your ideas that come from nowhere, I would say.
So, give yourself the freedom to surprise yourself. All right.
And along the way, you will see like you will input some details that actually may come from some images that you have deeper in your mind somewhere that you have seen maybe years ago, or maybe in the book or animation and so on. And this is how like when you draw once again, you just having fun and connect the different elements together and see what’s happened.
Okay.
So all of these are pretty wonderful. Once again, this is why is powerful on this is that you need to start creating your own way to start creating your own product with your own sensitivity.
That will help you to as a beginner to stop copying others but instead take inspiration from them and from different elements and once again to combine them together.
And the magic will happen. Okay.
Here’s a small tag. Actually, I saw some mobile speakers having these kinds of tags that remind textile-like Fashion and somehow and I felt pretty cool and just adding here.
And this likes more like very small details but is adding also some extra realism to the sketch.
So once again remember you have to go through the from general to details.
Always go in that way. The other way around is kept as an exception.
Here we go so here I’m trying to find some extension just thinking maybe having a screen behind. Just experimenting.
So it’s important that whenever you want to draw some ideas, don’t always look for the best sketches or the best piece of art just goes on the flow. Just take it easy. Okay, you might see a lot of doodles of sketches on the web or internet or what but look for doodling and relax.
Just have fun at sketching. Okay?
So you have some speaker doodle from simple form, and I invite you to go on The Design Sketchbook blog and get some more tutorials and some motivational articles as well to accompany you along your journey.
Alright, so you can see here the before and after of the simple forms to the product itself.
So remember to take a pen, do not hesitate to take some reference pictures on Google image for examples, and have fun.
Let’s draw!


Add comment