Did you know Designers could make Food designs?
| remember food design was one of our school projects in my 1st year of Product design school.
It was so much fun!
FOOD DESIGN: How to Draw Japanese Skewers in 5 steps! 13.10minutes
BONUS: You can download the printable tutorial file at the end of the article.
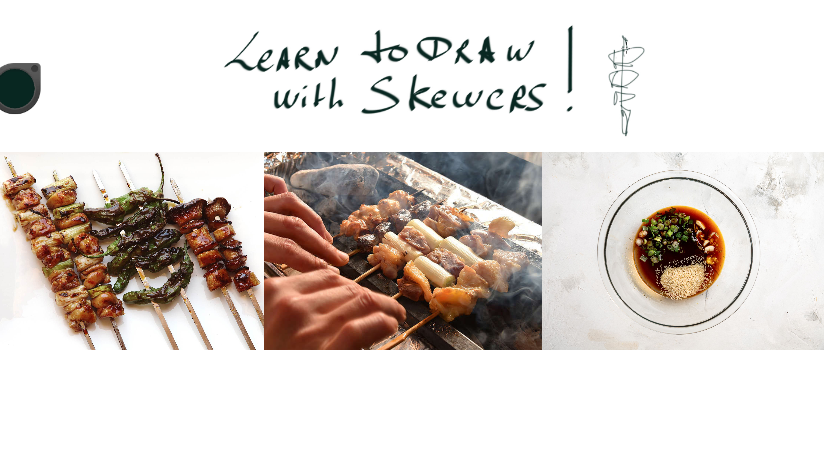
My girlfriend sent me a video on WhatsApp about “How to cook Kushiyaki at home.”
These are yummy Japanese Skewers!

I took the recipe in notes and doodled the skewers and ingredients.
Then, looking at my doodles I realized I could make a drawing tutorial for you guys!
Who wouldn’t want to draw Japanese food? lol.
It is so Oishii!! (Delicious in Japanese)
Food Design Tutorial
Today we a Japanese food sketching tutorial!
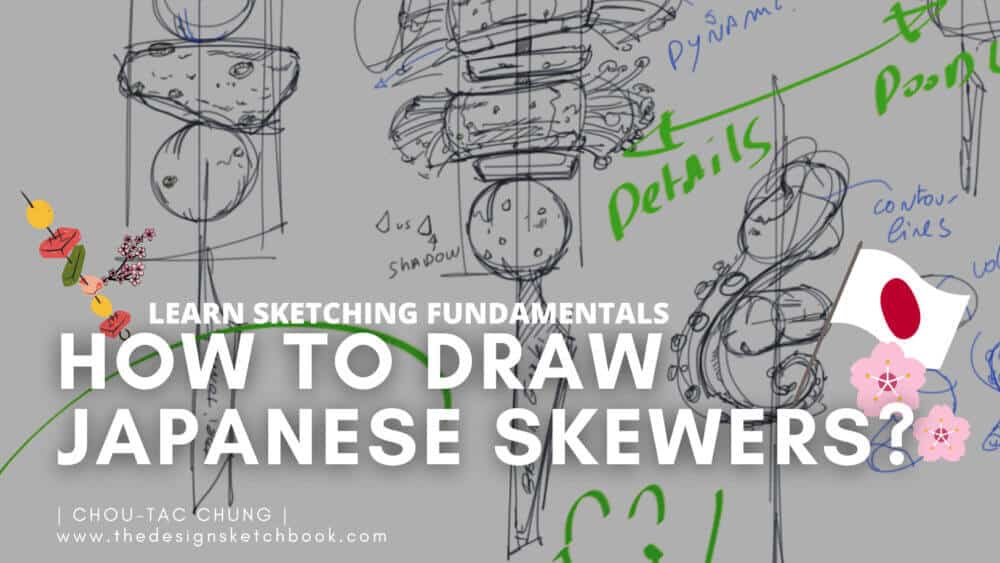
You will learn how to draw Yakitori. I will show you some skewer illustration techniques among plenty of food design drawing tips.
I explain basic fundamentals of drawing you must know as an artist or designer.
What you learn here will apply to many more products, food, and objects!
Yes, you will learn how to draw your own Japanese skewers, and more than that, the sketching techniques applicable to plenty of other food of course!
Remember, the ultimate goal is to draw anything from your imagination!
Let’s start the Beginner food illustration techniques with Sketchbook Pro drawing software
The sky is the limit!
PART 1 | Draw With a Guide
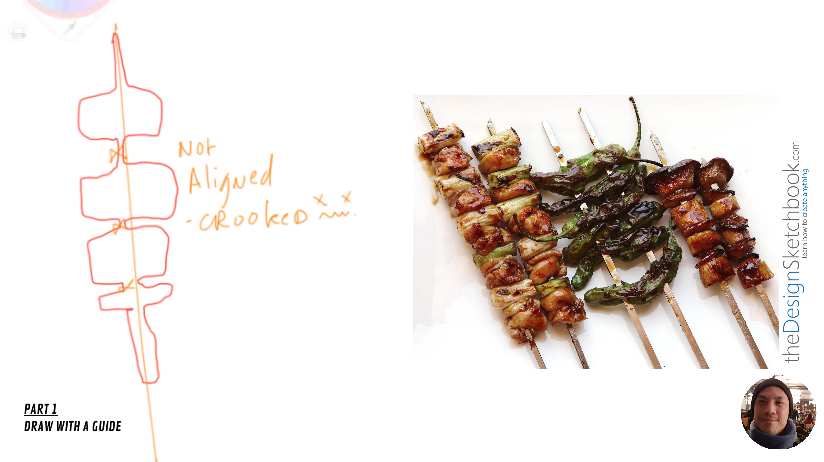
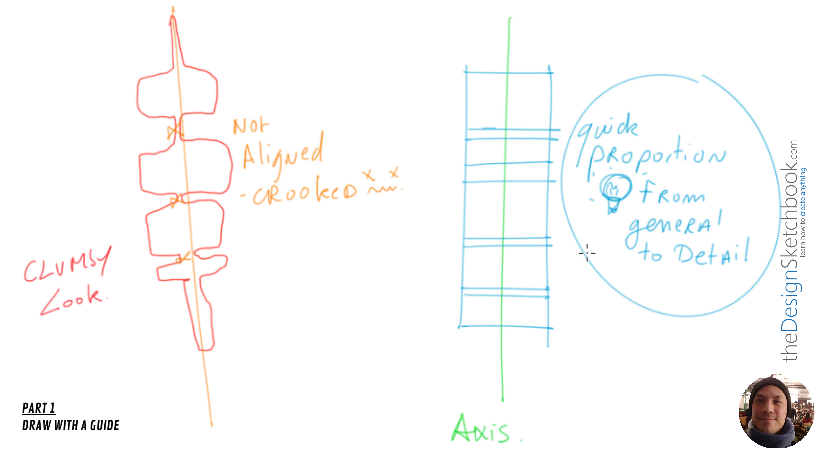
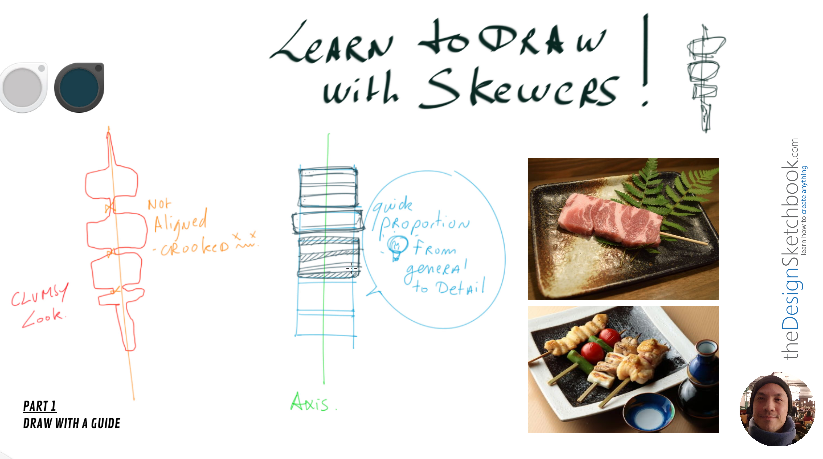
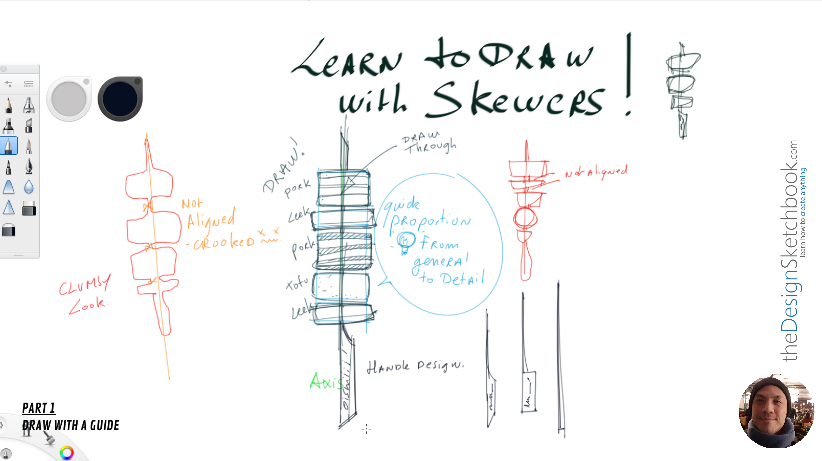
It helps you to draw following the vertical axis as a guide.
Part 2 | Shopping ingredietns
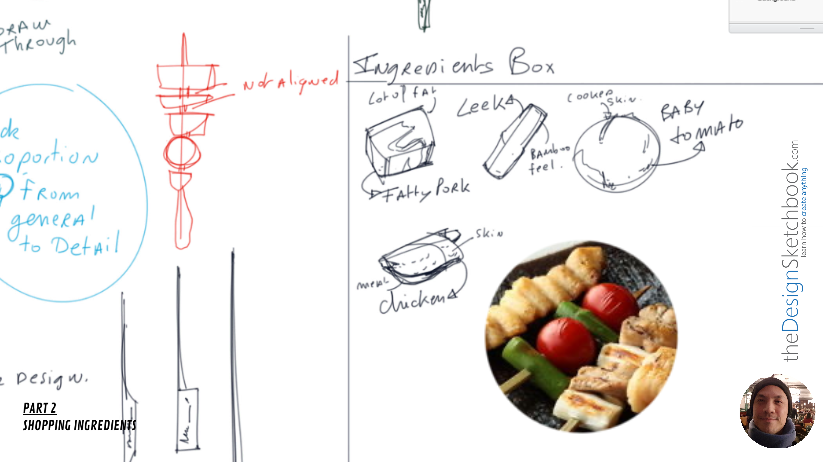
Just add a few only. The brain will reconstitute the rest.
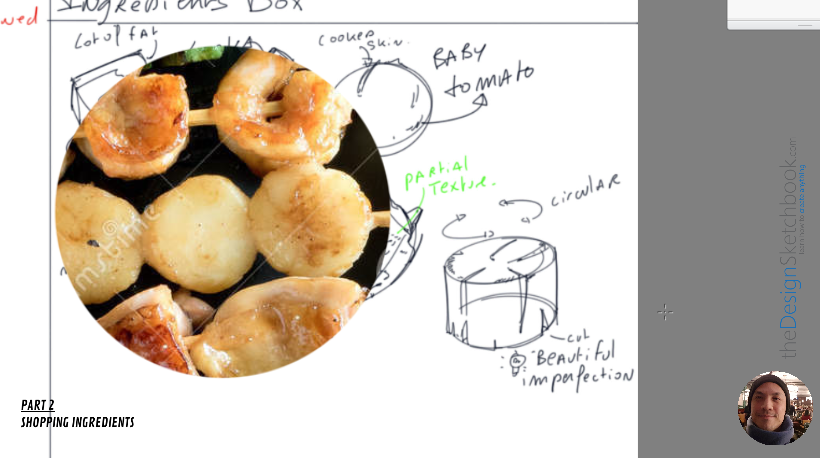
They help you draw with a more realistic look.
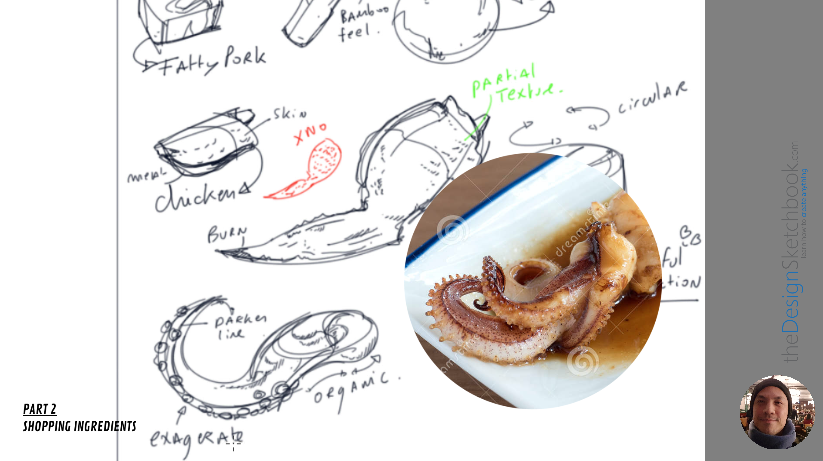
and feel free to exaggerate some details for better visual communication.
A few will be enough.

Part 4 | Draw with dynamism!

importing from the ingredients above.

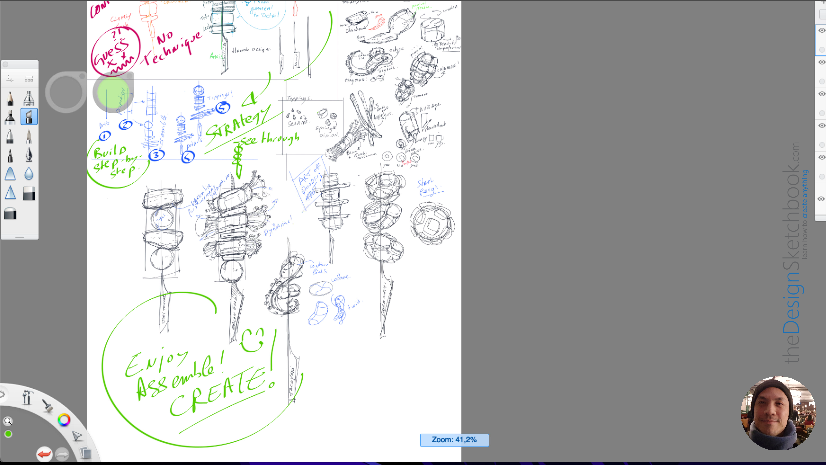
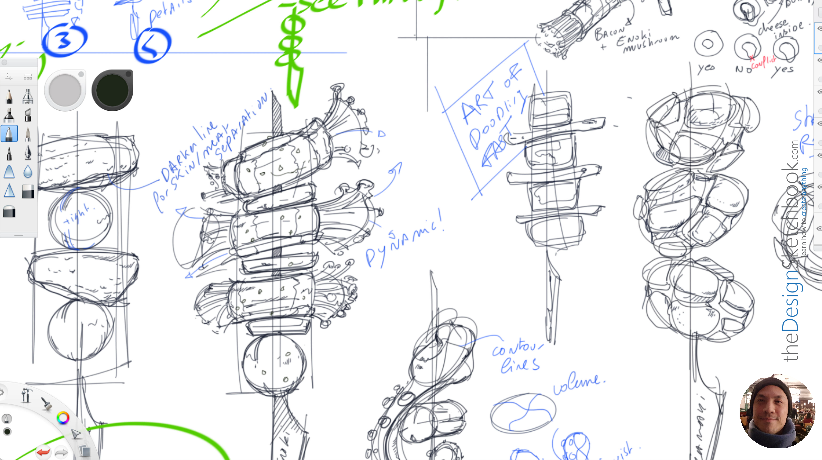
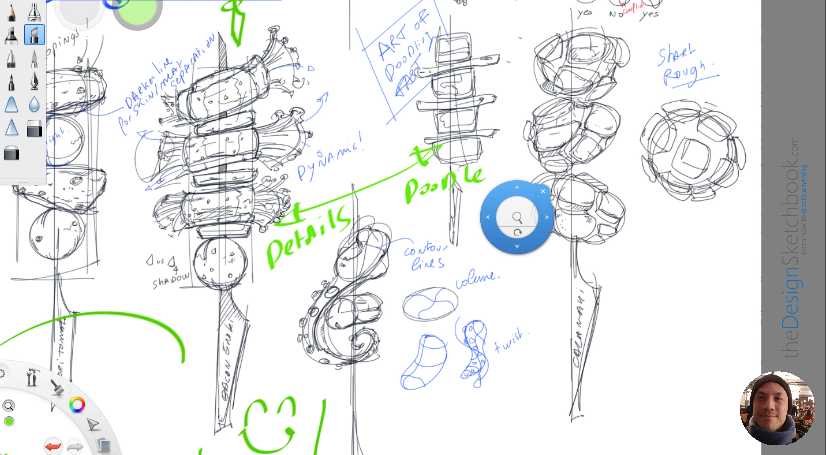
Have fun!
Cheers,
Chou-Tac
PS: By the way, I am using Sketchbook Pro software.
It is a wonderful software, light and free!
PPS: If you are scared of drawing, I invite you to meet Kim, a baker in Seoul.
Despite being afraid of drawing, all of his bakery’s recipes started with a sketch!
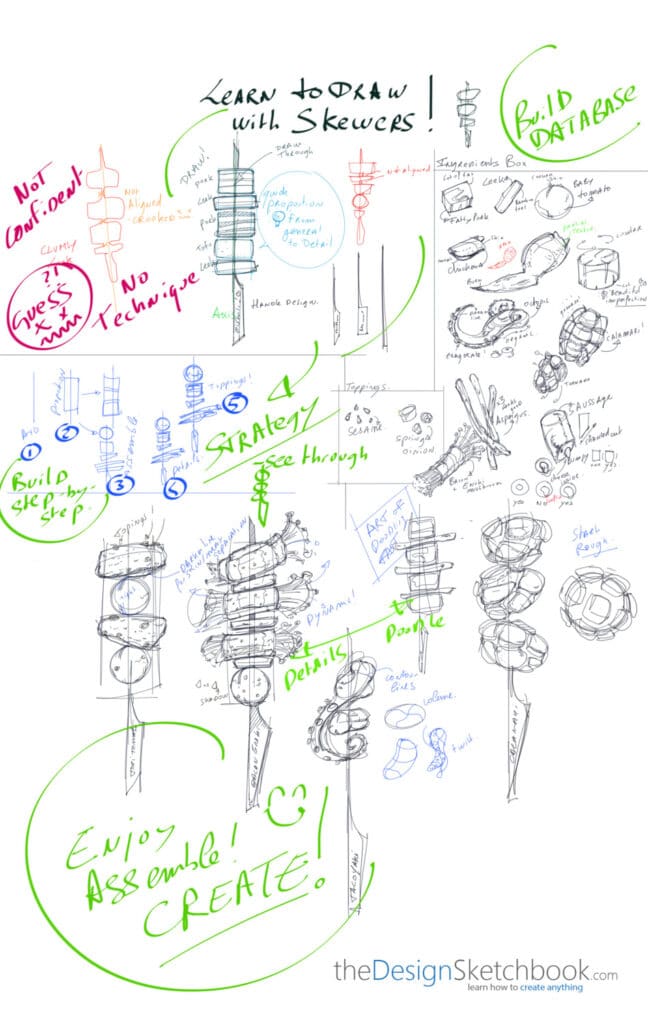
BONUS: Download below the full tutorial, ready to print!
Transcript
Hey. Last day, my girlfriend just sent me a video about how to make Japanese skewers. And so I was taking some notes, some doodles, and it gave me the idea to make a tutorial about it. So let’s see how to draw Japanese skewers.
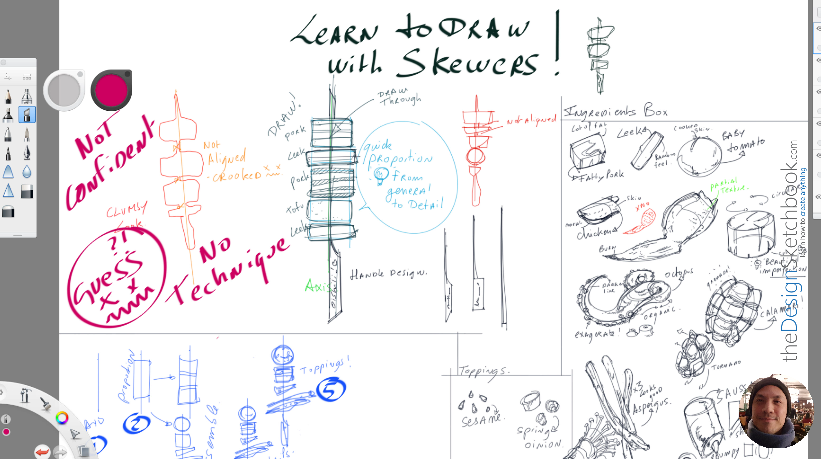
And here’s part 1: draw with a guide. Here is a common mistake in red showing you that if you draw only without the contours, the outlines of the skewers are not going to look good because the overall won’t be aligned. As you can see, the stick is quite crooked, and it just gives an overall look of clumsiness.
So what we should do is actually look for structure. What you should start with is to draw with a vertical axis. Then you’ll draw the general proportion of it. Like, this big rectangle is going to be where the ingredients will be. You can divide it into a few parts for each ingredient. So you want to get a quick proportion, a general idea of how your skewer will look like. Remember, you have to draw from general to detail. It’s something that is going to be applicable for anything that you’re going to draw.
So don’t hesitate to get some reference pictures. I’m drawing here the piece of pork with some fatty fat on it. Then here is some veghee, some asparagus; then we alternate with another piece of pork. Let me write. So I add some hatching so it makes some contrast with the fat and the meat. And here’s a piece of tofu. I’ll add some little dots for texture and another piece of asparagus.
So we got pork, we got leek, but actually, my mistake is asparagus: pork, tofu, and leek which is asparagus—oops! Then that’s the steps where we draw and we are having fun.
Then it’s time for the stick. So for the stick, what I like to do is to try again—like, chew all the ingredients. Here we go! Basically, you need to see through and draw through it. Don’t hesitate; even if it’s not something that is visible in real life, don’t hesitate to draw through it.
Alright! And then you have to respect the guide because just use this line as a guide. If you don’t, it’s kind of going back to stage 1 of the common mistake—not lining up correctly. Then you can have fun with the design of the skewer itself for the handle design.
Just for note, I’m using the software Sketchbook Pro—it’s free software that I really enjoy because the tools look very natural! Now I’m using the ballpoint pen tool and writing on it some indications like “oishi,” which means delicious.
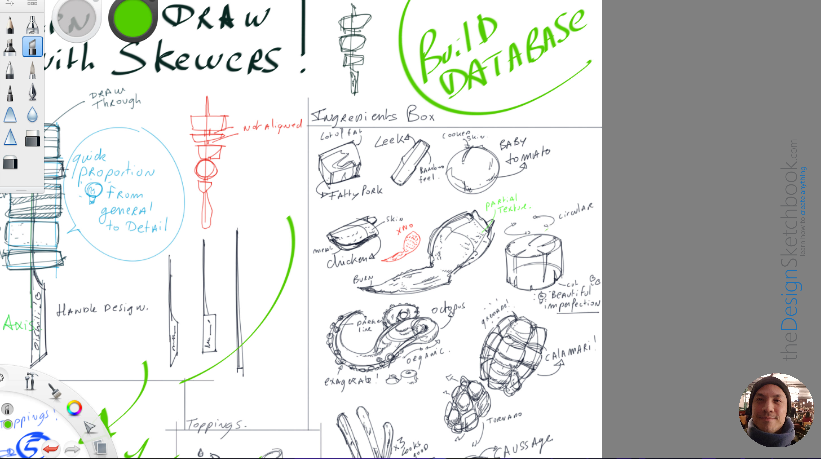
Part 2: shopping ingredients! In this part here, we are going to have fun drawing different ingredients as inspiration because what you want to do is build your database.
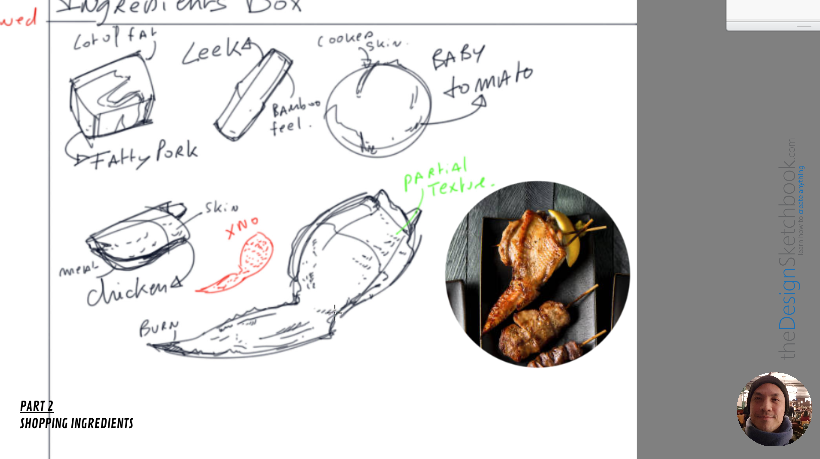
We have fatty pork which is very relevant for Japanese culture and food—the more fatty, the better! So I want leek (but it’s actually asparagus), tomato… Don’t hesitate to really observe reference pictures when you draw! Here is some chicken—the skin and meat. See the little notes? You have cooked skin that is peeling a bit; you have leek which has a bamboo feel; tofu has meat that has a lot of fat; and here we got chicken wings with a bit of burn on them because they had been BBQed.
As you can see for textures, I don’t put texture all over the chicken wings—it’s something that would be overwhelming; just put partial texture on it and it will define the overall nicely.
It’s clam chowder if I’m not wrong—it’s circular and has little cuts here and there; that’s what I call actually “the beautiful imperfection.” Don’t try to be perfect—try actually to find imperfections in nature, in food, and relay them in your drawings.
Here’s some squid with little tentacles; I try to have a very organic feel as you can see with dark lines—I also push them into my drawing! And I don’t hesitate to exaggerate some elements to make them more communicative.
There we go! This phase is done for observation purposes—you don’t have to draw exactly what you see 100%. Just try to learn about specifics of each ingredient that you’re drawing! Like here—it looks kind of like a grenade in how I’ve drawn it.
Here’s some asparagus—and I like having three pieces of asparagus; if you just show one or two they look kind of lonely—so add three!
Here’s some sudsyk—we’ll add cheese inside since it’s something they enjoy in Japan! See all three proposals? The second one has a conflict of lines so I will go with either first or third.
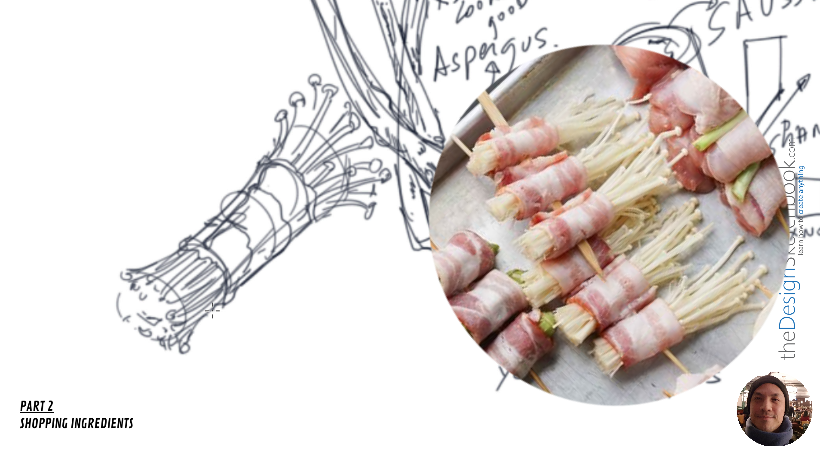
Here’s some bacon wrapped around enoki (the name of Japanese mushrooms). What I do here is always go from general to detail—as you can see I started with something brief then drew more details step by step. I don’t try to draw every single thing I see; it’s more symbolic.
Pecan press enoki! You have to consider you’re at stage sketching—not reproducing exactly what you see!
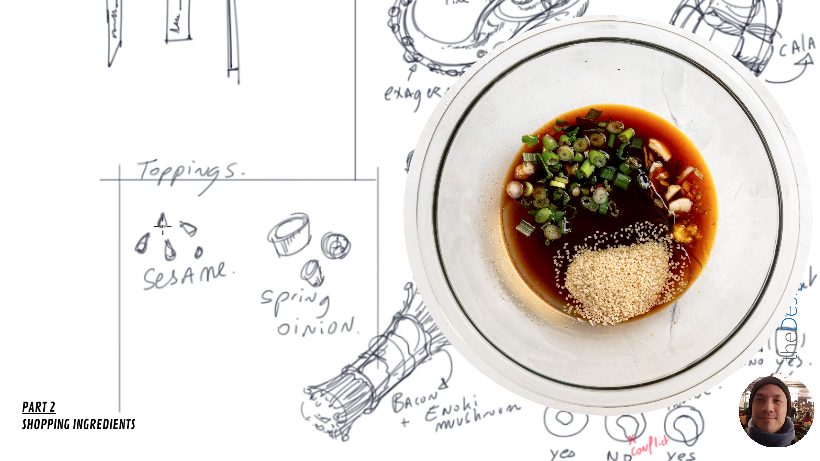
The toppings are all those little details like sesame seeds or spring onion that level up your sketch and give it realism in a way that makes it look even more appetizing!
Oh by the way—feel free to download the designer starter kit on my blog! Just send me your name and email and you’ll receive it by email! Feel free as well to ask questions or tell me about yourself in comments—I will be very happy to answer!
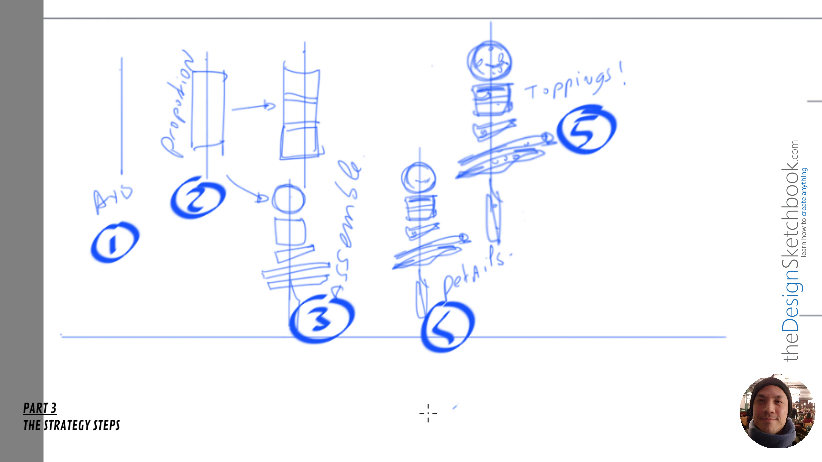
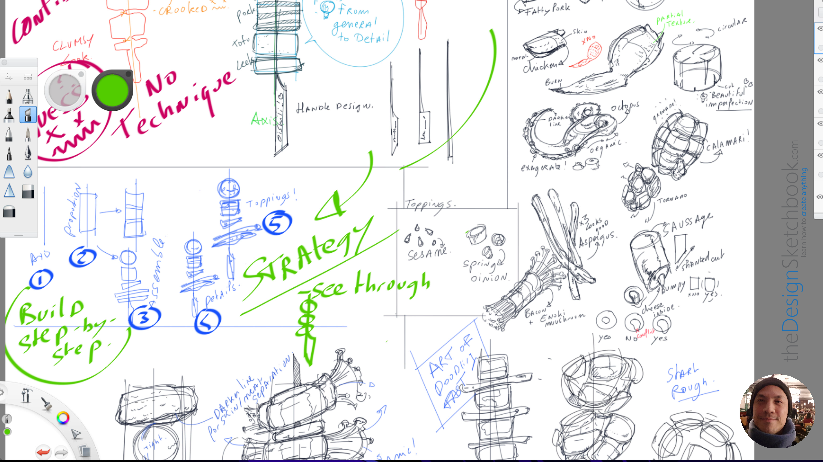
Okay Patrick—recap of steps: Step 1 is axis; Step 2 is proportion; Step 3 goes from general to detail; then we assemble different ingredients—you can follow rectangular shape or something very free-form in your assembly.
It’s good to doodle like this because it gives you quick previews if you want to draw bigger and in more detail! So here we go—we’ve got details and then little toppings that will elevate your drawing!
In five steps—you got it!
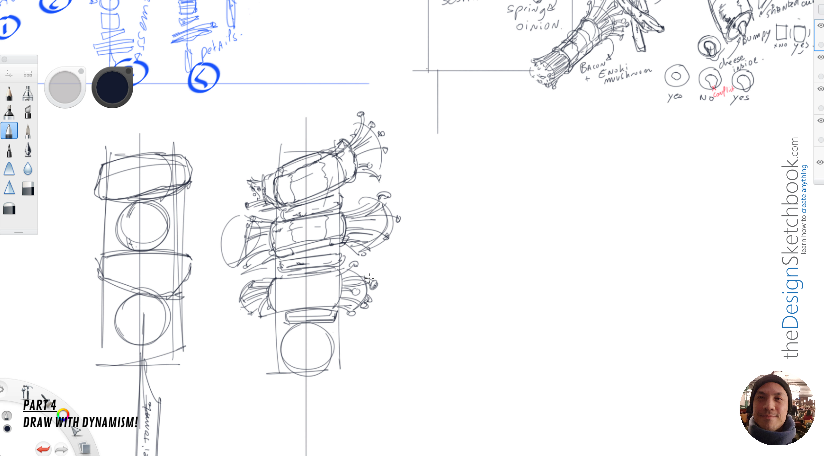
Part 4: drill—draw with dynamism! After drawing all this training from five steps along with your database of ingredients, your brain has already gathered good memory forms and details from Japanese culinary culture that you want implemented in your drawings right here.
As you can see I’m very rough at beginning—I feel free whenever needed—to refer back my initial drawing as reference—and it’s really fun doing this because you don’t think too much about “what am I going draw?” All this work has already been done ahead—it’s just about assembling what you want!
It’s more about composition—you see what I mean? We need release study from pleasure of drawing & creating—that’s how you’ll become even more efficient!
So here—I add darker lines separating skin from meat! Here’s enoki again—I like showing dynamism because remember drawing takes interpretation—that’s how you’ll create style!
Yeah—add skewers & hatching for contrast against elements & ingredients—kind of like sword somehow!
Keywords when drawing: interpretation—this creates your unique style—and square drawn by friend or colleague will differ due sensitivity.
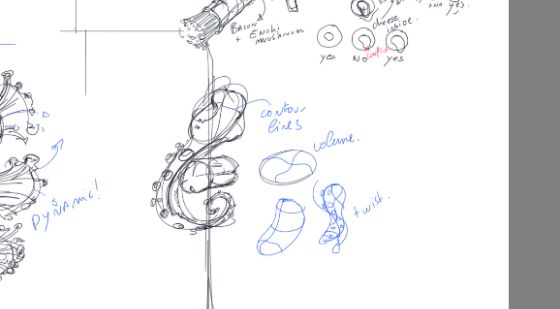
Here we go—and then for squid—I’ll really try getting organic once again! Extra variations here on stick—I added contour lines—they’re imaginary lines outlining volume helping comprehension better!
So feel free adding these into drawings as well—they enhance understanding sketch! One more here for fun!
Don’t overthink & study rough drawing when doing so—start rougher—you’ll progress faster without fear failing—redo & iterate again & again!
You must master detailed work but also quick doodles taking only seconds—it’s art doodle art!
Recap: At beginning saw don’t want clumsiness; lacking confidence/technique leads guessing—that’s what avoid! Study ahead & strategize building step-by-step!
Remember seeing through like dividing into three parts while building database—it’s ingredient box like fridge somehow allowing enjoyment assembling creating new things!
And forgot toppings—let’s add sesame seeds—even small ones add shadow effect where needed! Can see before/after? Which prefer?
For chicken—why not add spring onion? Here we go—the little toppings are small details but elevate overall extra nicely!
Remember—master doodle art along detailed drawings too! Here we go—that’s it! Hope enjoyed tutorial learning how curve strategy applies many products! Have fun—see blog designsketchbook.com for more tutorials!






Add comment