Hi Sketchers!
Are your sketching lines feels clumsy?
Let’s start to enhance your drawing skills rapidly by focusing on your line quality.
After this video, you will be able to draw straight lines freehand!
- 4 Simple Exercises to Master Freehand Straight Lines
- Exercise 0 – Before starting, check your drawing body posture
- Exercise 1: The Ghost drawing
- Exercise 2: The Constellation
- Exercise 3: The Star
- Exercise 4: The Pen Pressure Sensitivity
- You build long-term drawing confidence
- TIP: Practice straight lines anytime as a warm-up
- Conclusion
- Transcript
4 Simple Exercises to Master Freehand Straight Lines
Today, we improve your sketching skills with these
four easy-to-practice techniques for drawing straight lines without a ruler.
These exercises can be done anytime you have a spare moment,
helping to train your muscle memory and enhance the coordination between your brain and arm.
Even 5 minutes a day is great!
The 4 common mistakes
We will first cover the common mistakes to avoid:
- The Curve: Having the elbow touching the table, which restricts movement and results in curved lines.
- The Shy line: Drawing very slowly and inaccurately due to lack of control.
- The Furry line: Drawing small lines with hesitation, resulting in an uneven, fuzzy appearance.
- The overconfident: Trying to imitate professionals without enough practice, leading to inconsistent line quality.
The 4 exercises
Grab a pen and paper, and try these methods to solve these:
- The Ghost Drawing: A method to improve line precision
- The Constellation: A technique for connecting points
- The Star: An exercise in creating lines with various angles
- Pen Pressure Sensitivity: Learning to control line weight
These 4 exercises will help you develop steady hand control
and improve your overall sketching ability to draw with confidence.
Exercise 0 – Before starting, check your drawing body posture
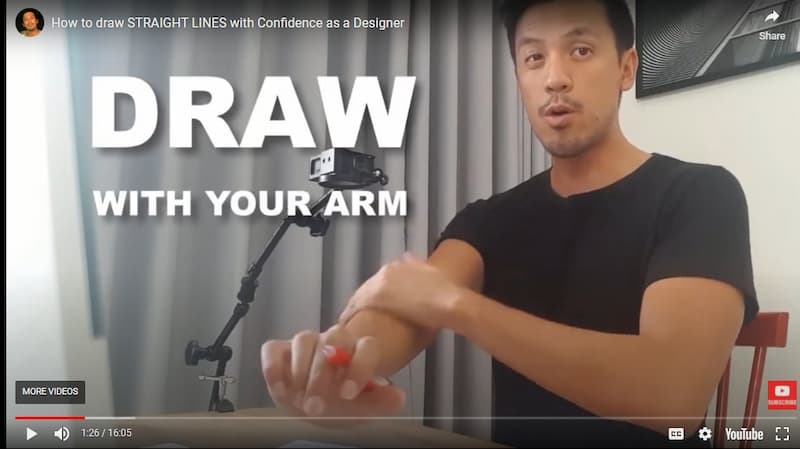
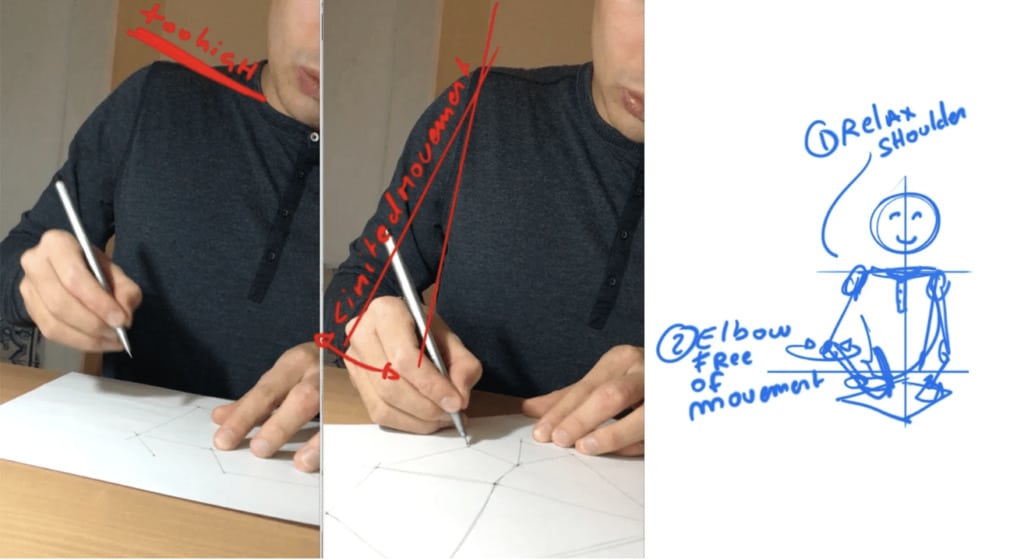
For aspiring industrial design sketchers, a crucial yet often overlooked aspect is body posture.
Many beginners make the mistake of drawing primarily with their wrist or elbow, resulting in stiff and awkward sketches.
To achieve fluid, dynamic sketches:
- Engage your entire arm and body in the drawing process.
- Ensure your shoulder is actively moving while sketching.
Be mindful that poor sketching posture can significantly impact your progress over time if left uncorrected. Developing proper technique from the start will lead to more natural, expressive drawings.
- Do not lift your shoulder.
Make sure your chair is at a proper height. - High enough to draw with your full arm (and not your wrist).
Your arm should be relax and free of movement. You should have a wide range of motion.
Exercise 1: The Ghost drawing
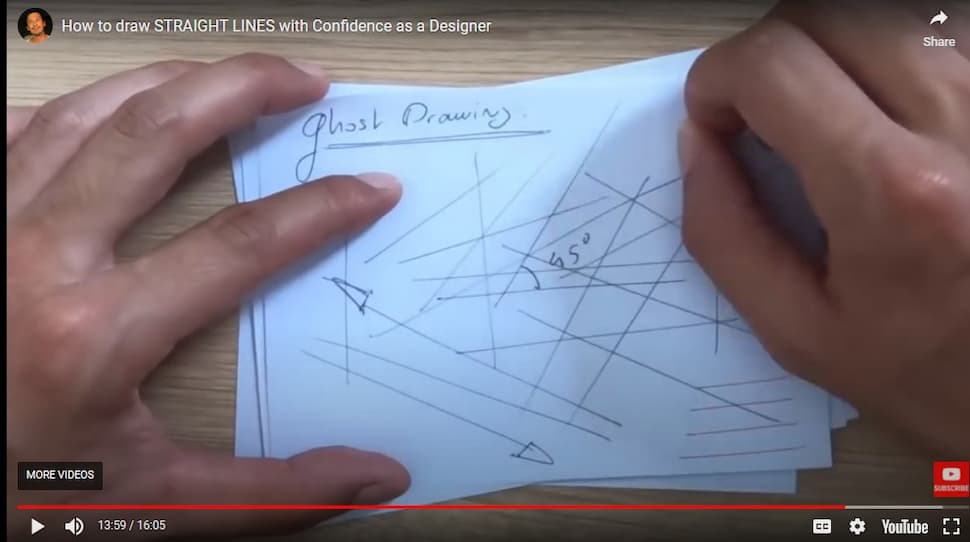
The goal of ghost drawing is to simulate the movement before actually drawing, allowing for visualization and practice of the right motion to achieve confident strokes.
To do:
- Simulate the straight line movement first.
- Make sure you draw with your full arm and not the wrist.
- Visualise your line and let your nib touch the paper gently when you feel confident.
- I recommend you to train drawing with a 45degree angle only. Get good at this angle first.
- Turn your paper when needed.
Benefits
The ghost drawing technique offers several benefits for designers and artists:
- Improved accuracy: By simulating the movement before actually drawing, you can better visualize and plan your lines, leading to more precise sketches.
- Better control: It helps you focus on using your whole arm for drawing, rather than just your wrist or elbow, which can result in smoother, more controlled lines
- Increased confidence: Practicing the movement beforehand can boost your confidence in executing the final stroke.
- Versatility: The technique works for various types of lines, including straight lines, circles, ellipses, C-curves, and S-curves, making it a versatile tool for different sketching needs.
- Momentum building: Ghost drawing helps you build momentum before putting pen to paper, which can lead to more dynamic and fluid lines.
Exercise 2: The Constellation
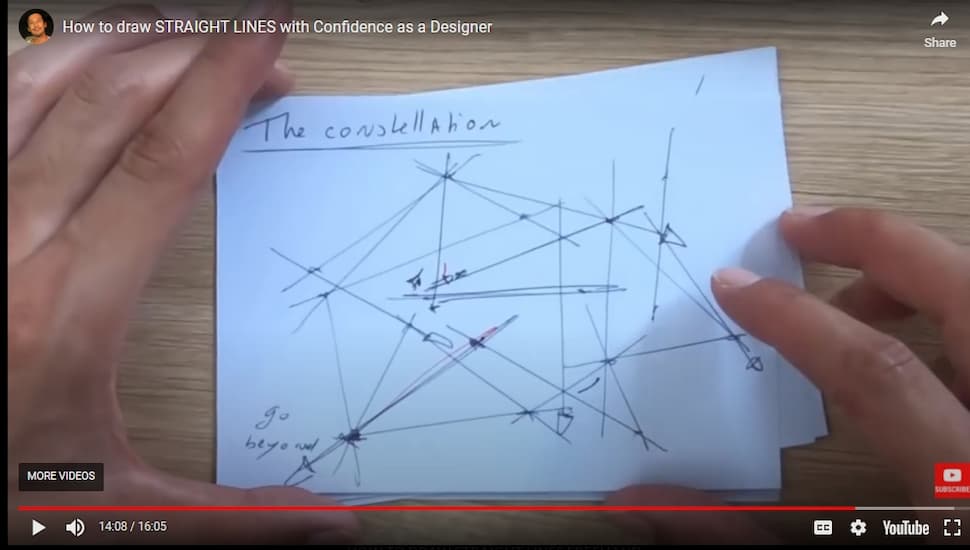
The exercise is considered “pretty easy” and focuses on connecting each point without overthinking it.
You can practice it anywhere and use it as a drawing warm-up.
- Add 2 dots randomly on your canvas
- Connect them with a straight line
- Focus at looking at your second dot to cross it.
- Feel free to draw beyond
Benefits:
- Improving hand-eye coordination
- Practicing drawing straight lines between specific points
- Developing precision in your sketches
- Building confidence in your line work
Exercise 3: The Star
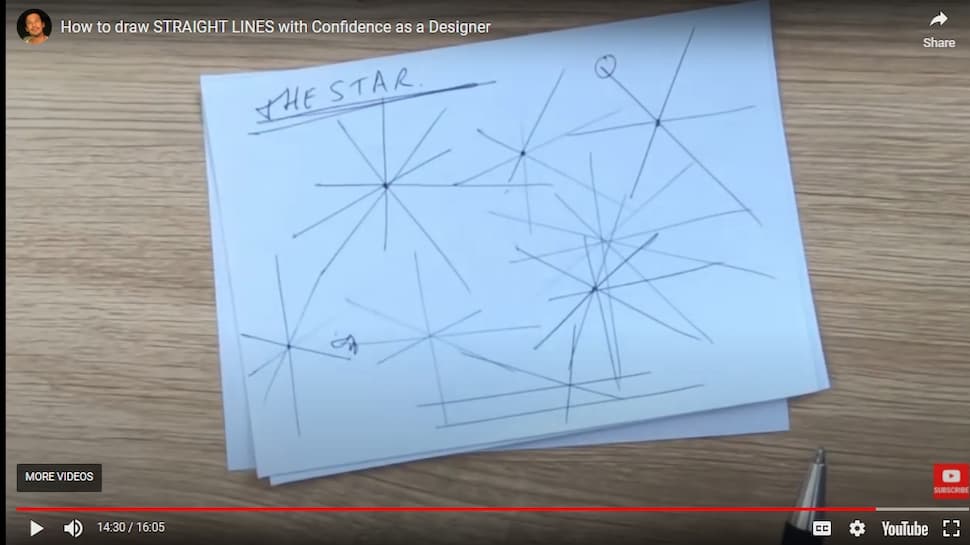
The star exercise helps in developing better control and confidence in drawing straight lines in various directions, which is crucial for creating more complex sketches and designs.
To do:
- Draw a straight line
- Turn your paper
- Add a second straight line crossing it
- Repeat crossing the intersection
Benefits
- Improving precision in drawing straight lines at various angles
- Practicing turning the paper effectively while sketching
- Drawing stars of different sizes from various angles
Exercise 4: The Pen Pressure Sensitivity
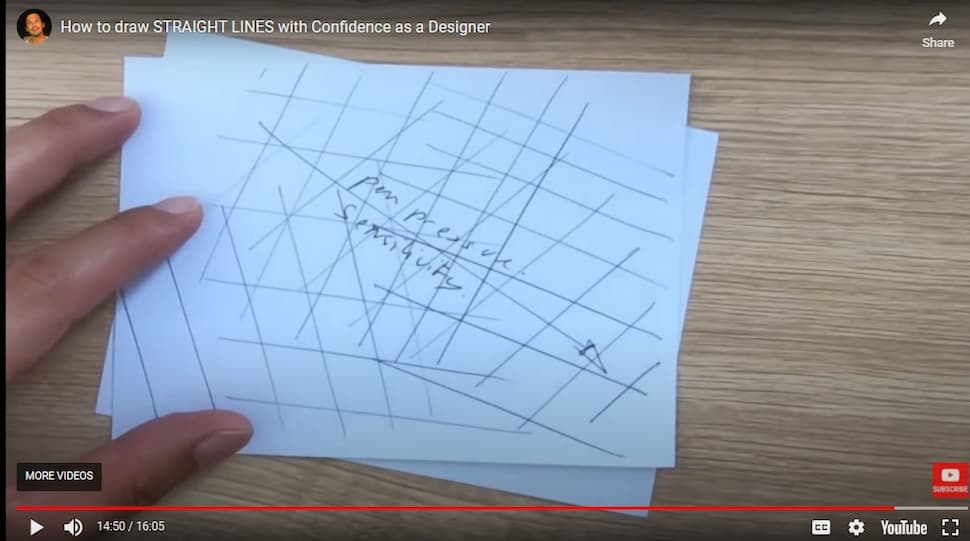
Start with light pressure and gradually build up to darker lines as you gain confidence in your sketch.
This practice can significantly enhance the quality and expressiveness of your drawings.
To do:
- Practice various pen pressure sensitivity by increasing the pressure slowly for each new line
- Start exploring different angle or arm movement
Benefits
- Improved line quality: You can create a range of line weights from light to dark, adding depth and dimension to your sketches.
- Better control: It helps you develop finer control over your pen, allowing for more precise and intentional strokes.
- Increased sensitivity: Your brain learns to intuitively gauge the pressure needed for different effects, enhancing your overall drawing technique.
- Versatility in sketching: You can create gradients, shading, and textures without changing tools.
- Preparation for professional work: Designers use pen pressure variations to create more dynamic and expressive sketches (Line-weight).
You build long-term drawing confidence
At the end of this video tutorial:
- You will gain great confidence using the basic movement of sketching.
- You will get ready to go further to make your first steps in perspective drawing.
As soon as you master this, it will become intuitive. You will be ready to level up!
- You will start sketching much faster
- Get more precision for your sketches by drawing quality perspective lines.
- You will see progress appear earlier and enjoy drawing more daily.
TIP: Practice straight lines anytime as a warm-up
Professional designers still like to draw straight lines as a good warm-up before a sketching session alongside drawing ellipses and circles. It helps to warm up your hand muscle and start with good motivation! : )
Like how my friend and member of my course Sketch Like The Pros, JonhgHo Lee,
Director of programs and professor at the Samsung Art & Design Institute (SADI) says:
Sketching is like body language (…)
JonhgHo Lee, Director of programs and professor at the Samsung Art & Design Institute (SADI)
It is all about learning the right movement in a step-by-step procedure.
Conclusion
We’ve embarked on a journey to enhance your sketching skills, focusing on drawing straight lines with confidence. Here’s a recap to keep you inspired:
- Master the Basics: The 4 exercises – Ghost Drawing, The Constellation, The Star, and Pen Pressure Sensitivity – are designed to train your muscle memory and improve the coordination between your brain and arm.
- Avoid Common Mistakes: We’ve addressed the pitfalls like the curve, the shy line, the furry line, and the overconfident line, ensuring your sketches are precise and confident.
- Posture and Precision: Proper body posture and arm movement are key for fluid, dynamic sketches. Engage your full arm and body for the best results.
- Build Confidence: With practice, you’ll gain long-term drawing confidence, making perspective drawing more intuitive and enjoyable.
- Practice Makes Perfect: Remember, even professionals use these techniques as a warm-up. Regular practice will not only sharpen your skills but also keep you motivated and excited about your art.
So, grab your pen and paper, and keep practicing these exercises. Whether you’re warming up before a sketching session or seeking to refine your line work, these techniques will help you:
- Sketch Faster: Improve your speed and efficiency in creating quality perspective lines.
- Enjoy the Process: As you see progress, you’ll find more joy in drawing daily.
Let’s continue this fun journey together!
Your passion for sketching will take you far, so keep going, keep dreaming, and keep having fun with your designs.
Let’s start drawing!
It is gonna be a really fun journey! 🙂
Cheers,
Chou-Tac
Transcript
Hey, guys.
How are you doing?
I’m Chou-Tac from the designsketchbook.com.
Today, I would like to share with you four exercises about how to draw straight lines with confidence. We are going to start with these two pens right here. So basically, with the red pen, I will draw all the common mistakes that you need to avoid, and after that, I will explain to you the right way to draw and the techniques that you can practice daily to improve every day.
The good thing is that learning how to do straight lines is essential because it will help you create higher quality sketches and draw with more confidence and speed. Alright, let’s get started with the common mistakes right here.
So let’s begin with the common mistakes. The first mistake is having the wrong body posture. Make sure that you have a good chair with the right height and that your elbow is not touching the table when you draw. You should not be too low or too high in relation to the table; you have to be in a comfortable position where your elbow can move freely whenever you draw. When you’re drawing, you’re not just using your hand; you’re drawing with your whole arm.
Now let’s look at the common mistakes. If your elbow is resting on the table, what is going to happen is this: your lines will become curved. Why is it curved? It’s very simple; it’s just a result of your body’s natural movement and arm rotation. So, make sure that you’re not stuck in a position like when you’re writing; for drawing, it should be free of movement.
The second common mistake is creating furry lines. Whenever you want to draw a small line like this, it ends up being hesitant and shy, which results in an inaccurate line because you lack control. On the opposite end of the spectrum is being overconfident—trying to imitate professionals and drawing super nice lines without proper practice. The problem here is that while some lines may look good, others could be clumsy and inconsistent.
So don’t rush; take everything step by step. Now I’m going to give you four exercises so you can practice them daily and drastically improve all your creative sketches.
Let’s go on to the first exercise: ghost drawing. Ghost drawing is the golden rule of sketching. Whenever you draw, every single stroke should involve ghost drawing. Basically, it’s about simulating your movement before making an actual mark on paper. This helps visualize what you’re going to draw while also ensuring proper movement.
You can use small finger movements along with a PC foam bone to slide on the paper easily. Try to find a solid wooden table rather than a matte or glass surface because glass can be quite sticky with your palm, slowing down your movement.
As you practice drawing straight lines from different angles, turn your paper accordingly instead of twisting your body into uncomfortable positions. Aim for about a 45-degree angle for comfort while drawing; this should be a natural movement for you.
Exercise number two is called “constellation.” This exercise involves drawing two crosses and linking them together. It’s straightforward—don’t think too much about making it perfect; just focus on connecting those points smoothly.
Whenever you make mistakes during this exercise, it’s okay—just keep going! A helpful trick is to look at each point before drawing so that you can connect everything seamlessly.
Next up is exercise number three: the STAR exercise. This exercise improves precision while turning your paper at various angles as needed while drawing stars or similar shapes.
A good tip here is to add some cushioning below your paper for better comfort as well as allowing smoother movements when drawing.
Finally, for exercise number four, we will focus on pen pressure sensitivity by trying out different pressures from light strokes to dark ones while counting rhythms along the way for consistency.
To recap: we covered common mistakes such as curved lines due to bad posture, furry and shy lines due to hesitance or overconfidence leading to inconsistency. We practiced ghost drawing first before tackling constellations and stars while improving pen pressure sensitivity through various strokes.
I hope these exercises are enjoyable for you and yield fast results! Feel free to practice them daily before starting any serious drawing sessions.
Before leaving, don’t forget that I’m also offering a link for the next step—the cube challenge made up of three videos focusing on perspective and straight lines which will be super fun!
See you in the next video where we will explore cubes at different angles! And remember to download the designer starter kit available on my blog so we can stay connected as you take your first steps in design sketching. Also, subscribe to my channel so you won’t miss any latest videos! See you soon!
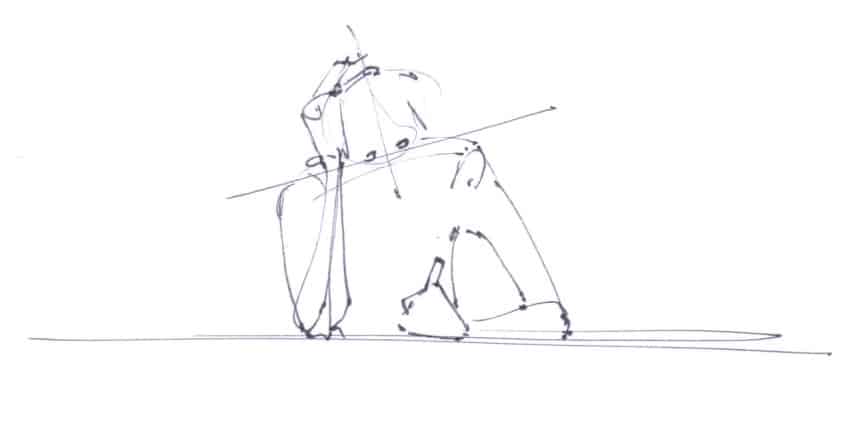




[…] a beginner, your focus should be on mastering basic shapes first like straight lines and circles. These shapes serve as the foundation for developing your sketching abilities and […]
[…] show you a hatching drawing technique that is simple to apply.If you need it, you can train at drawing straight lines freehand first.Make sure you draw also with the proper drawing […]