Do you have trouble coming up with new ideas for your product designs?
This beginner’s guide discusses how to use the Random Product Technique to draw unlimited random ideas!
Bonus: Light & Shadow tutorial with Photoshop at the end of the video.
How to Draw New Ideas with the Random Product Technique
Feeling uninspired when drawing? Don’t worry!
It’s normal for any artist to feel like they’re lacking in ideas.
Facing the blank page is normal.
Try the “random product techniques” to generate new ideas.
It will help refresh and invigorate your creative process!
You can become more creative
Looking for some ideas to inspire your next drawing?
Try visual brainstorming!
Let me share with you a technique I personally like as it gives us a lot of freedom.
We will generate new ideas by drawing random sketches with the power of idea association.
This technique is a great way to come up with unexpected ideas, think outside the box, and make daring associations. The random connections that result from visual brainstorming can often lead to brand-new and unique ideas.
Tap into this useful tool and see where it takes you in your creative journey!
Generate New Ideas Quickly with Just a Little Planning
Creative TIP 1 | Get inspired with reference pictures
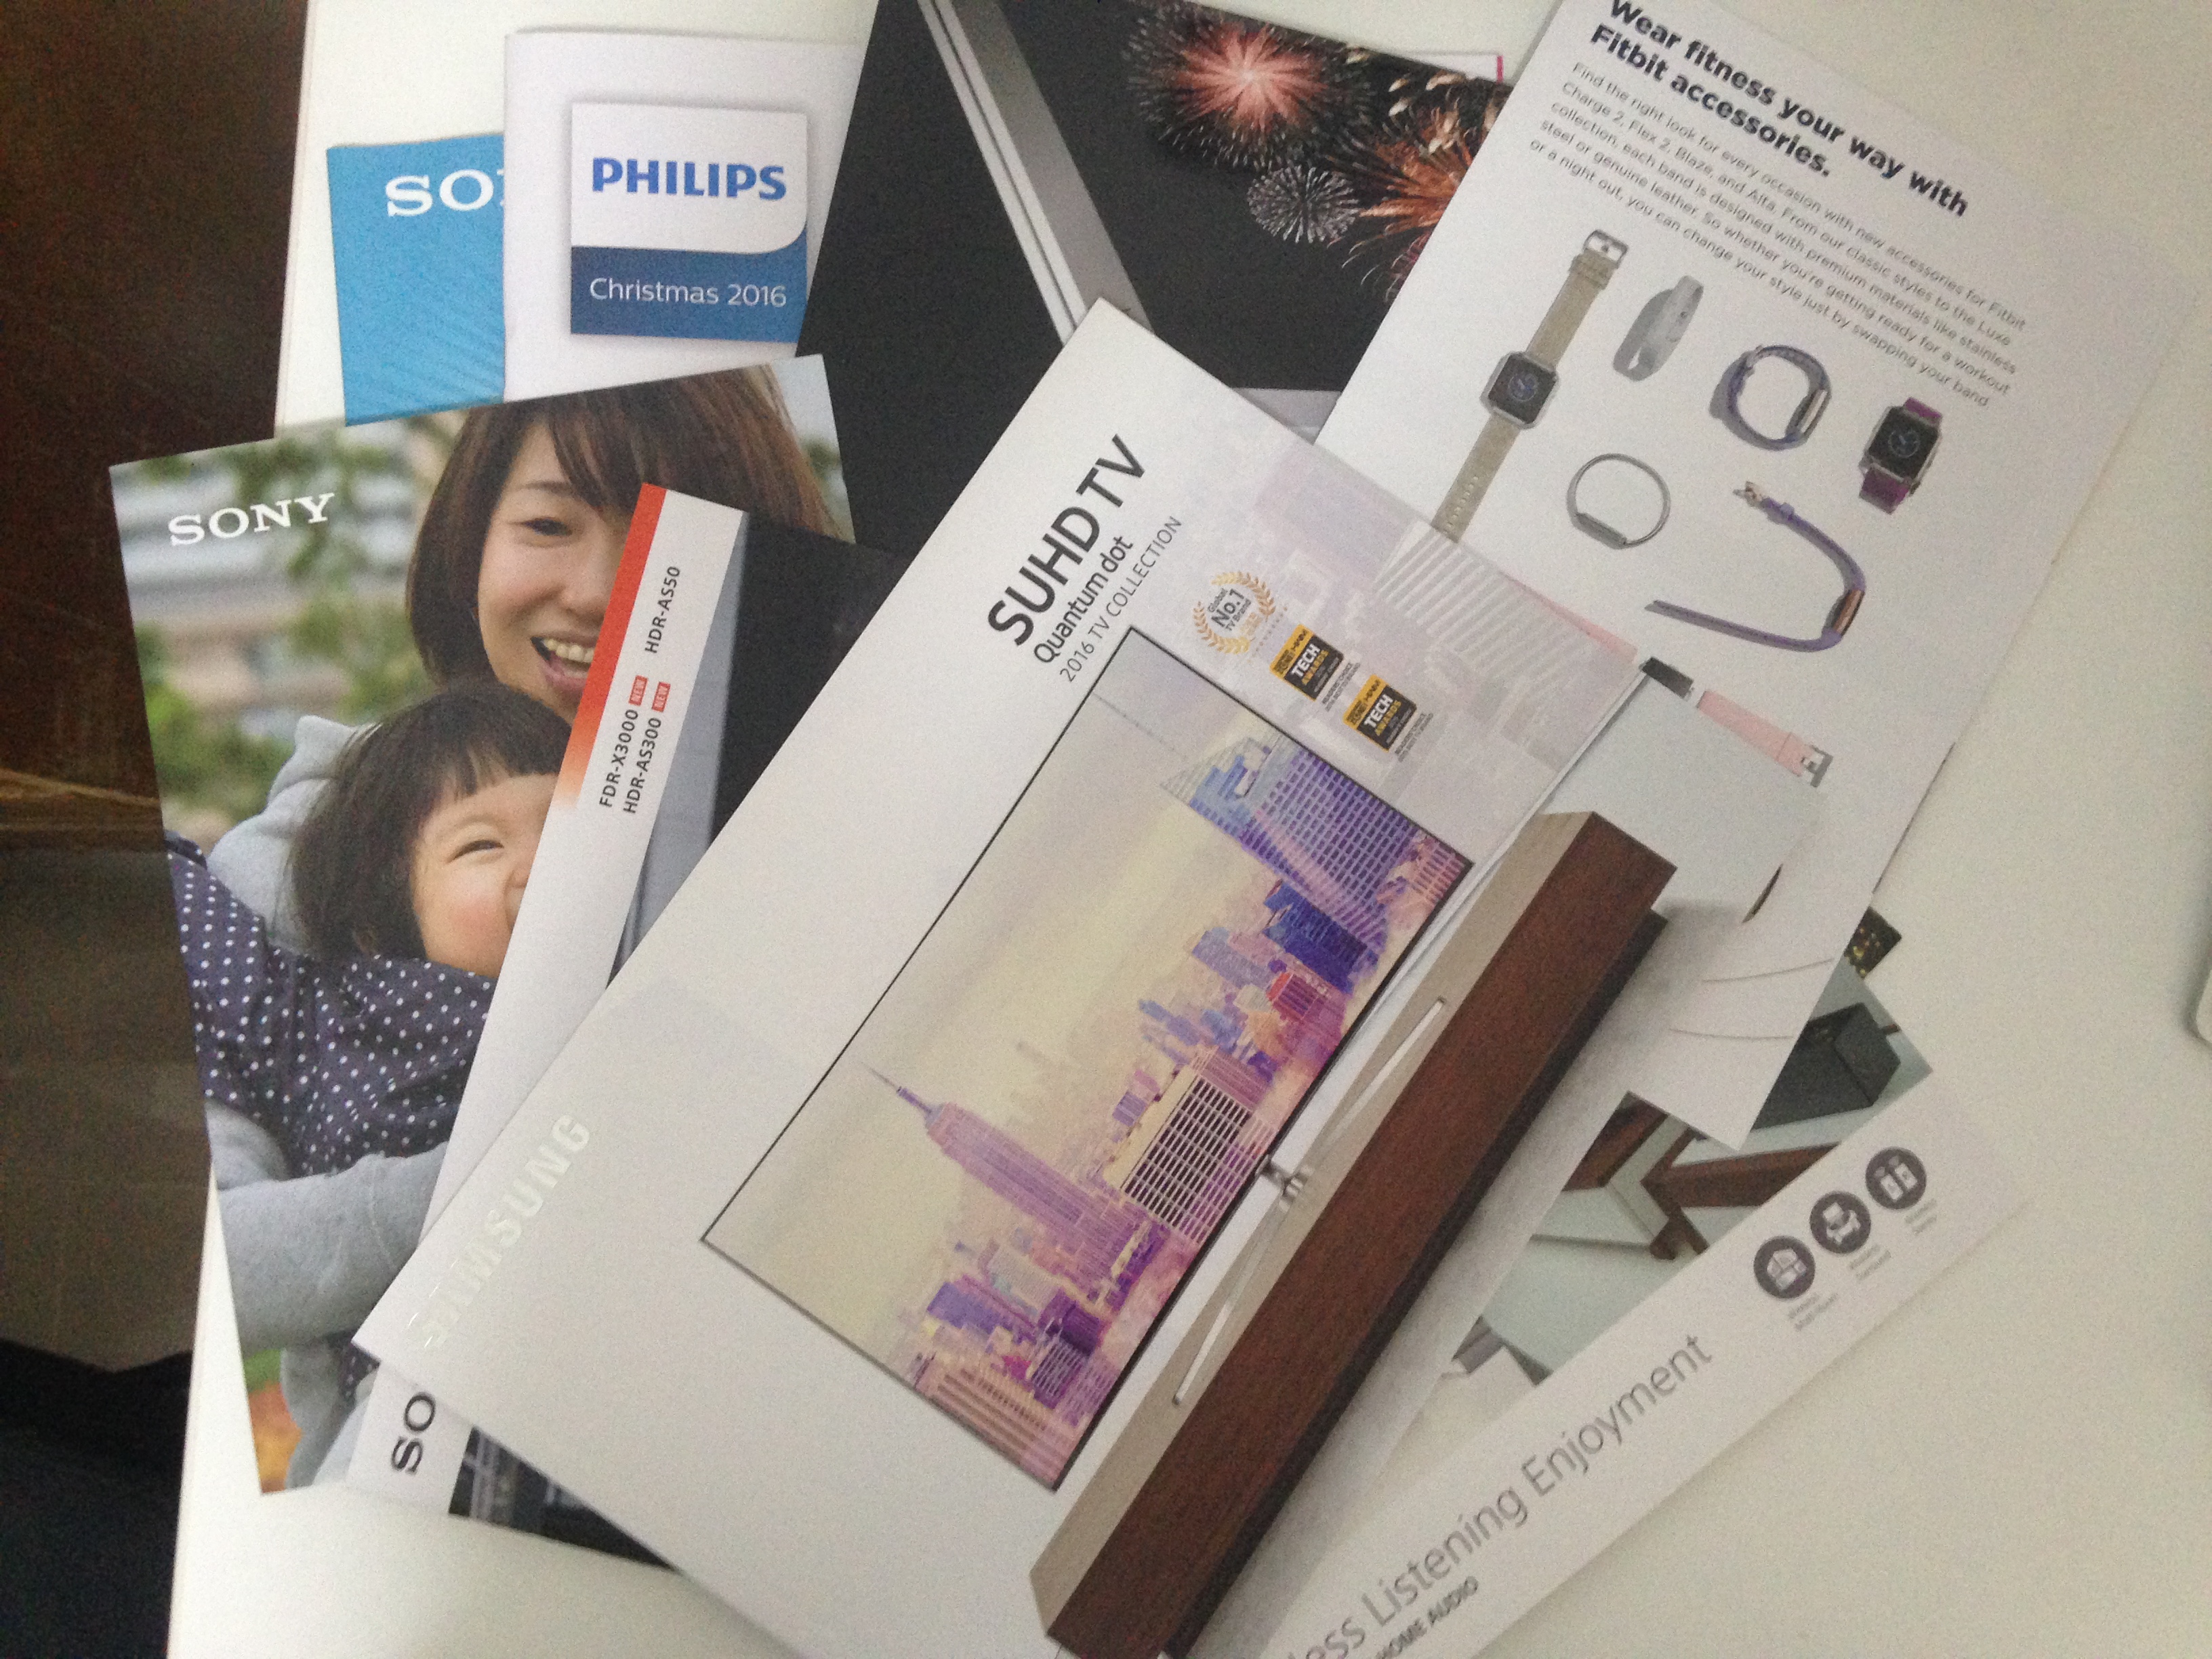
- Gather product catalogs and pictures of products you like for inspiration.
Bring back home magazines, design books, advertising, brochures… - Display them in front of you.
You can cut your brochures, and stick your product selection on a board, on the wall, or on your window. - Spot the interesting design details before starting to sketch. Observe your pictures for a couple of minutes or more. You basically absorb the information like a sponge.
- When you memorize them, try to describe them with keywords, and attached some emotions.
Ask yourself what sensation these products, shapes, and forms try to make the users feel.
Design thinking with the 5 senses. - Now you are ready to import your product observation in your sketches!
CREATIVE TIP 2 | Draw with fluid movements
Keep drawing having your pen always in movement.
Your ideas will flow in your mind as well as your pen is in motion.
I recommend drawing with a ballpoint pen. Do not use any eraser as it will interrupt your flow of ideas.
As you become more practiced and experienced in drawing, intuition begins to play a vital role. Your brain starts to think faster than your hand can work, allowing you to rapidly sketch out new ideas as they come to mind.
Chou-Tac Chung
This natural flow of ideas allows you to create art with fluidity, expression and creativity.
CREATIVE TIP 3 | Embrace failure with the iterative approach
Do not spend too much time on only one sketch.
Do as many drawings as you can. You draw with iteration.
It is totally ok to fail!
The idea here is to experiment!
You have the freedom to draw anything that comes up in your mind!!
There are no good or bad drawings. No judgment.
- When you have multiple sketches, jump from one to another anytime.
- When you ideas pop, you can draw an extra sketch.
- Fusion ideas are fun! Often ask yourself What if… I combine this idea with this idea…
It will help you to connect ideas.
CREATIVE TIP 4 | Generate ideas daily is your new designer routine
When using the Random Product technique,
don’t feel constrained to draw realistic or even possible items, but instead aim to push your creative boundaries.
Practice this technique of “Random generation of ideas” daily.
Initially, you will be randomly sketching with no logical approach.
Over time, however, your brain will become more comfortable and familiar with this technique and then you can use it when designing for clients too – adding extra unexpected touches to the project!
This method is a great way to test the limits of your creativity
and go in new directions with your design work – so why not give it a try?
How to multiply and draw your ideas fast
Product designers look for productivity.
When we lack inspiration, a great trick is to provoke your brain to create new ideas fast and easily!
That is why I love using the Random Product Technique.
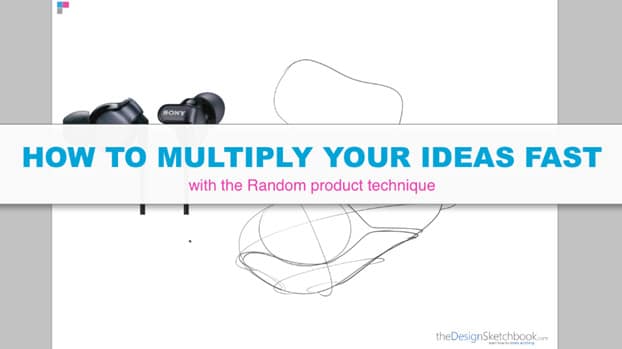
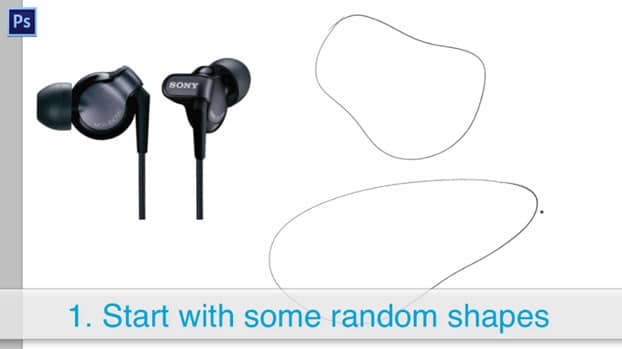
Start drawing random shapes in 2 dimensions
Without thinking too much, draw some random forms.
To make it simple, I draw some beans, chicken nuggets, or stone forms.
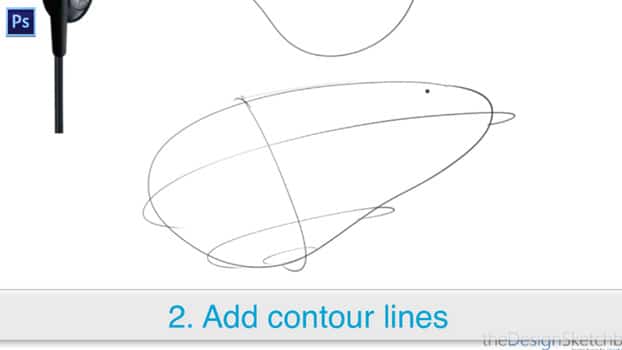
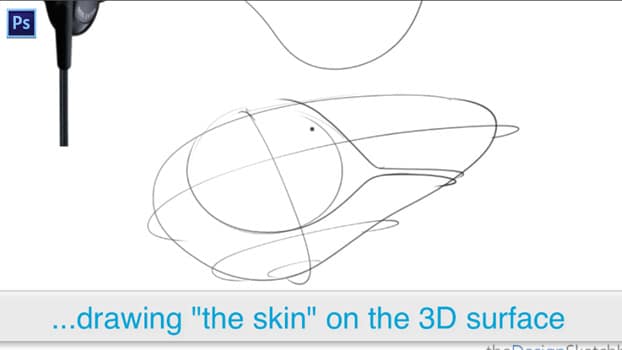
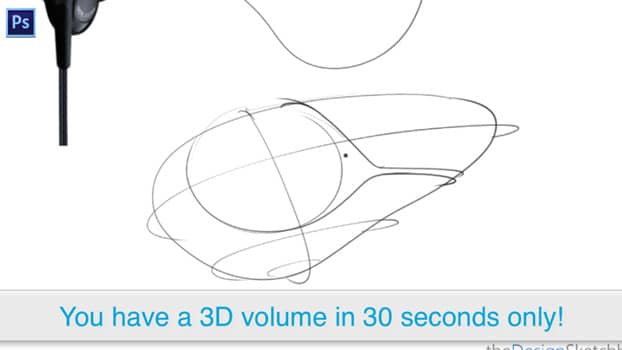
Draw contour lines
Create a 3d volume illusion super fast with the contour lines.
In just a few seconds, your 2 dimension shape starts to “bring life”.
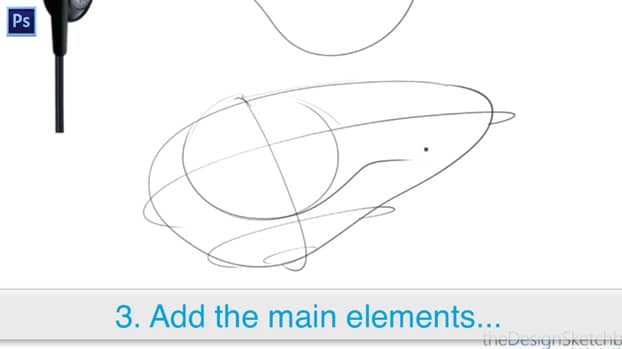
Draw the main elements of the design
I imagine a giant button on top. I imagine a portable Music player.
Draw keeping your pen in movement
To keep up with the momentum of generating random ideas for product designs, do not stop your flow of drawing.
Let your pen constantly be in movement. It helps you avoid overthinking.
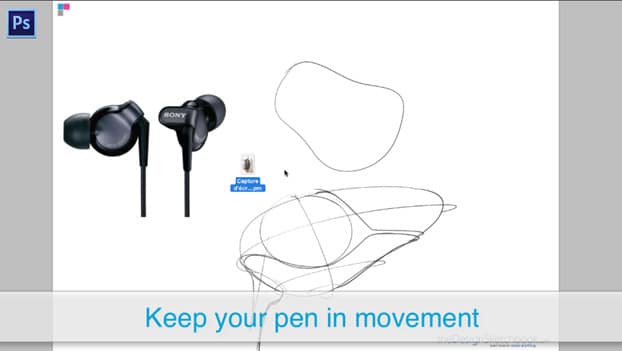
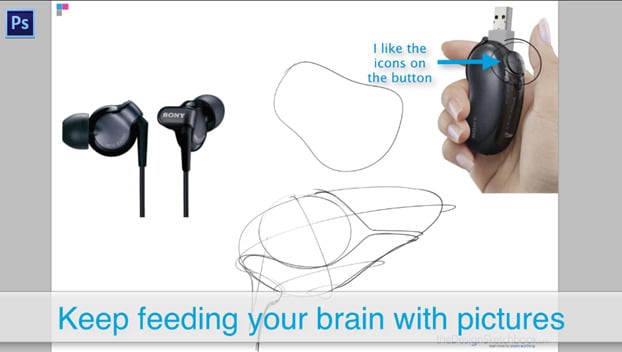
Use reference pictures to import ideas
You don’t have to reinvent the wheel.
Come up with pictures you like to mix ideas so you can create your own!
This is how you will build efficiently your library of forms.
Since every designer builds their own, each of them creates their own style.
Do not look for perfection
Sketch your ideas like a draft.
You want to experiment and discover new forms.
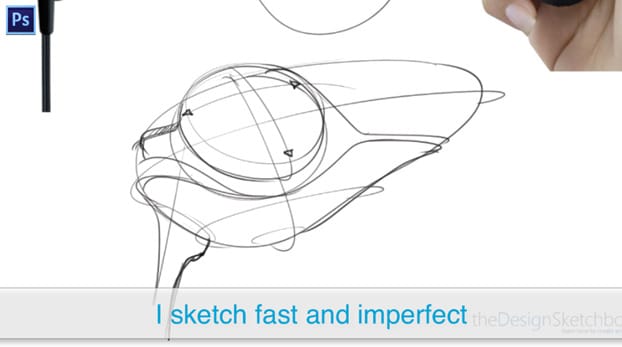
The curves follow the 3 dimensions of the volume.
When I draw the “product skin”, I visualize a wireframe enveloping the product all around in 360 degrees.
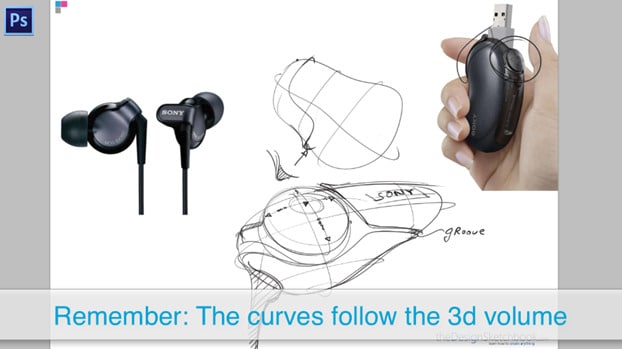
Draw and create “on the flow”
Before starting, I did not know what the product would look like yet.
I improvise along the way.
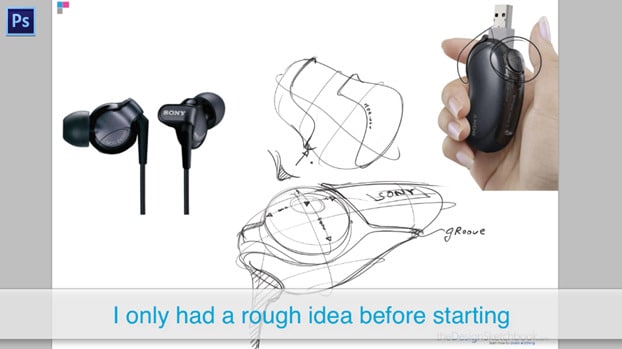
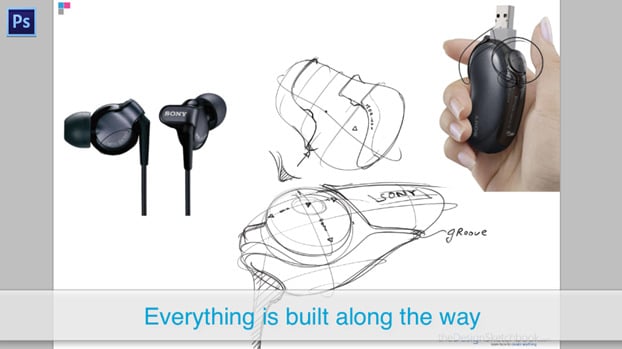
Jump from one idea to another
I do not wait to finish one drawing to jump to the next one.
I freely navigate among the sketches so they mutually feed each other in creative forms and ideas.
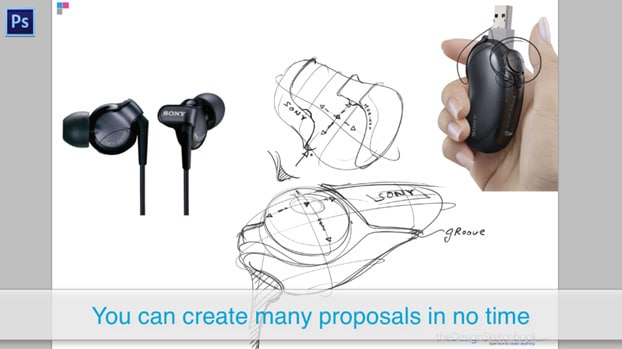
Generate random ideas fast
Practice this technique and you will draw faster random ideas for designs.
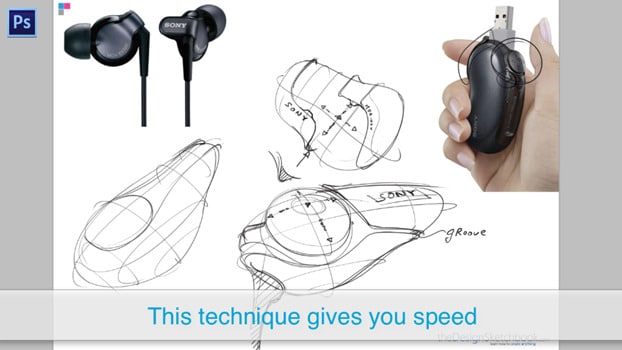
Bonus Photoshop
I added a quick tutorial about Digital drawing and rendering with Photoshop at the end of the video.
Let me know if it’s a topic that interests you to learn.
If you are, let me know in the comments, and I will be glad to create more digital tutorials.
Easy “Light & Shadow” tutorial with Photoshop
We render the products fast with a quick shadow.
If you need, you can learn how to parameter your brush size and opacity here.
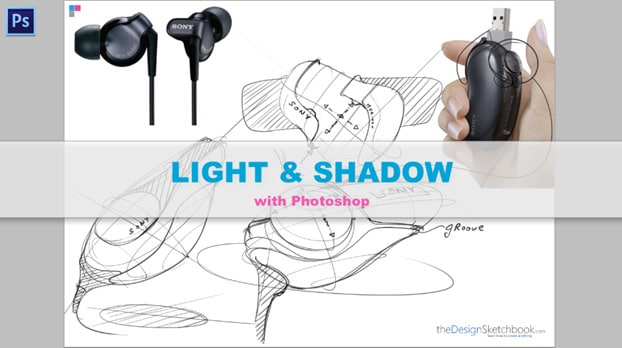
Start with a Super wide brush for ambient light
Always start with the widest shadow that covers the whole page.
It is pretty subtle but half the bottom page is a bit darker.
Imagine the scenery being under a wide ray of sunlight.
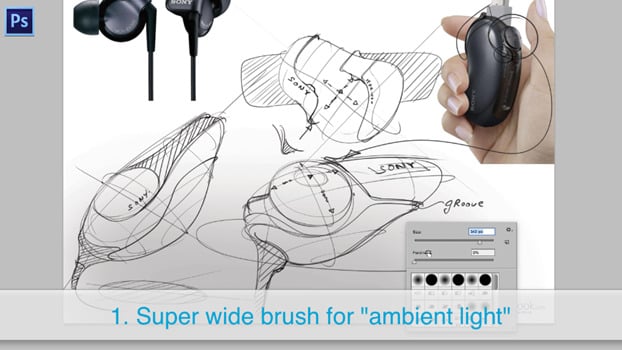
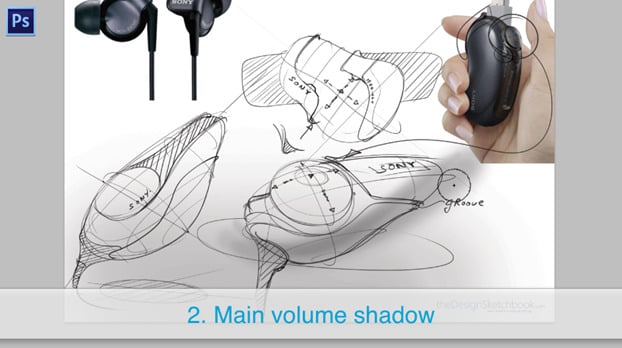
Use a wide brush to shadow the product itself
Now is the time to add a straightforward shadow on the product itself.
Remember to visualize the product in 3 dimensions.
You may think of the contour lines and wireframes.
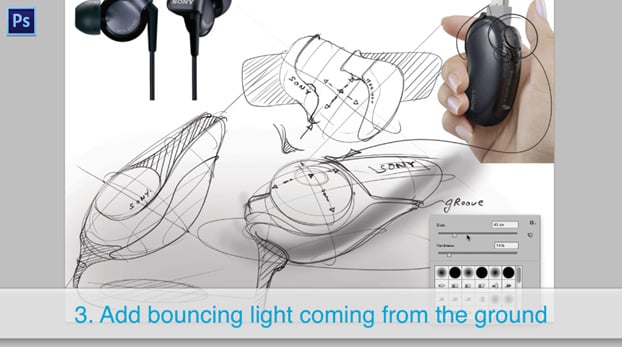
Add a bouncing light
The bouncing light comes from below your product.
Imagine your product on a white table.
The light would bounce on it to gently lighten your product below.
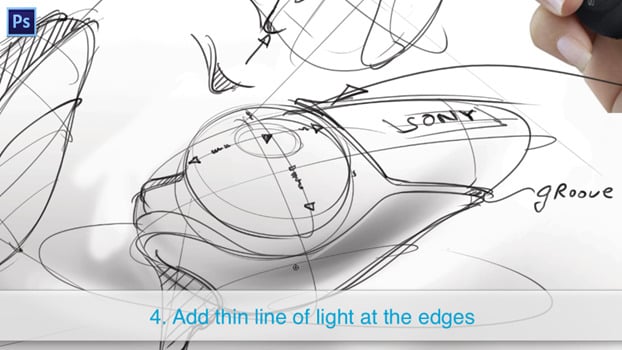
Add definition on the edges.
This light detail adds realism easily!
You just need to add a touch of light to the edges of your products.
Do not hesitate to zoom in.
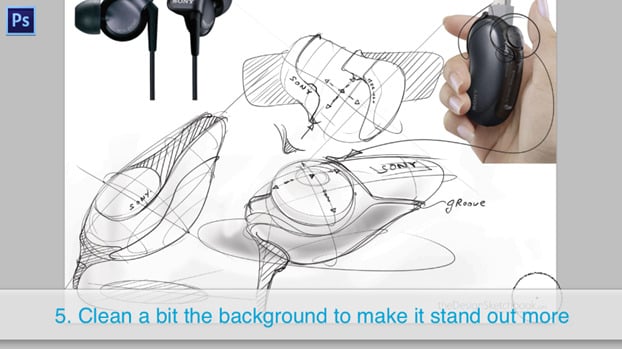
Clean the background
To make your product stand out, we did erase some of the backgrounds.
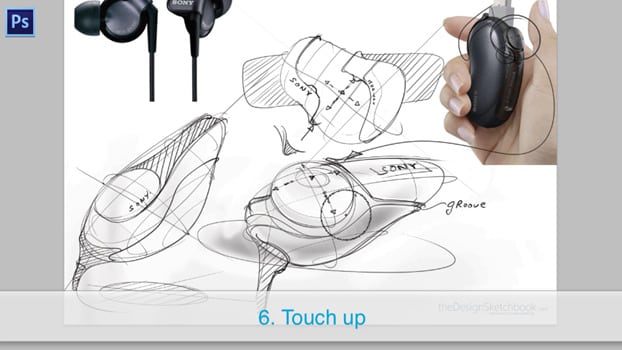
Touch up
Refine your light and shadow as you wish.
Remember to remain subtle and do not overdo it.
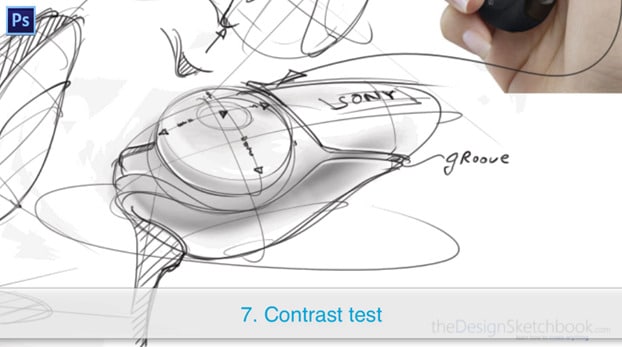
Use the contrast layer
I test the shadow with the contrast layer.
I would like to see if it looks better if the shadow becomes darker.
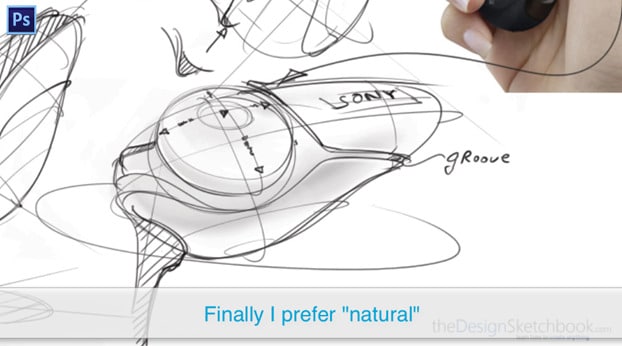
Tadaa!
It was actually nice at the original.
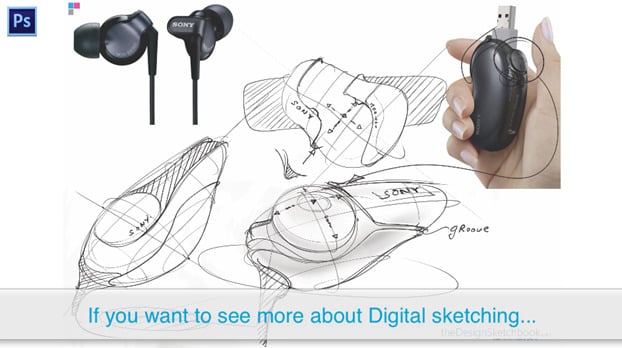
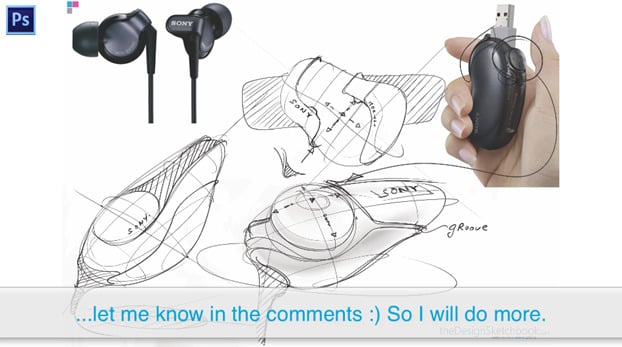
You can produce hundreds of proposals fast with this technique.
Do not hesitate to add them to your Design portfolio!
See you for the next tuorial !
Cheers,
Chou-Tac
Online course for Product Designers:
”This past week has been very exciting with the launch of the course |SKETCH LIKE THE PROS|. It’s a real pleasure to see such enthusiasm from so many people around the world who share the same passion for Design Sketching.
I would like to thank all of you for your awesome support for this project. I officially start the course today with the students, a great and exciting journey is starting :D. Even though I will be taking special care of my students, I will still remain giving you guys a lot of free content on the blog 🙂
You can now Register for the “Sketch Like The Pros” online course Waiting list.







[…] As a Designer, when you work with your client, your colleagues, your manager… it is all about having a “visual conversation” where you use your pen to express your ideas. […]
[…] They do great for research of new ideas or forms. […]
hi, i am very interesting in your photoshop rendering, i dont know if you could do a detail product render to help polish my industrial design drawing and presentations. thanks
Hi CT!
Sweet work! I wish one day to be able to sculpt volumes in such a way! I would defenetly like to see more of these videos, also on rendering techniques!
Great work!
Sure, you will. Make a try sketching on paper you will see.
Well noted about the digital tools, thanks.
🙂
Cheers,
Chou Tac
Thank you for the great tips Chou-Tac! Very helpful. The quick tutorial video of rendering digitally with Photoshop is awesome! I would definitely like to see more videos of those with tips on Photoshop rendering. Great work 🙂
Thank you Roger !
Glad it was helpful. Well noted for Photoshop.