Don’t Make the Mistake of Reinventing the Wheel in Product Design
Learn how to copy with the Copy-Doodle Technique!
Progress faster and soon create original products of your own.
How to Progress Faster with the “Copy-Doodle Technique”
One of the superpowers of a designer is to draw from imagination FAST.
But before you can create, it is essential to learn how to copy.
Too many beginners put their egos in the wrong place and refuse to copy existing products. If you’re in this case, you need to realize you’re sabotaging yourself…
If you want to progress faster,
you can’t reinvent the wheel, especially as a beginner.
Today, I think it’s important to show you the “Copy-Doodle technique” to Progress fast by copying others, so you will soon create your own original products! 🙂
Hey guys,
so today let’s see how to copy to progress faster with the copy-doodle technique.
Alright, so welcome to thedesignsketchbook.com,
I’m Chou-Tac, and feel free to download the designer starter kit.
It’s free, and the link is in the description:
https://www.thedesignsketchbook.com/sign-up-and-receive-the-ebook-the-designer-starter-kit/
Step 1: Prepare Your Pen and Paper
Clean your pen nib.
Take a spare sheet of paper and clean any smudges from your pen nib. Also, make sure your pen is not dry so that the ink flows smoothly.
Step 2: Find Reference Pictures
Let’s get some reference pictures.
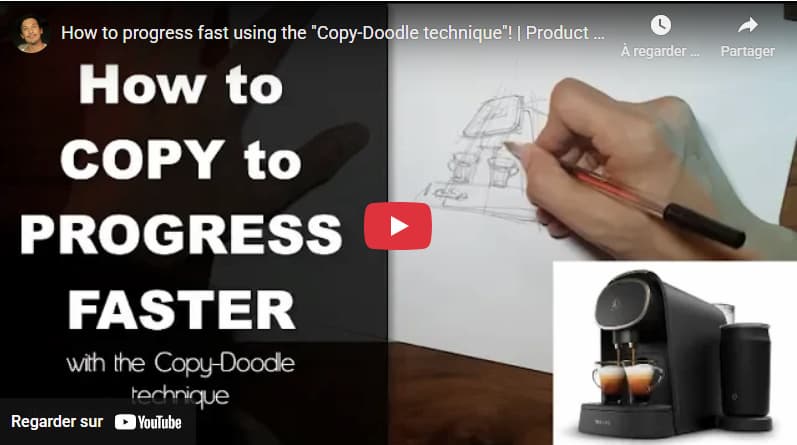
I use Google and type “coffee machine.” Let’s see what images come up, and let’s choose one I like.
I selected this one: a Phillips capsule coffee machine. The advantage of visiting the main website is you can see additional views.
What I suggest is a quick look at all the views to remember them, then focus on copying just the main view here.
Step 3: Quick Doodles for Practice
Create quick doodles — when you draw, aim to be fast. This helps you remember the main shapes and forms without overthinking.
Don’t try to memorize everything perfectly; focus on capturing the main shape and overall form.
Work on only one reference picture at a time, avoiding too many views at once. Keep the information minimal to let your brain interpret the object in 3D — imagine turning it around in your mind.
Step 4: Build Your Visual Library
The point of this exercise is to feed your design library with forms and shapes.
Practice whenever possible: use online references, take notes with a pen, go to shops and draw, or take photos to study later at home in a quiet environment.
Step 5: Focus on Main Shapes and Accessories
In your sketches, start with the main shapes — like the head or the largest form. Then add smaller details, such as props and accessories (e.g., glasses).
Always draw the main structure first, then add props afterward — it helps you think logically about the order of drawing.
Step 6: Train Your Intuitive Drawing
By doodling fast, you develop an intuitive “sixth sense” for drawing.
Remember: in design sketching, always think from general to detail.
Step 7: Iterate and Improve
Your sketches don’t need to be perfect in one shot. They are early drafts — you can refine and iterate through second, third, or even fourth versions, quickly.
Using the doodle strategy allows you to try multiple attempts within a short time, rather than spending hours perfecting one drawing.
This method helps you improve faster by treating each sketch as a quick, experimental iteration.
Final Tips for Better Sketching
When you have the main shape, slow down and add details carefully.
Try to work from a different viewpoint than the reference, imagining how the object looks from various angles — this builds your 3D visualization skills.
Knowing how to turn objects in your mind’s eye—like in product design—gives you the power to draw from imagination.
Building Your Creative Library
Add more details by studying reference images, especially intricate parts like the water behind the coffee machine.
Copying and doodling from references in 3D from different angles helps you modify and extend forms later.
This process builds your library of forms, which you can later import into your own product designs and modify creatively.
Practice, Have Fun, and Keep Improving
Practice this exercise endlessly: draw the machine, focus on details, create compositions — make your sketches expressive and rich.
In just about nine minutes, you can make a good draft. Keep practicing, and I’ll see you in the next videos!
Remember to subscribe and hit the bell to stay updated. Visit the blog for more articles and tutorials today.








2 comments