Have you ever wondered how to draw a realistic glass reflection?
Check out this step-by-step guide to learn the beginner technique in no time!
I show you an easy and fast sketching technique for product designers.
- Draw Glass Reflection with These 14 Easy Steps (Coffee Carafe)
- 1. DRAW THE VERTICAL AXIS
- 2. SET THE PROPORTION WITH A FEW ROUGH LINES
- 3. DRAW THE PROFILE WITH SYMMETRY
- 4. DRAW THE COFFEE CARAFE ELEMENTS
- 5. SPOT THE FUNCTIONAL DETAILS
- 6. DRAW SIMPLE LIGHT REFLECTION
- 7. ADD TINY SPOTLIGHTS
- 8. Create a new carafe design!
- 9. Start drawing unlimited new designs!
- 10. KEEP DRAWING MORE!
- 11. Draw dark reflects of objects
- 12. Draw hatching for depth
- 13. Light reflection in front and behind
- 14. Quick Hatching Background
- BONUS TIP:BRING YOUR DRAWINGS TO LIFE!
- BONUS TIP: GOOD COMPOSITION SERVES YOUR MESSAGE
- Conclusion
Draw Glass Reflection with These 14 Easy Steps (Coffee Carafe)
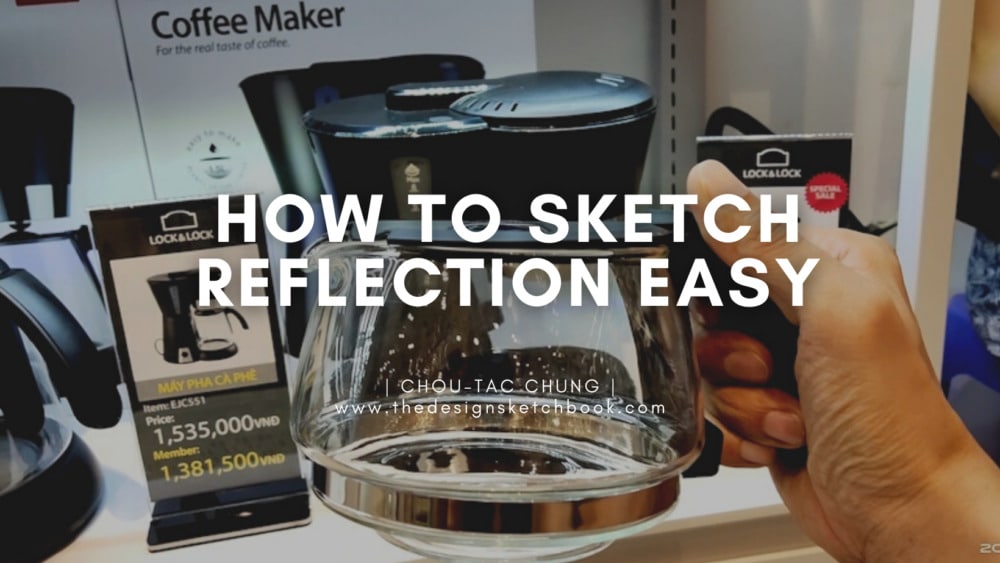
I like to go to shopping malls to find plenty of design ideas for free!
Today I found a transparent Coffee Carafe
to inspire me to show you an easy way to draw glass reflections.
This coffee carafe from Lock & Lock has nothing special or innovative,
DRAWING TIP-A-DAY about: Light Reflection Drawing on Glass (for beginners)!
Let’s draw!
Related article: How to draw a bottle (with a digital tablet)

1. DRAW THE VERTICAL AXIS

Begin by establishing a vertical axis in your sketch.
This line acts as a guide for symmetry, ensuring that both sides of the carafe are balanced.
It’s essential for creating a visually appealing and proportionate design.
2. SET THE PROPORTION WITH A FEW ROUGH LINES

Next, sketch a few rough lines to outline the main dimensions of the carafe.
This step helps you visualize the overall shape and proportions, making it easier to correct any discrepancies before adding details.
3. DRAW THE PROFILE WITH SYMMETRY
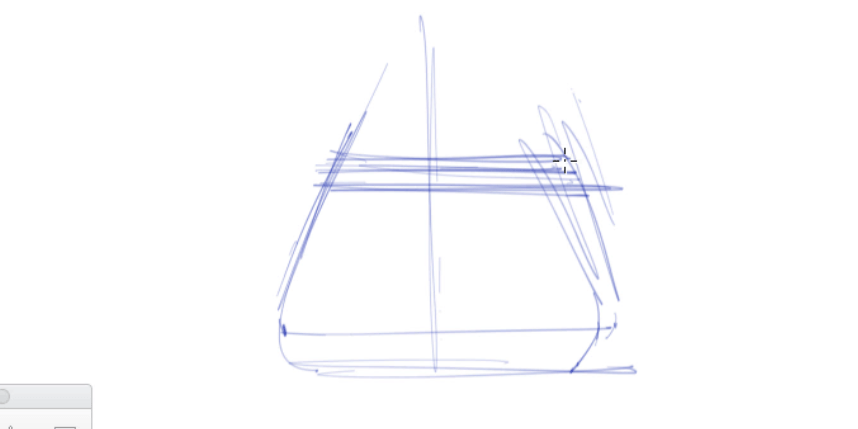
Once you have your proportions set, draw the profile of the carafe on one side of the vertical axis.
Then, replicate this profile on the opposite side, mirroring it to maintain symmetry.
If your curves are not quite right, don’t hesitate iterate until you achieve a pleasing shape.
4. DRAW THE COFFEE CARAFE ELEMENTS
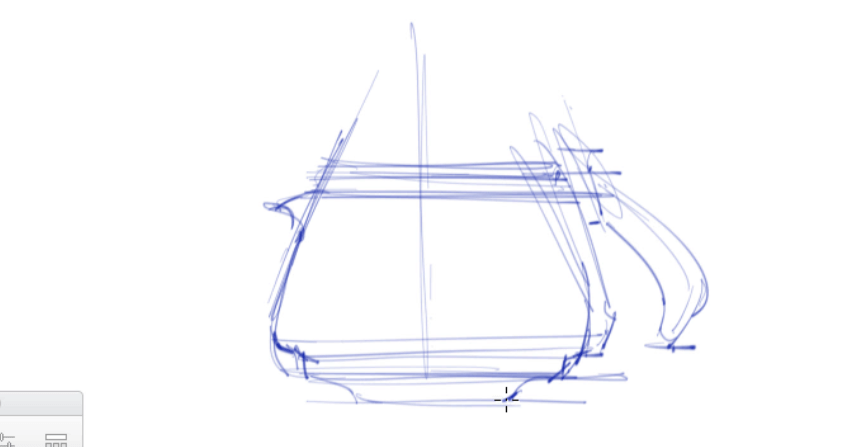
(THE SPOUT, THE HANDLE, THE COVER, AND THE PLUG)
With the main body established, focus on adding elements like the handle and spout.
Pay attention to how these components attach to the body of the carafe, ensuring they flow naturally with the overall design.
5. SPOT THE FUNCTIONAL DETAILS
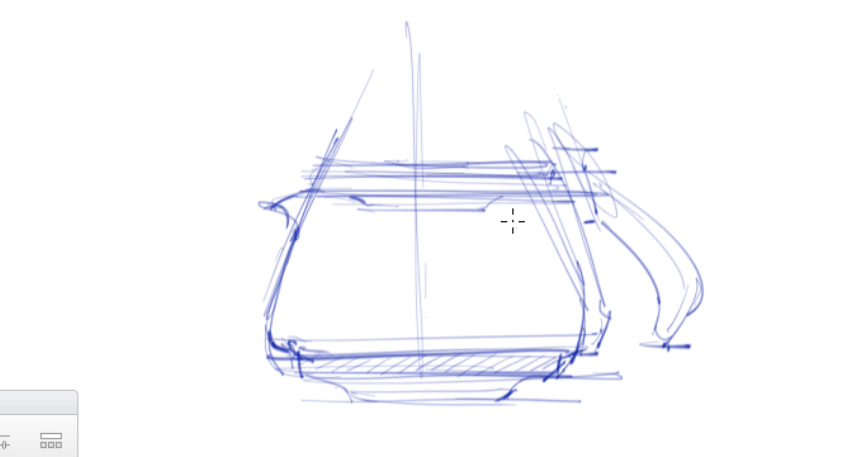
(BEHIND THE GLASS SURFACE)
Examine your carafe closely and identify functional details that may be overlooked, such as the underside of the lid or any grooves. Including these details adds realism and depth to your drawing, showcasing your attention to detail.
6. DRAW SIMPLE LIGHT REFLECTION
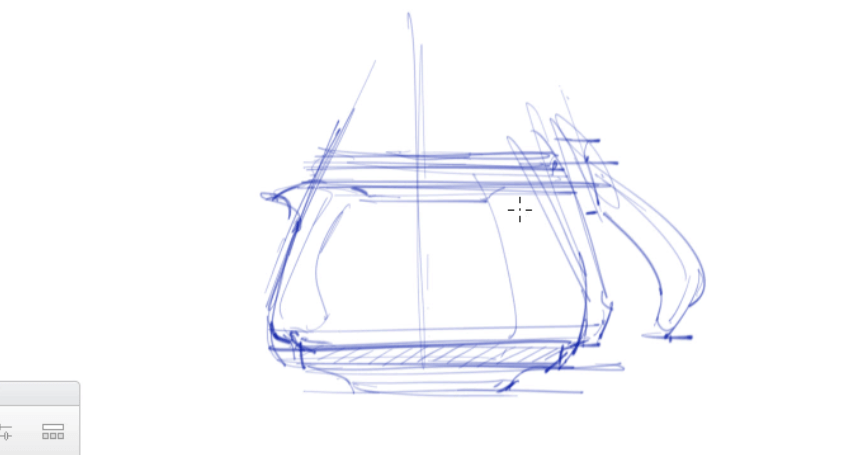
Create smooth areas on the surface of the carafe to represent light reflections.
Follow the curves of the glass to enhance its three-dimensional appearance.
This step is crucial for conveying the shiny quality of glass.
7. ADD TINY SPOTLIGHTS
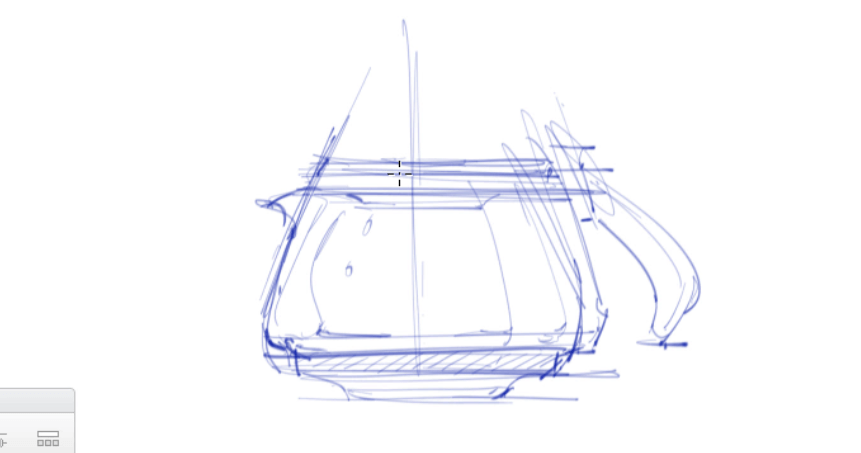
Incorporate tiny light spots where reflections would naturally occur.
These highlights add a magical touch to your drawing and enhance its visual appeal, mimicking how light interacts with glass surfaces in real life. (See picture below)

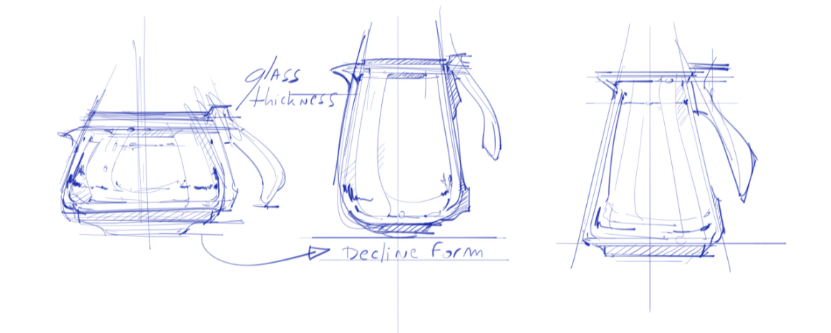
8. Create a new carafe design!
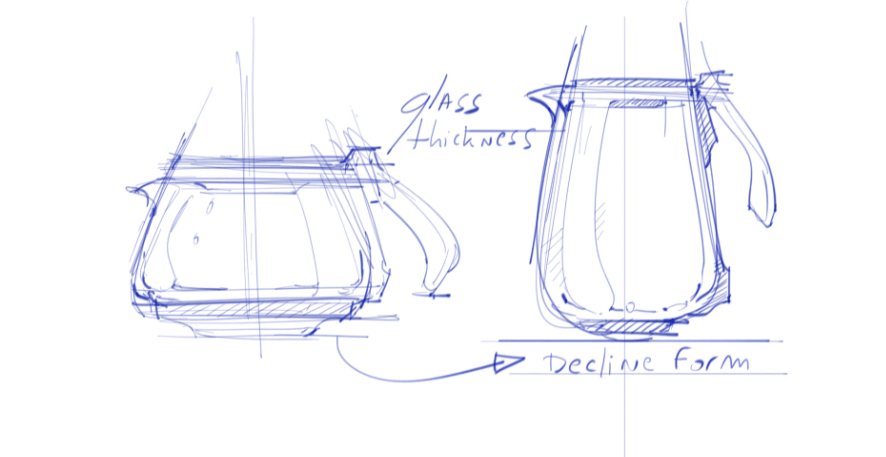
To practice further, apply what you’ve learned by designing a new carafe.
Experiment with different proportions and profile shapes while keeping the same sketching strategy in mind.
This variation will help reinforce your skills.
9. Start drawing unlimited new designs!
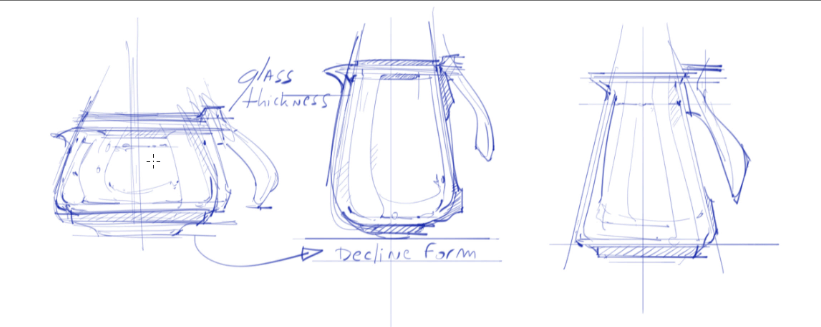
Feel free to explore various designs for carafes or similar objects.
Since many glass items share symmetrical qualities, you can apply these techniques broadly.
If using digital tools, leverage features that aid in creating clean sketches.
10. KEEP DRAWING MORE!
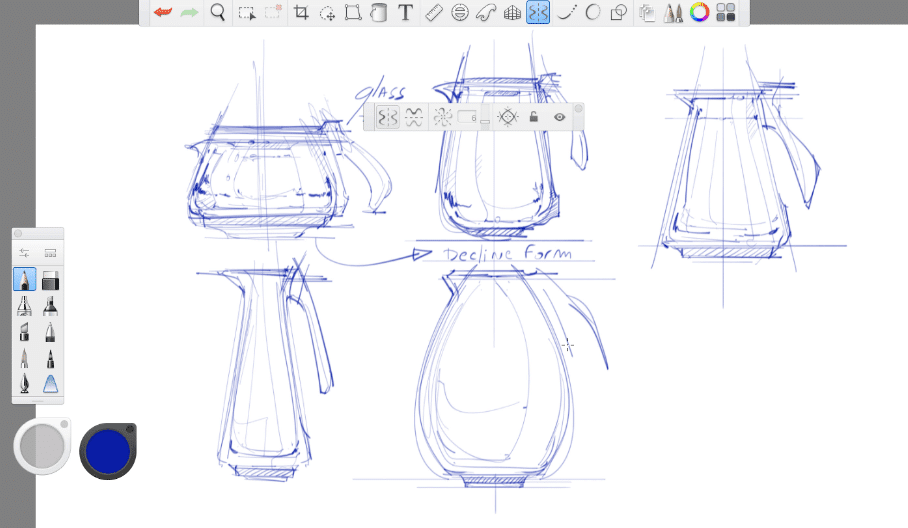
Continue sketching additional coffee carafes as an enjoyable exercise.
Allow yourself to experiment freely with shapes and styles—making it a fun challenge that enhances your creativity and skill over time.
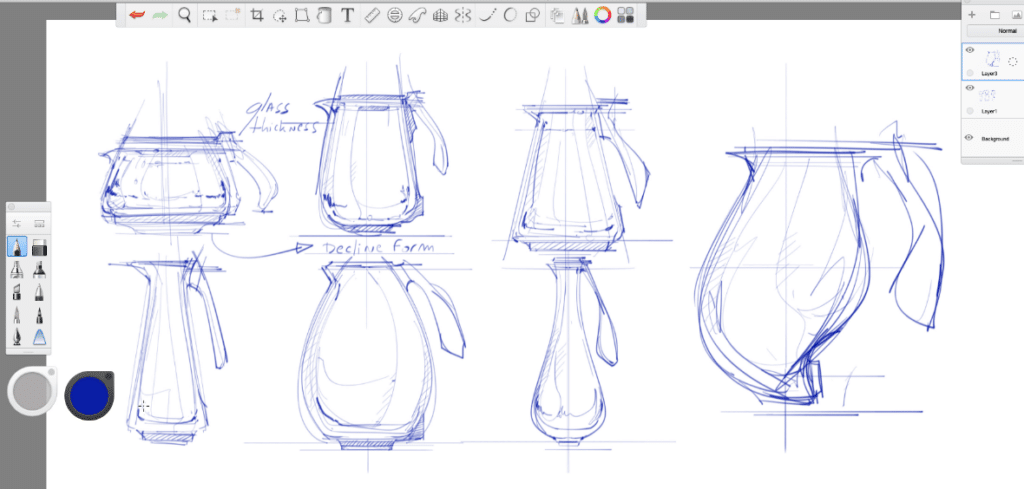
You can go crazy with your designs!
I thought to draw it like an art sculpture.
It may not be that functional though.
Whatever, I had fun drawing it! : )
11. Draw dark reflects of objects
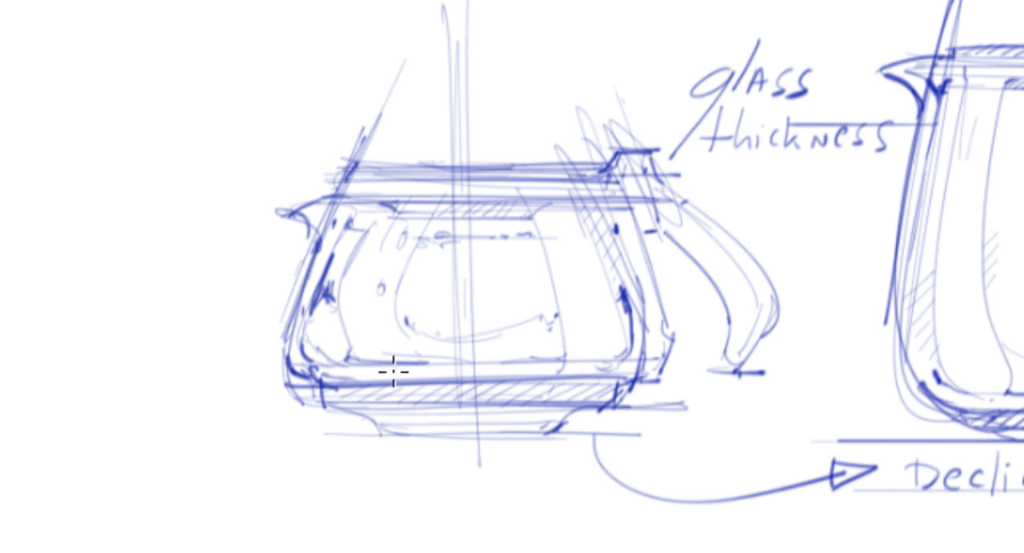
Observe other objects surrounding your carafe and simplify their reflections using dark zig-zag lines along the curviest parts of the glass. This technique helps define edges and adds depth to your drawing.
12. Draw hatching for depth
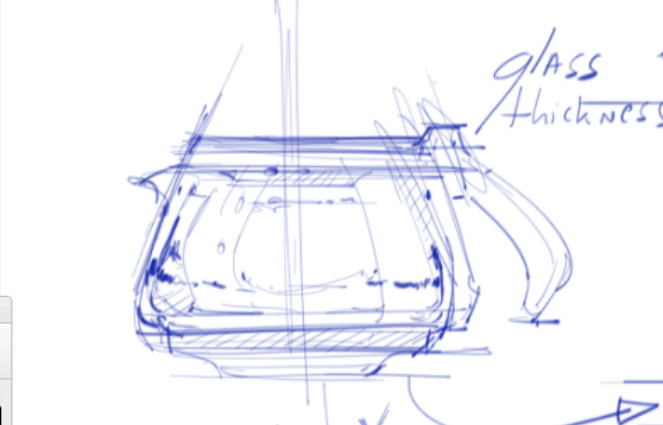
(MAKE SURE IT DOESN’T COVER THAT WHITE ZONE)
Introduce hatching techniques to create shadows and depth within your drawing. Use varying line thickness and spacing to achieve different levels of shading, which will enhance the three-dimensionality of your sketch.
13. Light reflection in front and behind
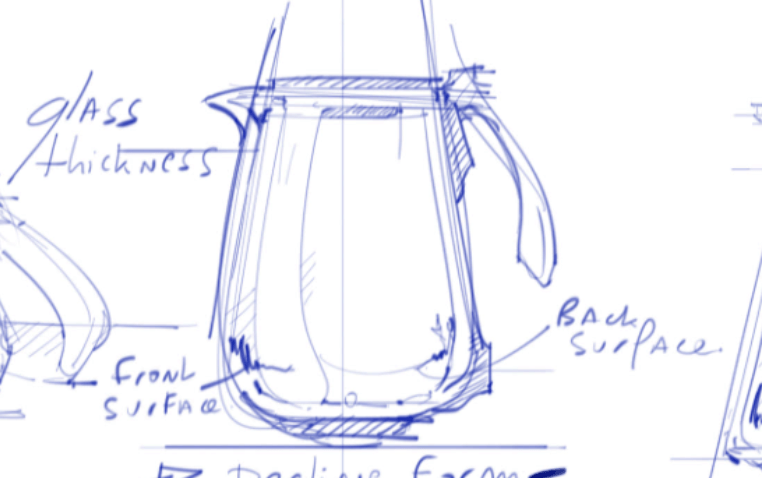
Don’t forget to depict light reflections on both the front and back surfaces of your transparent object. This adds complexity and realism to your drawing, making it more dynamic and engaging.
14. Quick Hatching Background
To further emphasize your glass reflection, incorporate a distorted background behind the coffee carafe using quick hatching techniques. This backdrop can suggest context without distracting from your main subject.
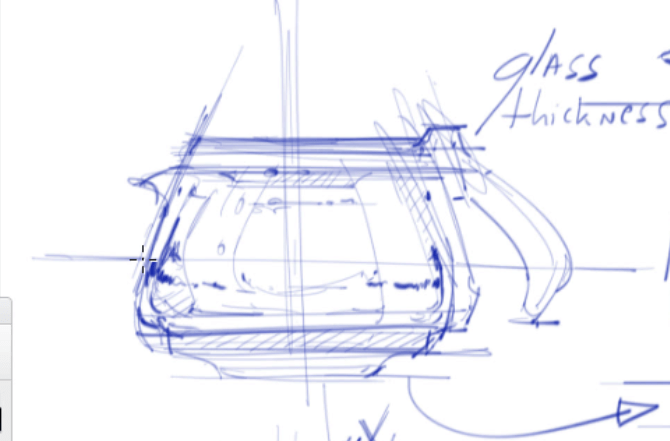
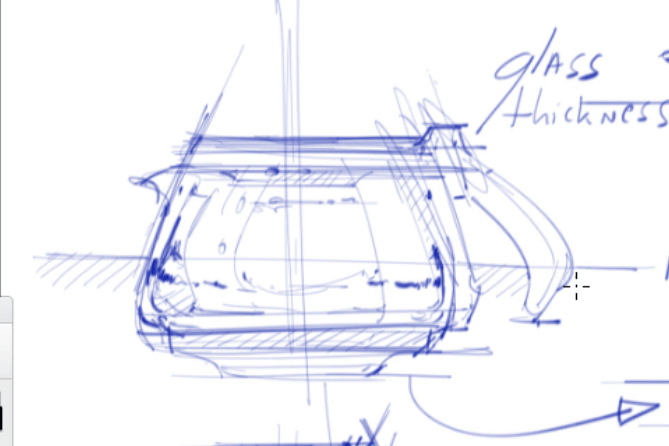
(BEHIND THE COFFEE CARAFE)
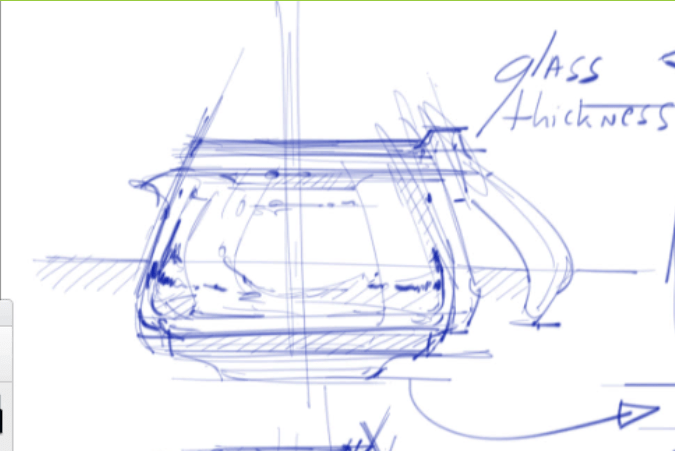
DISTORT THE LINE AND DRAW HATCHING FOLLOWING THAT CURVE
BONUS TIP:
BRING YOUR DRAWINGS TO LIFE!
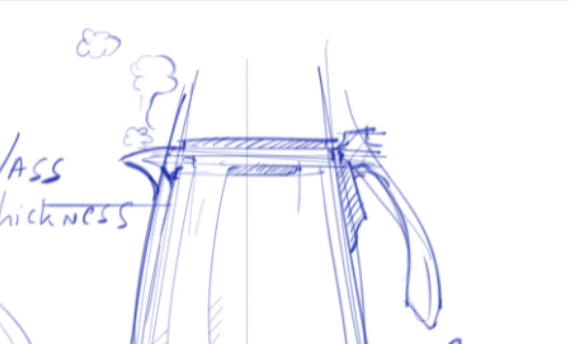
You have total creativity on that.
Here is a coffee carafe to heat the drink.
Let’s add some steam to give it a cartoon touch.
I could have drawn some coffee beans and liquid inside the carafes.
Make your board interesting and attractive with some “contextual illustrations”.
These extra details will retain your audience, and give them a warm feel.
BONUS TIP: GOOD COMPOSITION SERVES YOUR MESSAGE
Finally, consider composition carefully—think about what message or feeling you want to convey through your artwork. A well-thought-out composition enhances communication with viewers and strengthens your overall presentation.
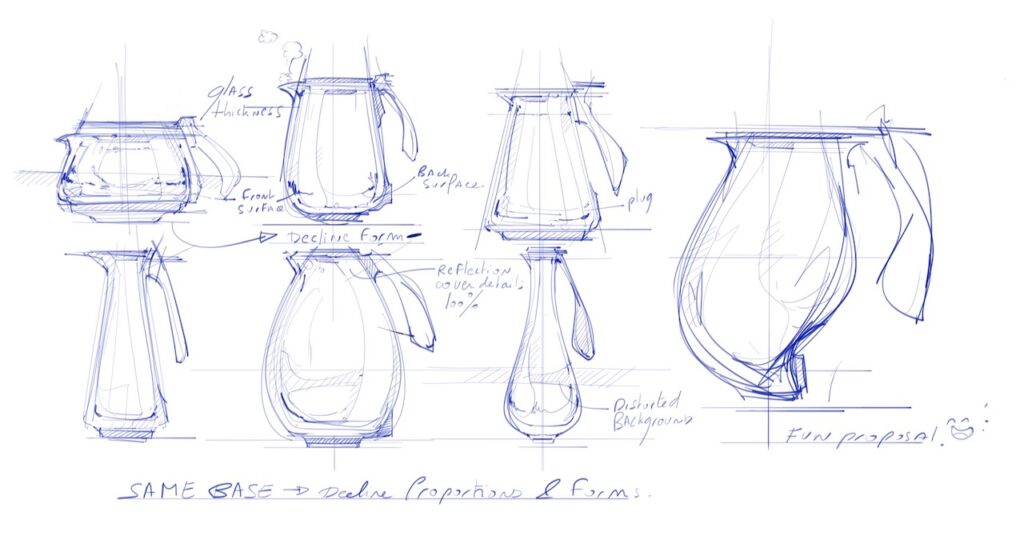
IT DOESN’T HAVE TO BE NEAT THAT WAY. BE CREATIVE!
When you choose your composition, think first about what message or feeling you want to communicate.

(Drawings of Adidas sneakers I made for my portfolio before I worked there! : ) )
If you want to, I can make tutorials on presentation board composition for you to raise your chances to convince your audience about your student projects, portfolio, degree, or job.
Conclusion
Mastering the art of drawing reflections, particularly on transparent objects like a coffee carafe, can significantly enhance your sketching skills and overall design capabilities.
By following the 14-step process outlined in this tutorial, you not only learn to depict realistic glass reflections but also develop a deeper understanding of light and form.
Remember, the key to success in sketching is practice and experimentation.
Each drawing session is an opportunity to refine your technique and explore new designs.
Don’t hesitate to create variations of the carafe or other objects, applying the same principles to expand your creativity.
Incorporating contextual elements, such as steam or coffee beans, can add life to your sketches and engage your audience more effectively.
Lastly, always consider composition as a vital part of your artwork; it serves to communicate your message clearly and attractively.
So grab your sketchbook and start experimenting!
With patience and persistence, you’ll find that drawing reflections becomes not just a skill but a rewarding part of your artistic journey.
Happy sketching!
Cheers,
Chou-Tac







Add comment