A cube is a 6-sided 3D form like a dice or a Rubik’s cube.
Artists and industrial designers learn how to draw in perspective drawing a series of cubes from any angles.
It helps to build their 3 dimension visualization skill.
So they can learn how to draw any products with good proportions.
Perspective can scare many beginners.
However, if we decompose the process in simple steps,
you can master the basics very fast.
This video tutorial shows you in a simple way how to draw a cube with a 2-point perspective easily.
You will see:
- Step-by-step how to draw a cube
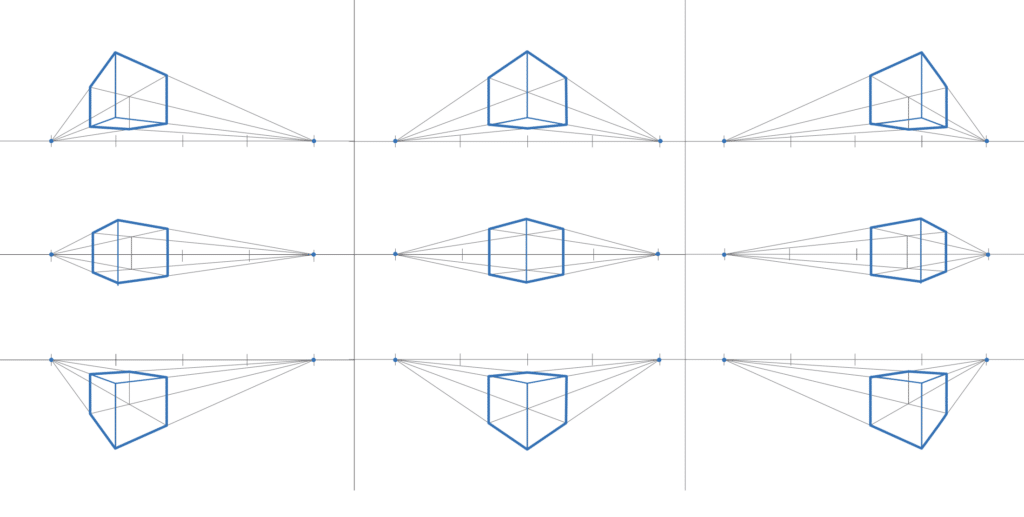
- A time-lapse of the cube sketched from 9 basic angles.
How to draw a cube in perspective (2-point)
Click here to Download your complete beginner sketching book (4 guides)
Related article: How to draw a cube with 1-point perspective
The 2-point perspective vocabulary
To understand perspective the easy way, we draw a simple cube.
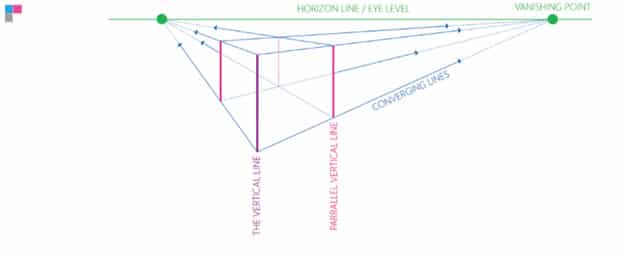
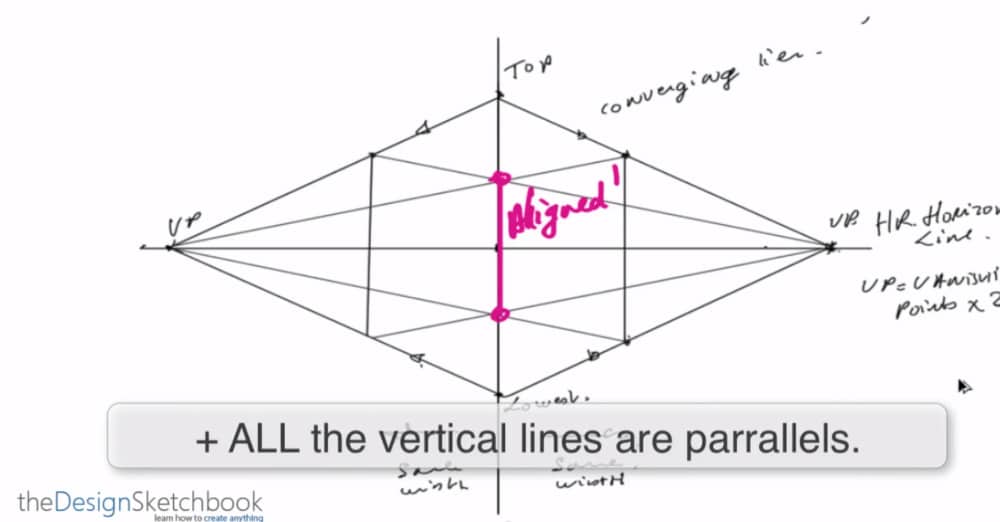
This 2-point perspective set up has only 4 elements:
- GREEN LINE: Horizon line
- GREEN DOTS: 2 Vanishing points
- BLUE LINES: 4 Converging lines
- PINK LINES: 4 Vertical lines
Whenever you will draw in perspective, you will have to consider these.
What is the horizon line?
IMPORTANT: The horizon line is also called: The eye level.
FUN FACT: The horizon line is the straight and horizontal line you see far away at the beach when the water meets the sky. (It is basically the main line you see from any landscape very far away.)
Depending on the position of your cube (toward the horizon line), the viewer will perceive it differently.
This position will define the cube viewpoint.
How to draw a cube step-by-step
Step 0. Common mistake
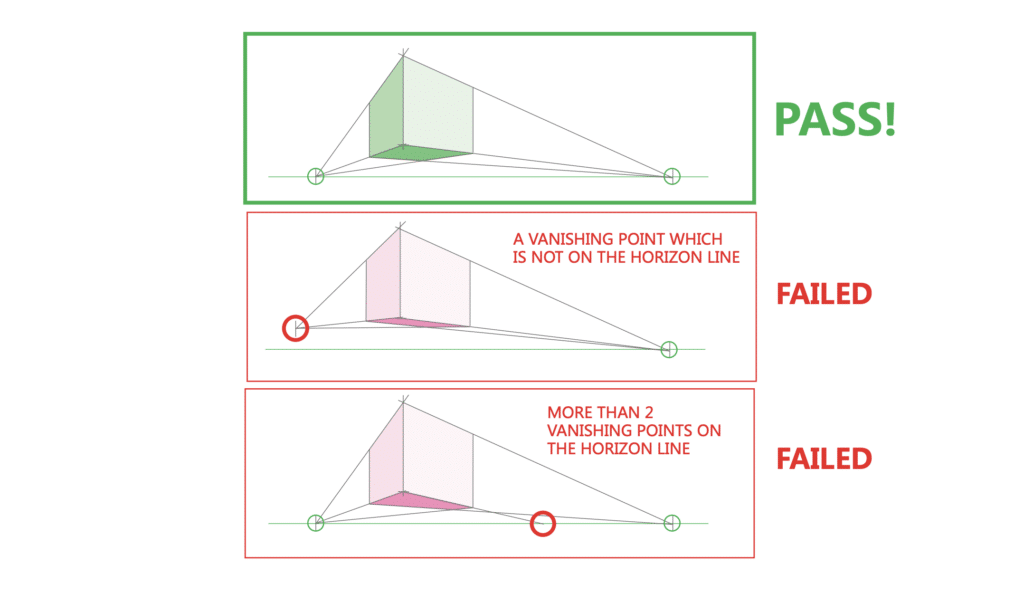
TO KEEP IN MIND: The beginner common mistake is when all the converging lines are not linked to your vanishing points.
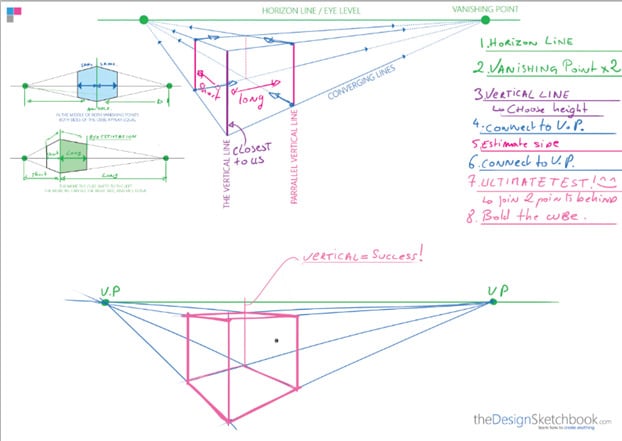
STEP1.
Draw the horizon line

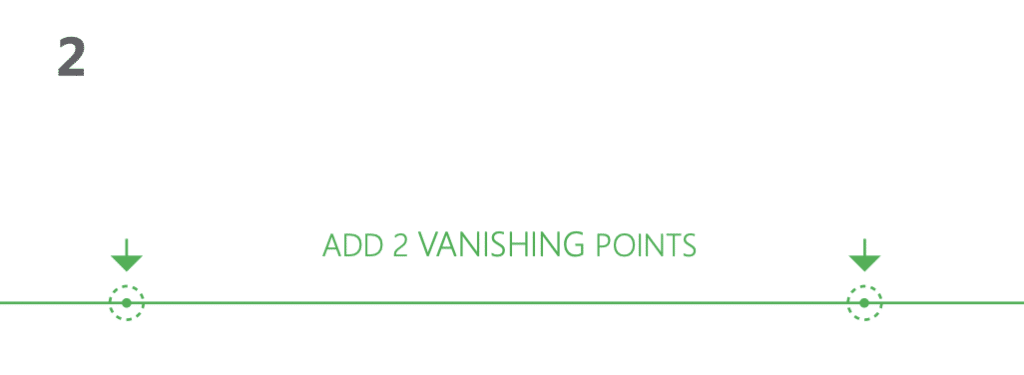
STEP2.
Draw the Vanishing points
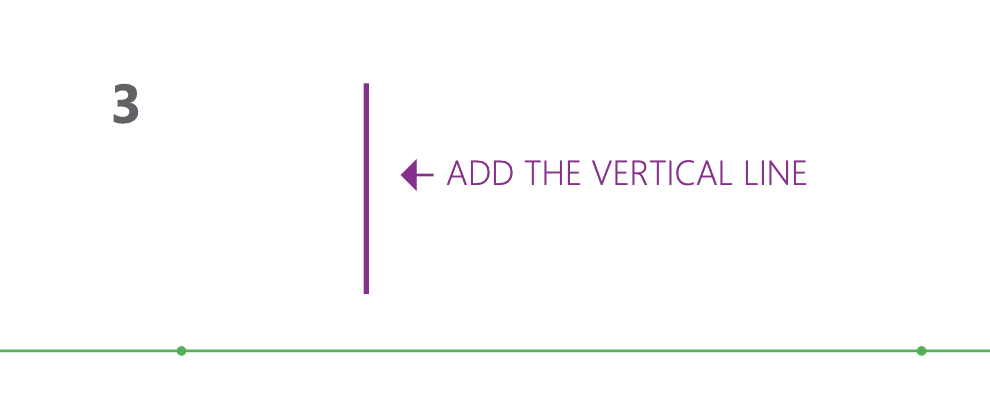
STEP3.
Draw a Vertical line
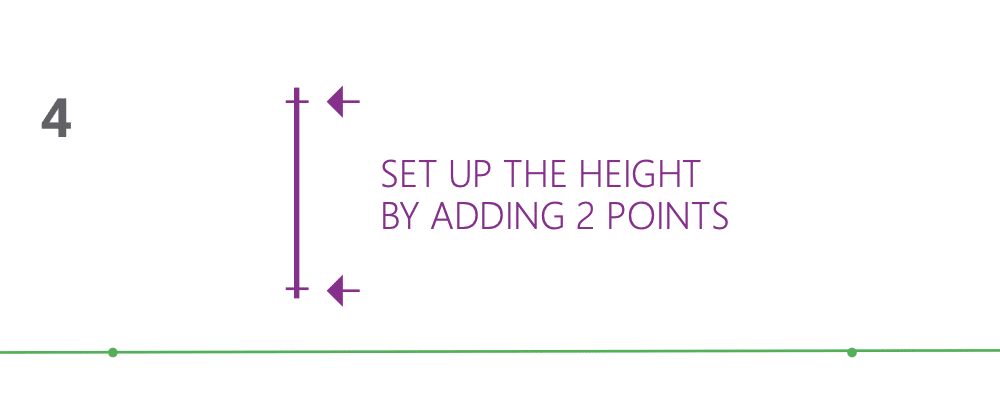
STEP4.
Set up the height
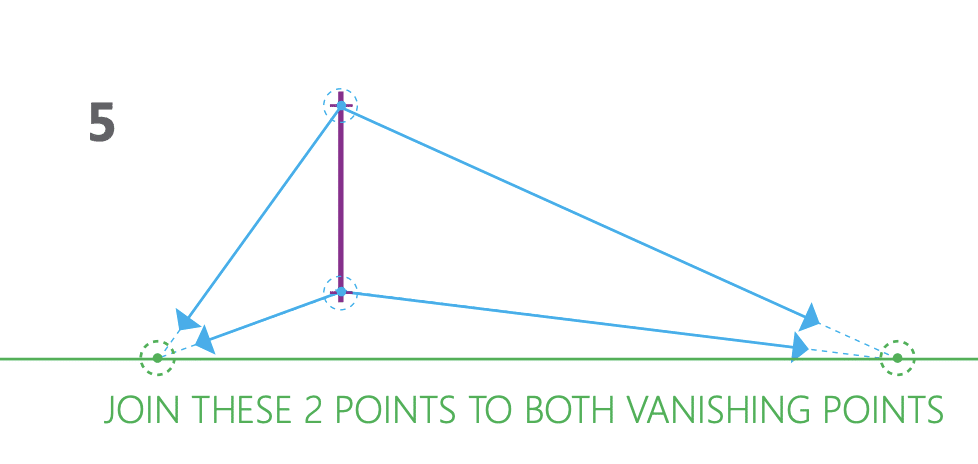
STEP5.
Connect each dot to both vanishing points
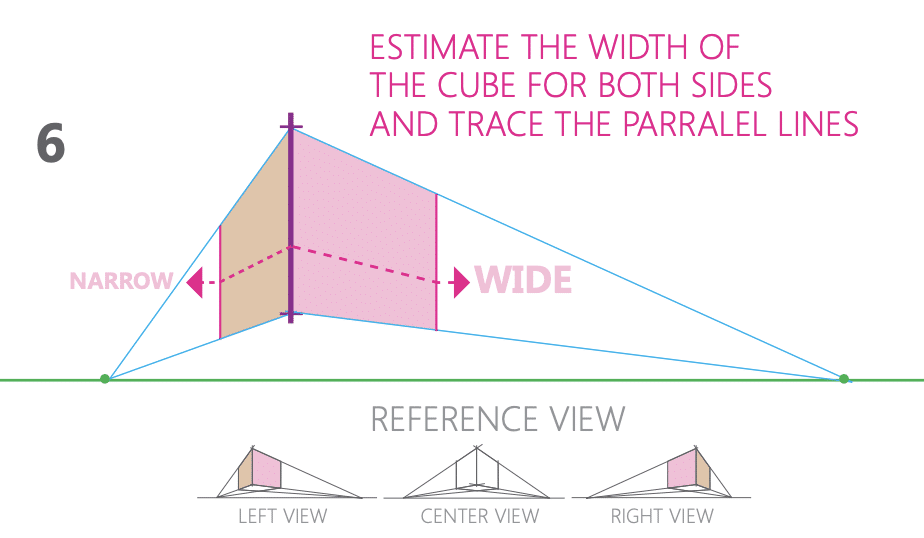
STEP6.
Estimate the width for both sides
(Check the reference view)
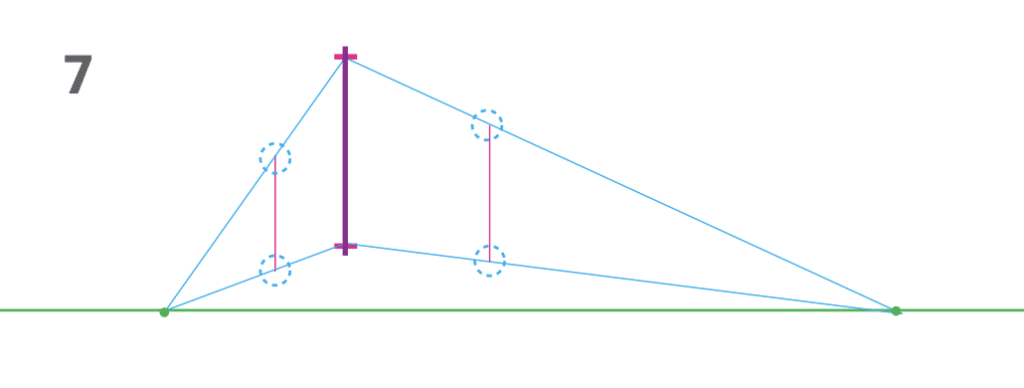
STEP7.
Spot these 4 dots and draw 2 vertical lines
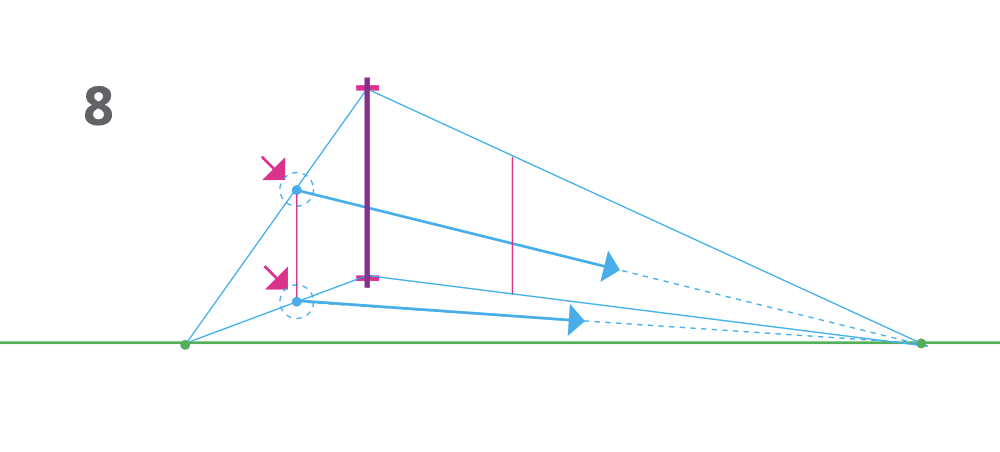
STEP8.
Draw the back surface of the cube
The left vertical lines’ dots connect to the right vanishing point.
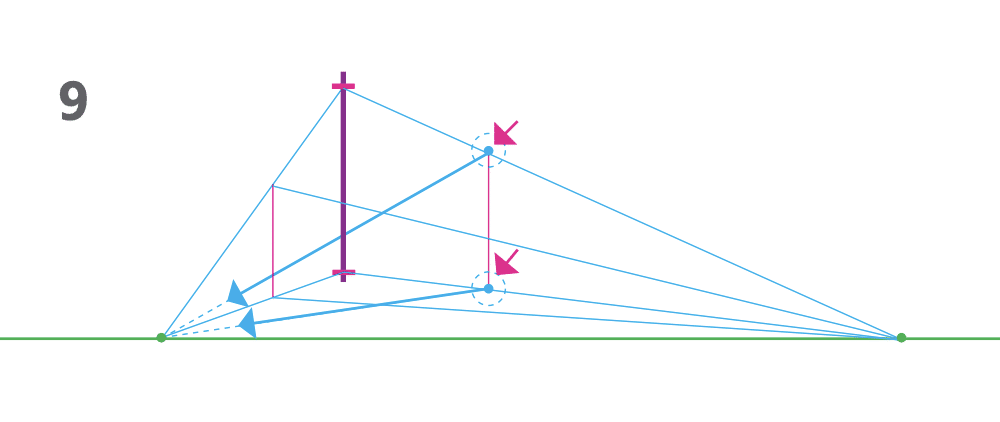
STEP9.
Draw the other back surface of the cube
The right vertical lines’ dots connect to the left vanishing point.
STEP10.
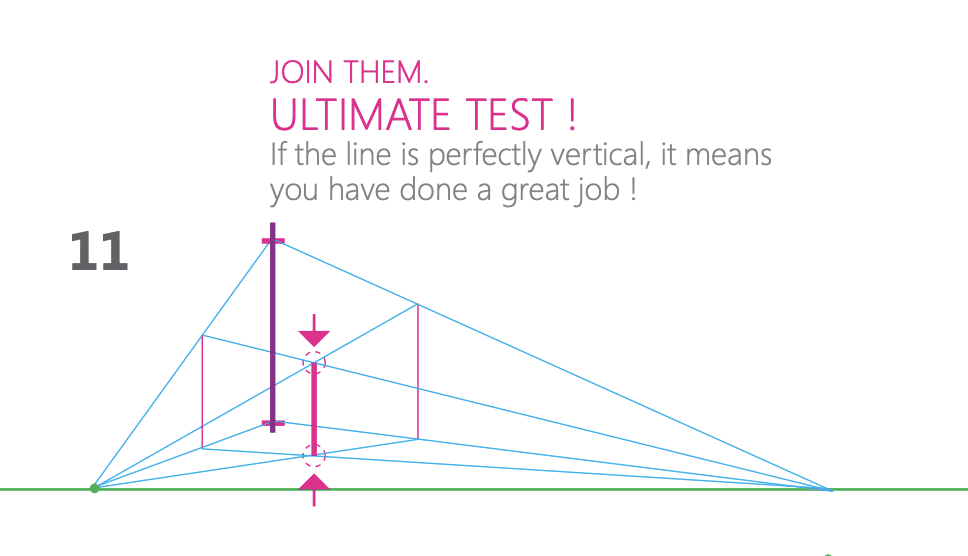
Observe the two points behind. Are they vertically aligned?
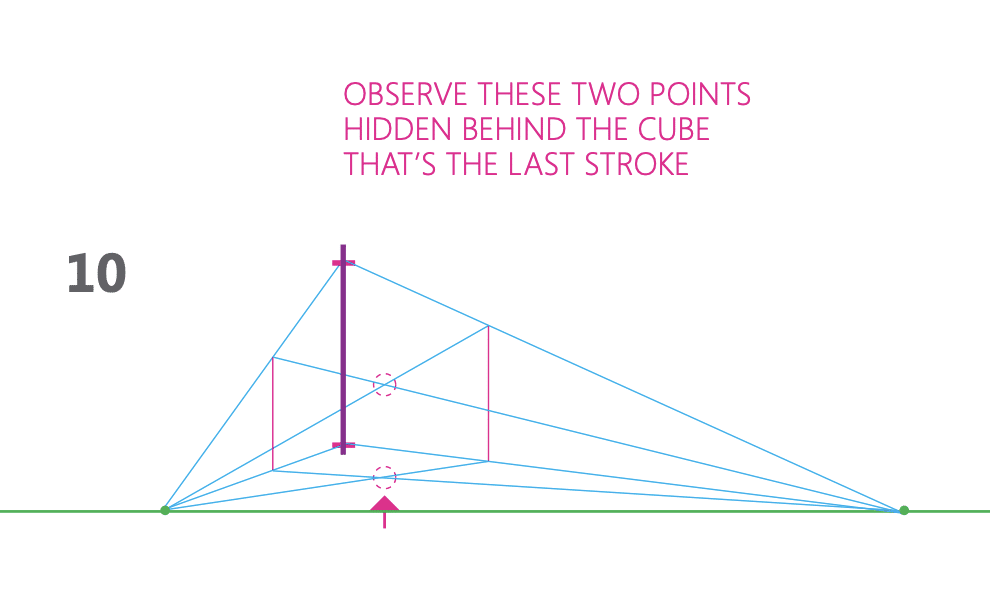
STEP11. If yes, connect them with success!!
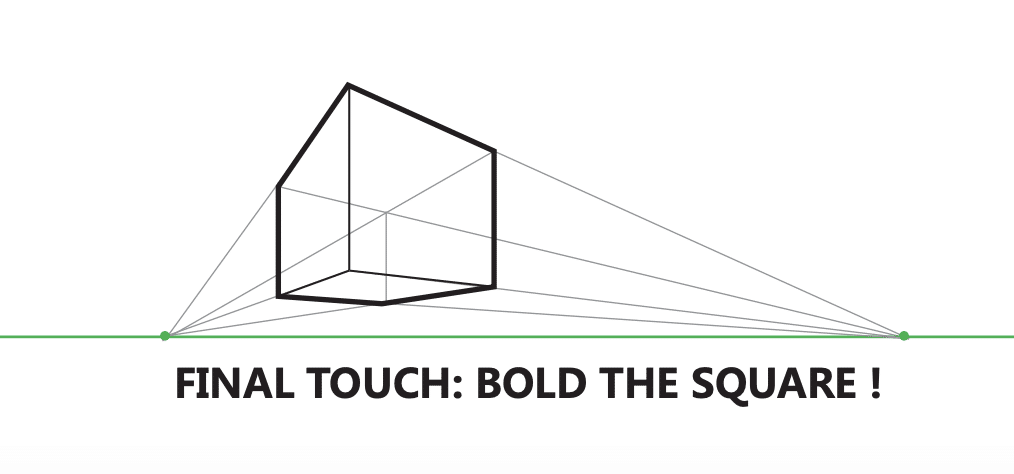
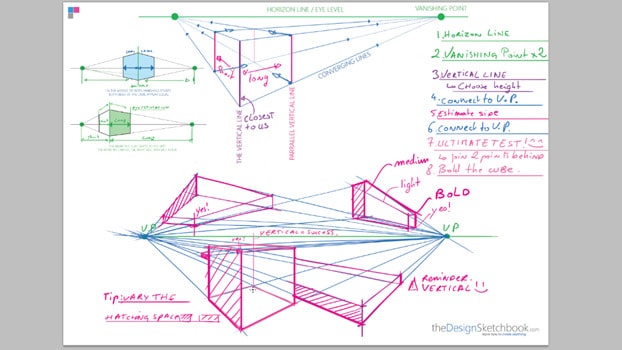
LAST STEP.
Bold the cube!
CUBE EXERCISE:
DRAW EVERY SINGLE ANGLE!
LEARN MORE ABOUT THE CUBE VIEWPOINT
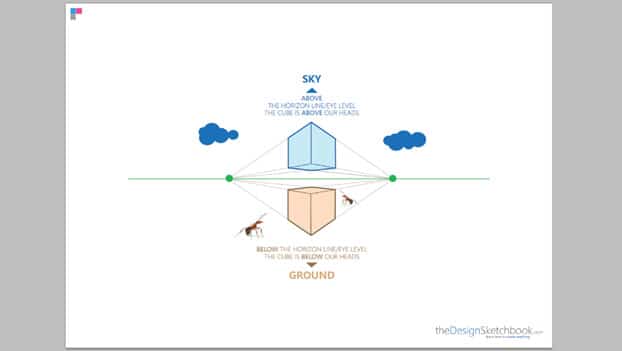
Cube and vertical position
Case A: On top
When you draw the cube on the top side of the horizon line: it is above your eye level. The below surface of the cube is visible.
Case B: Below
When you draw the cube on the bottom side of the horizon line: it is below your eye level. The top surface of your cube is visible.
Simple right ? 🙂
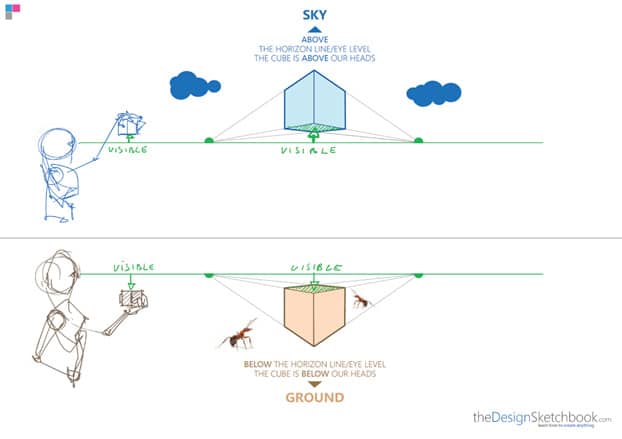
Cube experiment | Vertical position
I invite you to experiment this in real life.:
- Take a box, a thick book, or anything cubic.
- Hold it in front of you
- Move it up and down.
- Be attentive to the bottom and top surface of your object.
Cube and horizontal position
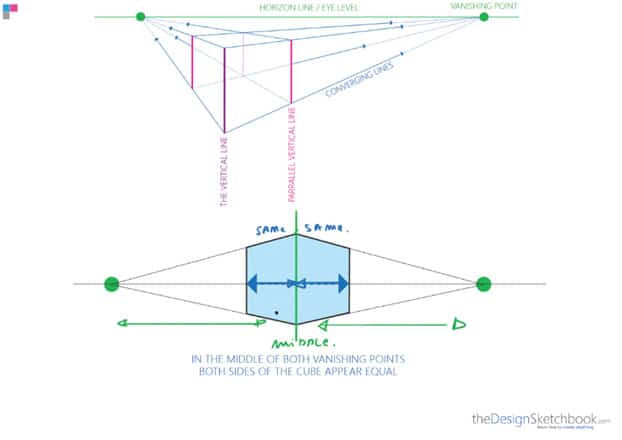
Case A: Cube in the middle
When the cube is drawn in the middle of both Vanishing points (the 2 green dots), both left and right sides of the cube are visually equal.
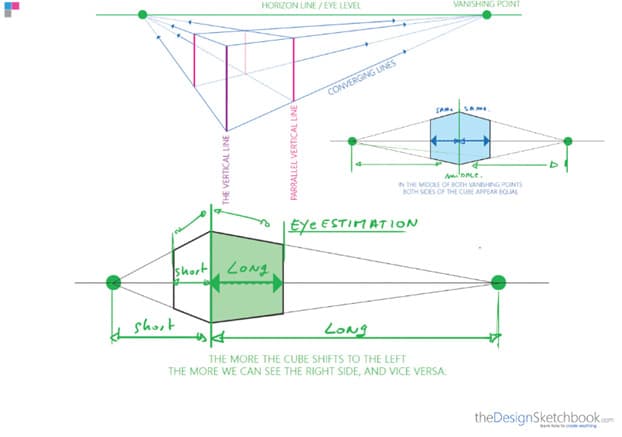
Case B: Cube on the left
When the cube is on the left, the right side becomes visually longer.
(This is called the foreshortening visual effect.)
Cube experiment | Horizontal position
Imagine you are talking to someone face to face. The vertical line of the nose represents the front edge of the cube.
If that person is in front of you, you see both left and right sides of the face.
But when that person will make a step on your left, you will see more his right side.
EXERCISES:
Draw many boxes of different sizes!
You are now ready to draw many boxes of any sizes and angles with this simple step-by-step cube drawing tutorial! : D
Congratulation on completing the Cube and boxes tutorial!
What’s next?
Let’s level up the game!
To acquire this cube drawing skill until it becomes intuitive, we are going to raise the level a bit. 🙂
I show you how to draw complex 3D forms with a very simple technique – all starting from a basic cube drawing.
We will increase your 3d vision drawing an infinity of forms from your own imagination!








This is very helpful and helps me a lot. Thank you so much for sharing this information. Please keep it simple and be direct.
This is very helpful and helps me a lot. Thank you so much for sharing this information.
[…] you are a beginner and start sketching an object, you feel lost with Perspective.There is a high chance your converging lines get […]
This article is very informative thanks for sharing
My pleasure Saniya !
This article is too much informative as well i read and alot of enjoy.
Love this tutorial! The steps are so clear and easy to follow. I can’t wait to try drawing my own 2-point perspective cube. Thanks for sharing!
very helpful thank you to share this
Merci Christophe ! Ravi de te visite. 🙂
Thanks a lot 🙂 really appreciate what you’re doing for the community of budding artist/desigers 🙂 pls keep doing this
You welcome Ace. I will try to make more videos. Keep posted !
Thank you, very helpful tip!
My pleasure Livnat.