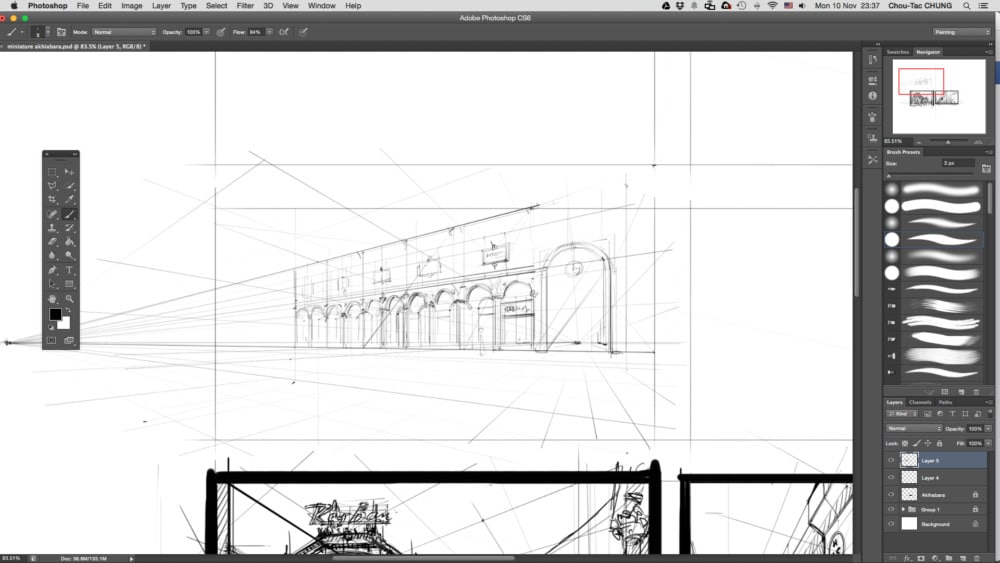
Let’s look at some inspiration pictures of my last trip in Milan.
I like the repetition of pillars along the shops. To sketch these one with accuracy, I will start by showing you a simple and very useful trick using basic geometry. I remember the day my teacher shows me that simple trick I was amazed! It is not difficult if you follow step-by-step.


How to duplicate the pillars in perspective ?

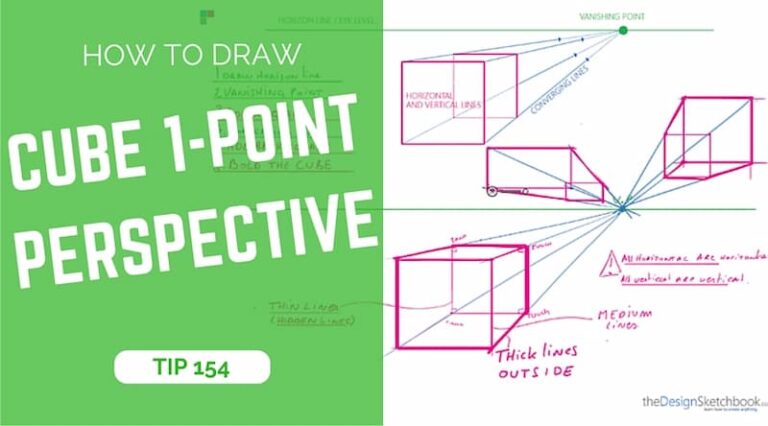
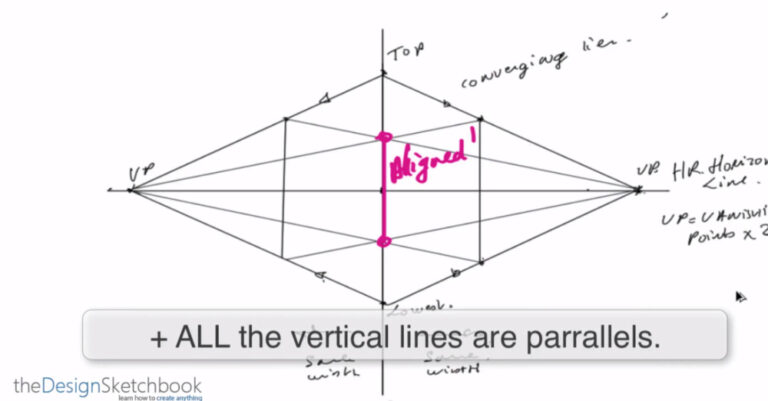
STEP 1. Set up your perspective lines.
– Horizon line
– Vanishing points
– Converging lines
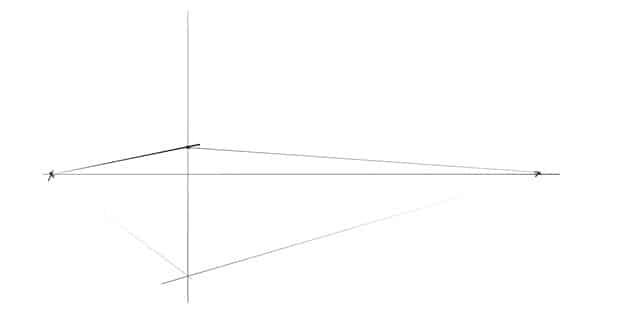
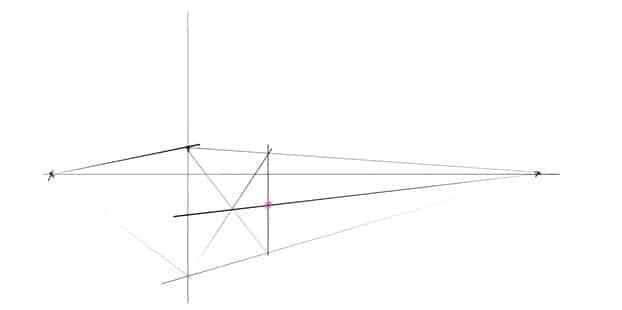
STEP 2. Draw the first pillar drawing a vertical line. 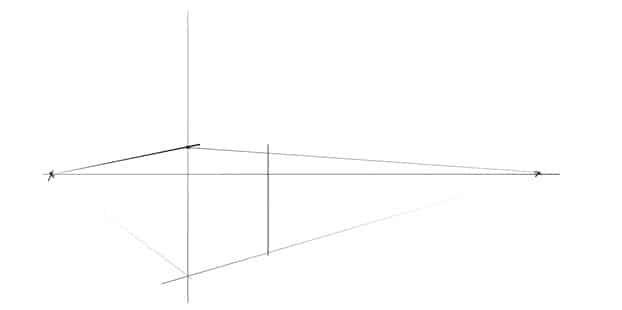
- The trick start here. Just follow step by step. Identify the middle of this rectangle in perspective, drawing the diagonals.
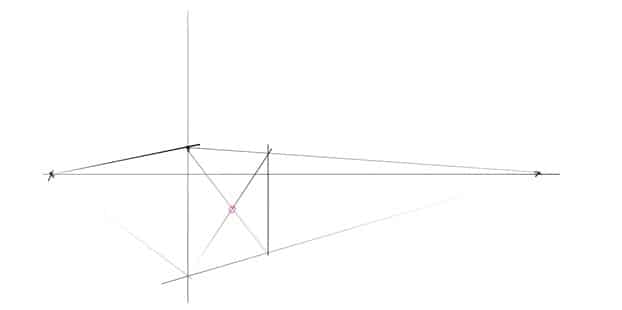
- Join this middle to the vanishing point. The first pillar will be divided in 2 at its own middle (pink dot).
- Draw a line from the top left corner going through that middle. It will cross the bottom converging line where the next pillar will be.

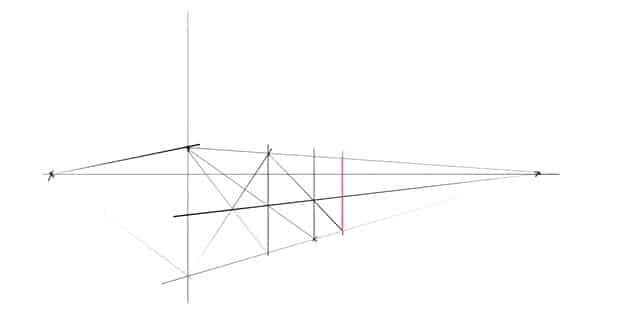
6. Draw your pillar with an other vertical line !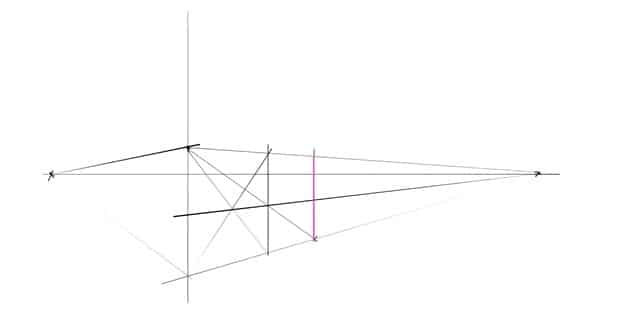
7. Repeat the 5th operation as many times as needed !
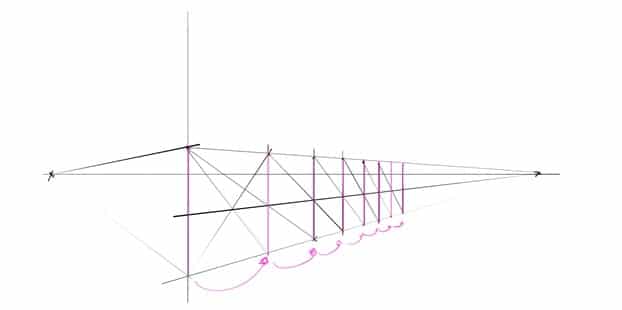
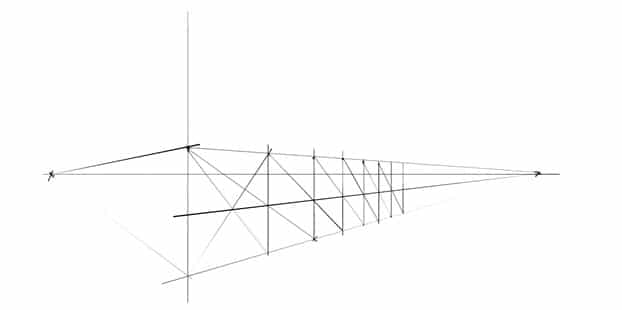
That’s all ! It may visually looks complicated. However, try it following step by step. As soon as you do it once, you will realise how simple it is. With this simple rule, you won’t have to guess anymore!
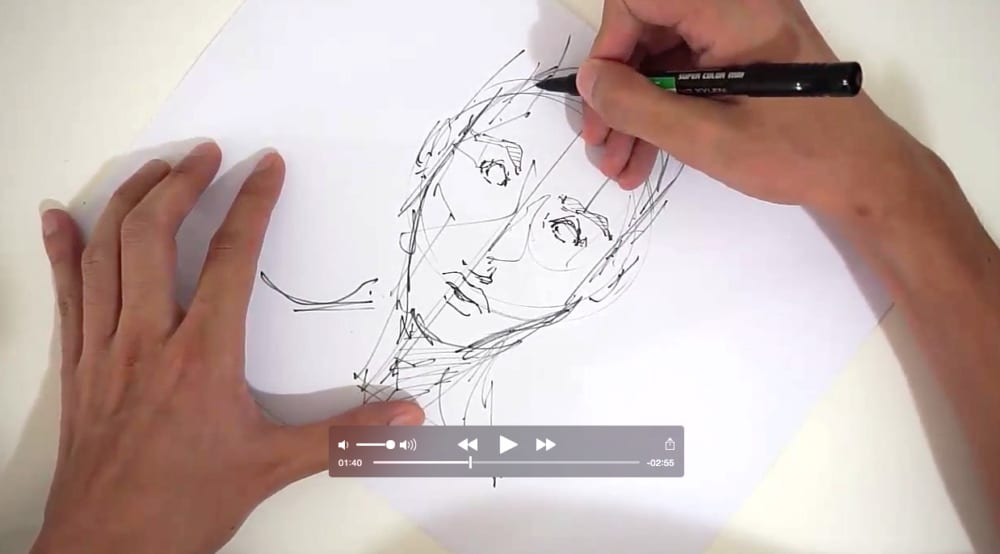
After the theory, an example of sketch.
Before starting I roughly visualize the scene in my mind. It especially helps to define the horizon line.
1. Set up the perspective.
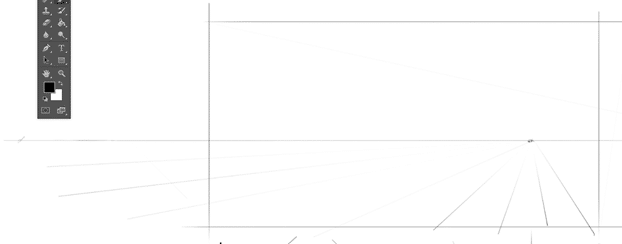
2. Draw some converging lines below and above the horizon lines. Just draw enough of them to roughly visualize the ground and the sky.
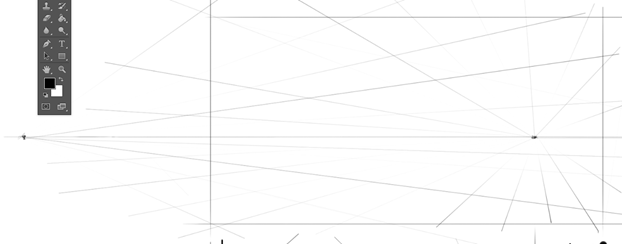
3. Apply the trick on How to duplicate pillars in perspective.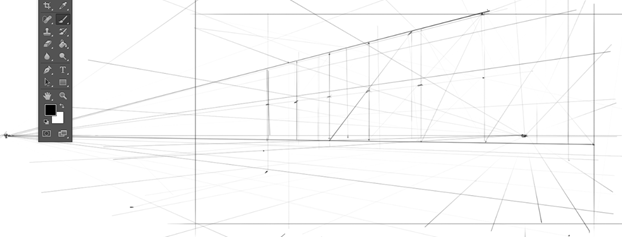
4. Adding a bit of pillars detailing to better visualize the structure.
That’s all for today. Hope it helps. Feel free to leave some comments.
See you tomorrow for the next Tip of the day !
Cheers,
Chou-Tac
Related Articles


Hi, I’ve trouble lighting and shading the pillars of a scene I’ve drawn.
they continue to look weirdly flat or too simple in comparison to the rest of the picture. I’m stuck at this, any help is greatly appreciated
Lorsque tu traces tes lignes de perspectives, les traces-tu à main levée ou avec une régle (ou un outil spécial ligne dans ton programme) ?
Salut Loic,
Ah oui tiens, ca serait bien que je precise ca. J’utilise un raccourci clavier sur Photoshop. D’abord, tu choisis l’outil pinceau. Ensuite:
1- Cliques quelque part pour faire apparaitre un point, ce sera le depart de ta ligne.
2- Presse et maintient SHIFT.
3- Clique ailleurs pour faire un autre point, la fin de ta ligne.
4- Magique tu as une ligne droite!
J’utilise ca pour les lignes qui rejoignent chaque point de perspective.
L’épaisseur de ton trait dépendra de la pression que tu auras applique a ton stilet quand tu auras presse chaque point. (si c’est a la souris, le trace sera épais et constant)
Voila. Facile non ?
Oh astuce supplémentaire pour des lignes parfaitement horizontales ou verticales. Attention, nuance subtile !
Choisis l’outil pinceau. Ensuite:
1- Clique et maintient la pression avec ton stilet, ne bouge pas !
2- Appuis et maintiens SHIFT
3- Trace ta ligne horizontalement ou verticalement.
4- Ta ligne va apparaitre parfaitement droite !
Horizontal: pour dessiner la ligne d’horizon.
Vertical: pour la hauteur des bâtiments
Voila, dis moi si c’est clair.
A tout !
C’est parfaitement clair ! Merci beaucoup d’avoir pris le temps de répondre !! Je vais continuer de suivre ton aventure avec intêret !! Bye bye ^^
Ahhhh I remembered this tip ! Took me so long at no.6